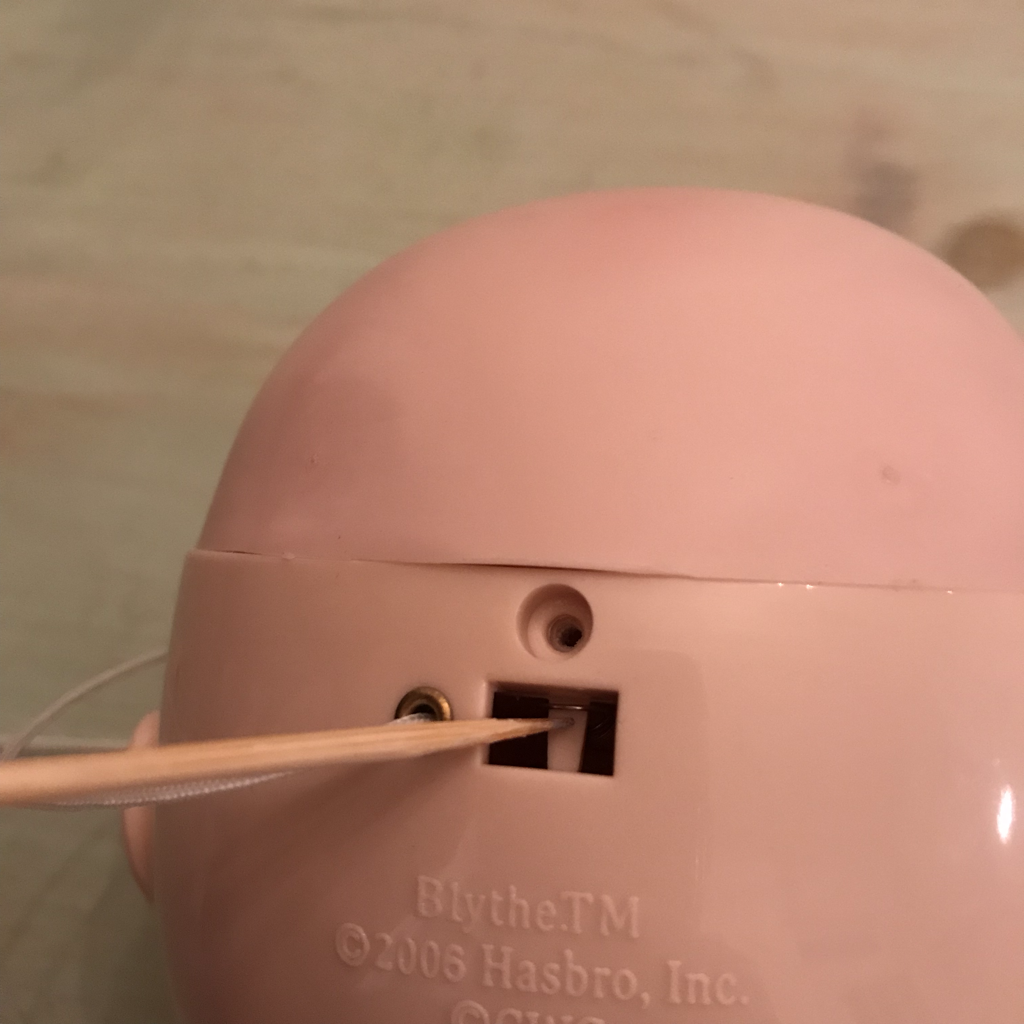
 Months ago I promised to write a tutorial showing how to convert your Blythe doll's color change eyes to sleep eyes and now I have finally gotten around to writing it. I know I've been the world's worst blog writer and newsletter poster lately and I am trying really hard to get back on track. So, if you are a Blythe owner you know the Blythe doll comes with really cool color change eyes. When you pull a string in the doll's head the eyes close and click and re-open with a different color and gaze direction. Blythe eyes don't stay closed, however, and some people like to be able to close the eyes so Blythe can "sleep". A word of warning: if you convert the eyes don't leave them in the closed position for long periods, as some Blythe owners claim this warps the eyes so they no longer work. To begin your repair you will need to remove the spring in the back of Blythe's head. You can lift it up with a skewer or pliers and unhook it from the shaft. You will not need this spring if you plan to create sleeping eyes but you might want to save it for future repairs of other dolls. 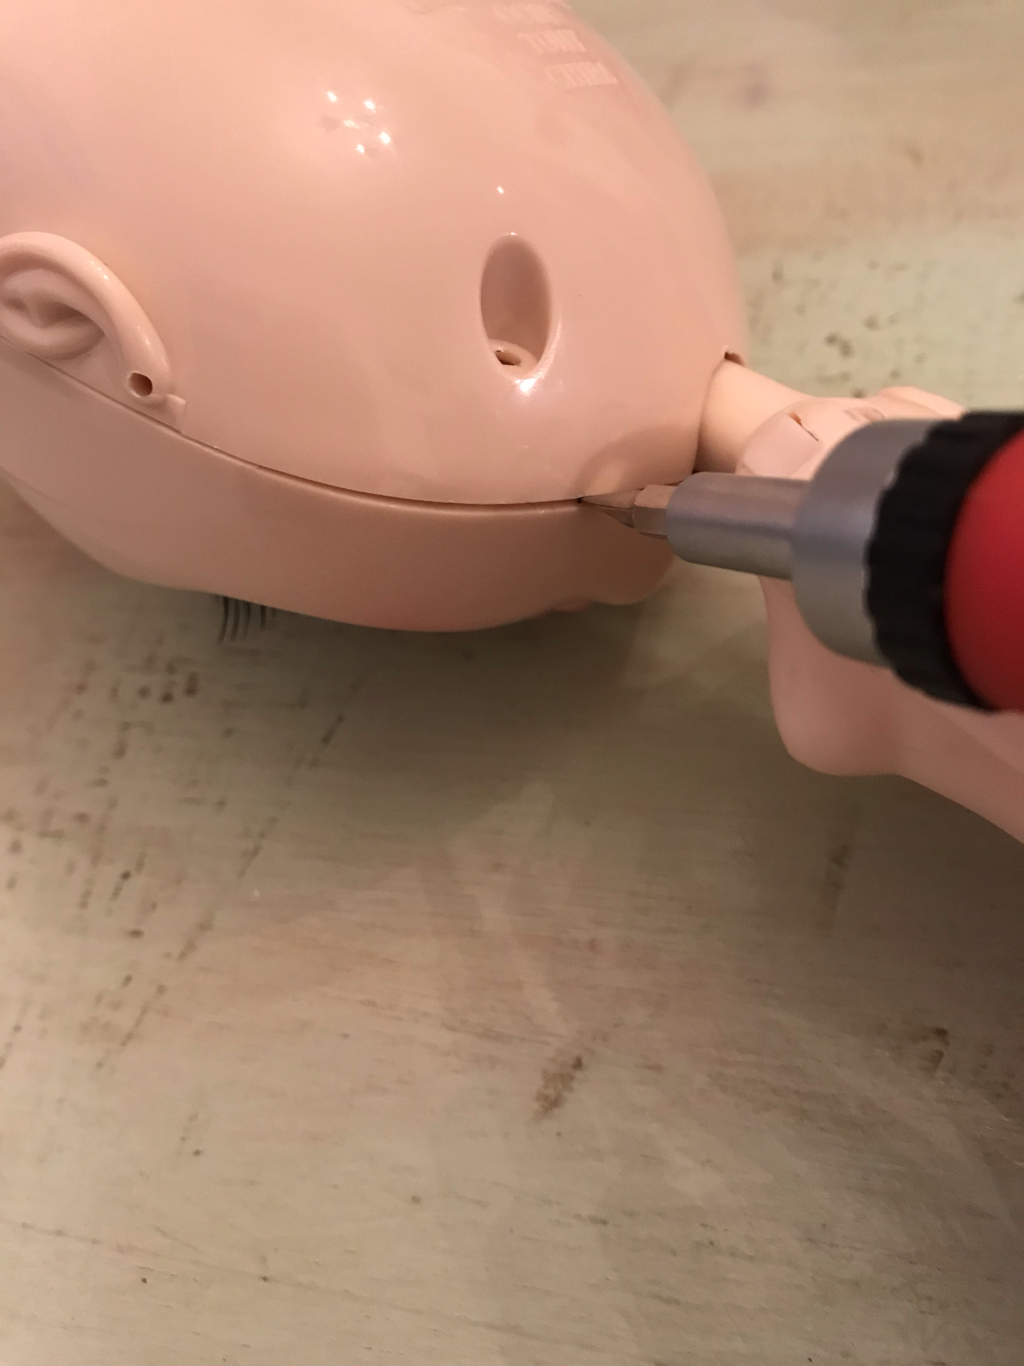 After you unhook the spring unscrew the back of the head and gently pry it open with a flat head screwdriver or similar tool. I used a zipper bag to corral all the screws and other pieces so I wouldn't lose them. 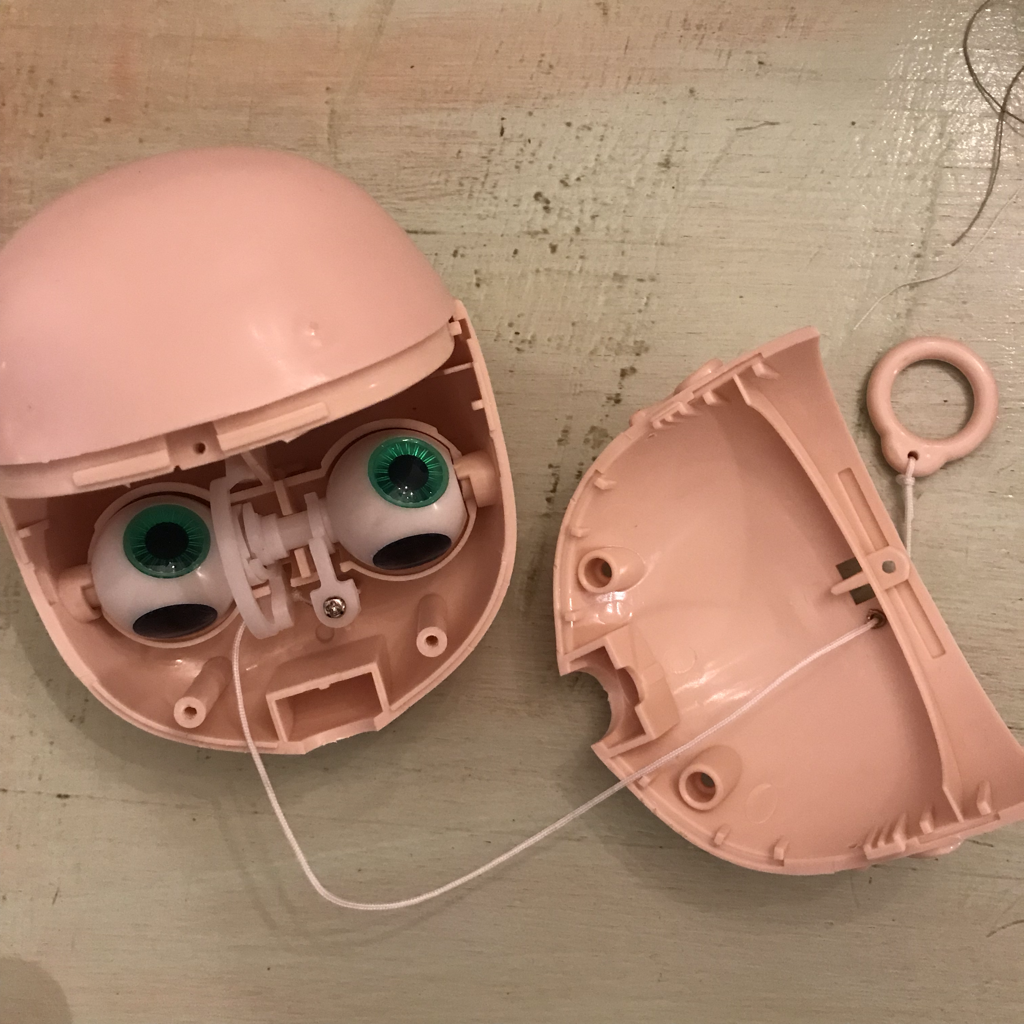 Lift off the back of the head and make sure to note the location of all the pieces and screws. It is helpful to take a picture so you can refer to it during re-assembly. 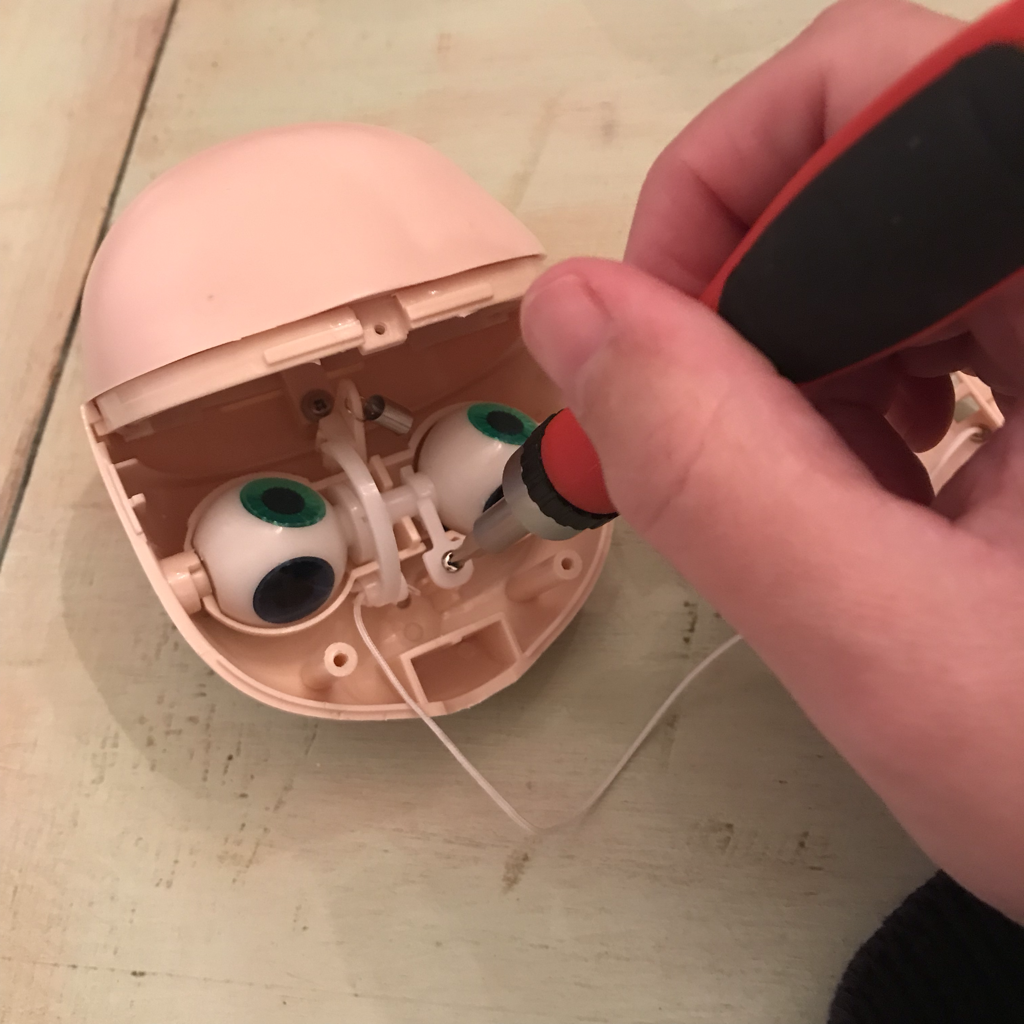 Remove the screw and the tiny paddle-shaped piece under the eye mechanism. Don't lose this piece! This is the piece which holds the eye chips in place so the color shows and the eye opens. 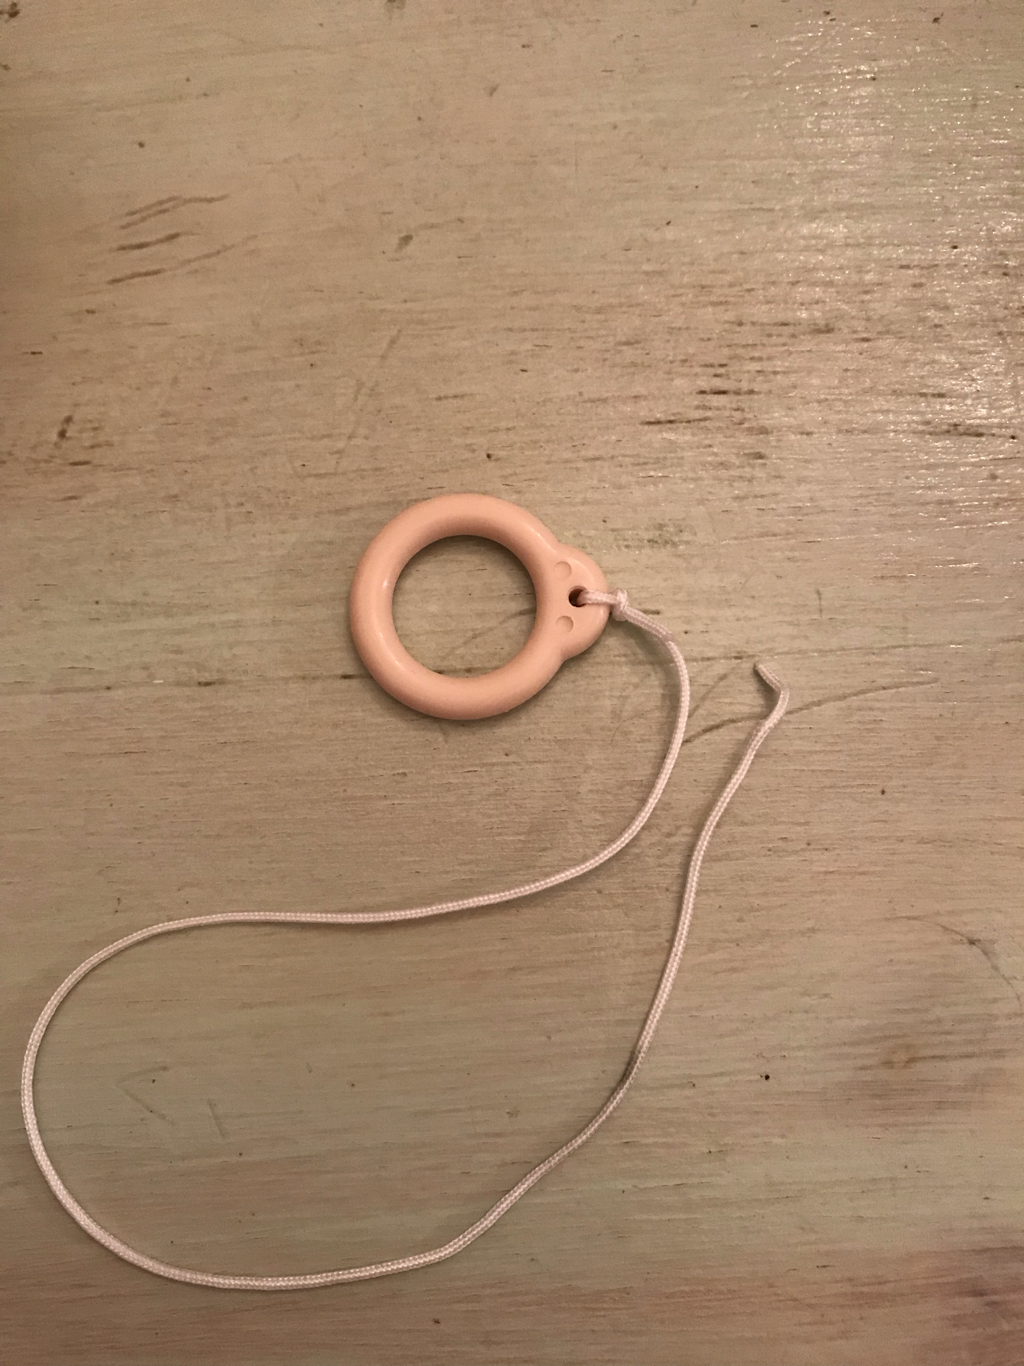 After you remove the paddle untie the drawstring from the eye mechanism. It's helpful to use a pair of tweezers to untie the knot. Remove the drawstring and set aside. You can re-use this, bead it and decorate it, or replace it entirely. You will be using two strings instead of just one with the sleep eyes, so most people replace the string with two new matching strings. 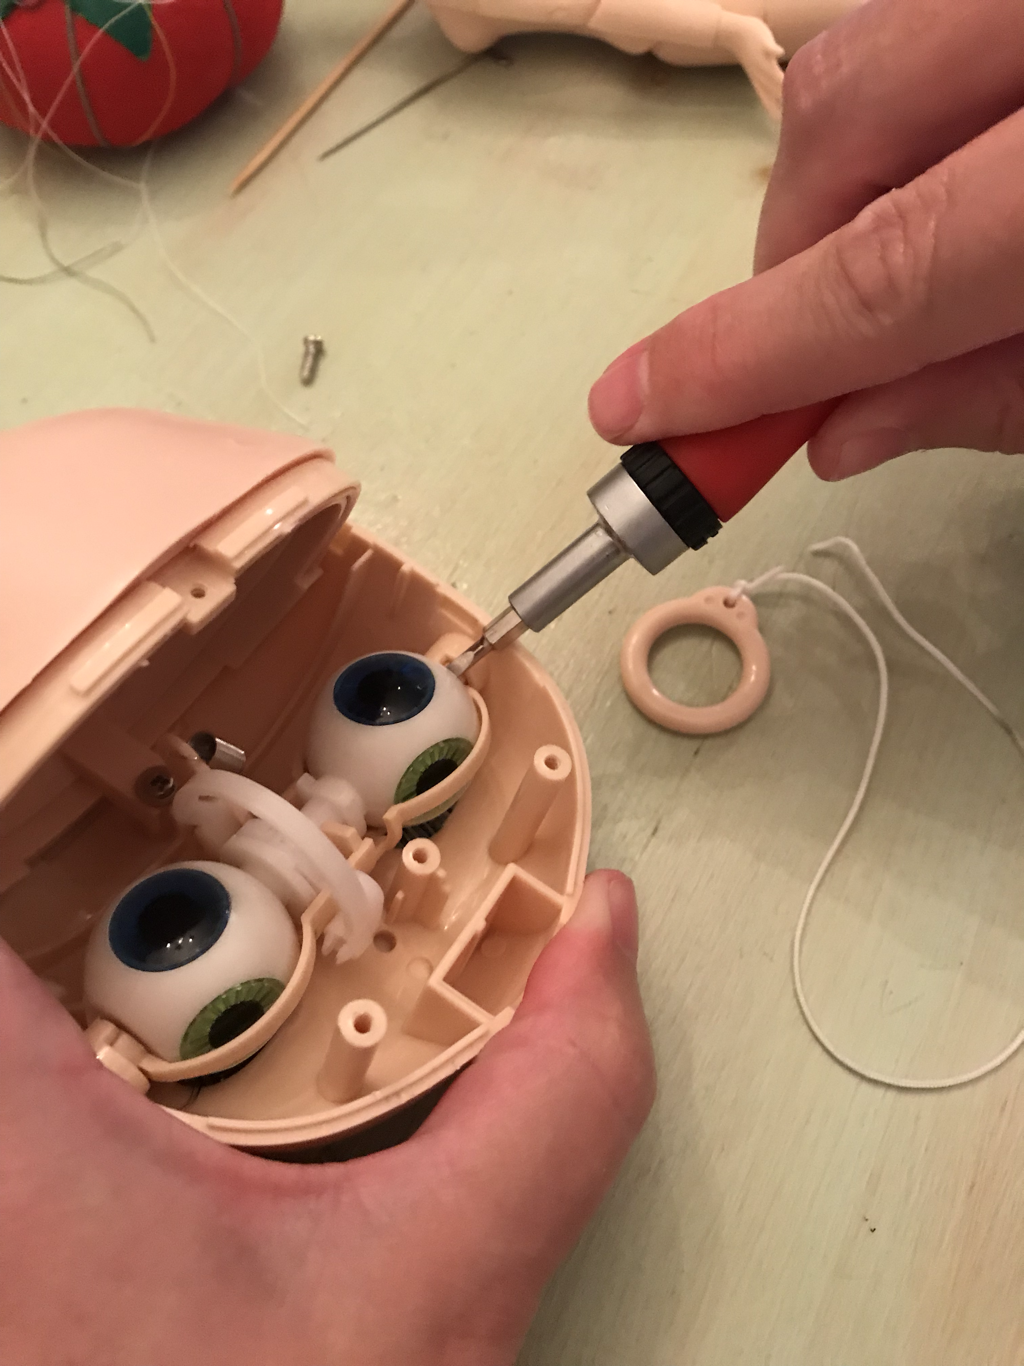 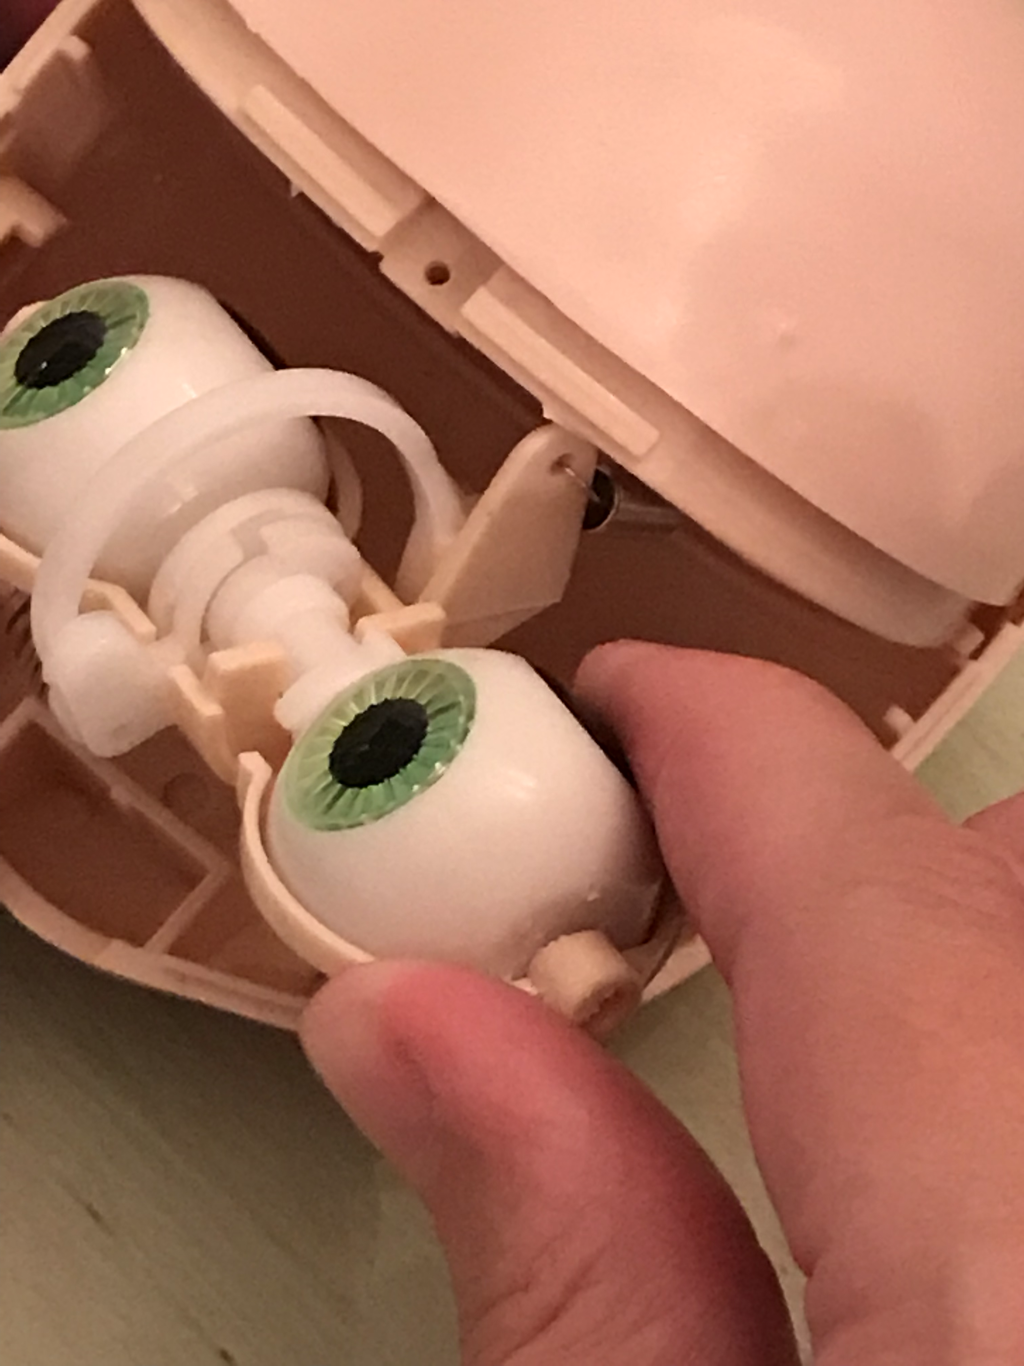 Remove the eye mechanism by pushing against the side of the eyes and lifting them out of the head. You will have to press hard, so be careful not to scratch the eyes. At this time also remove the scalp from the head. You may or may not need to unscrew it depending on which Blythe version you have. Remove the spring from inside the head as well. You can just unhook it with pliers and set it aside. 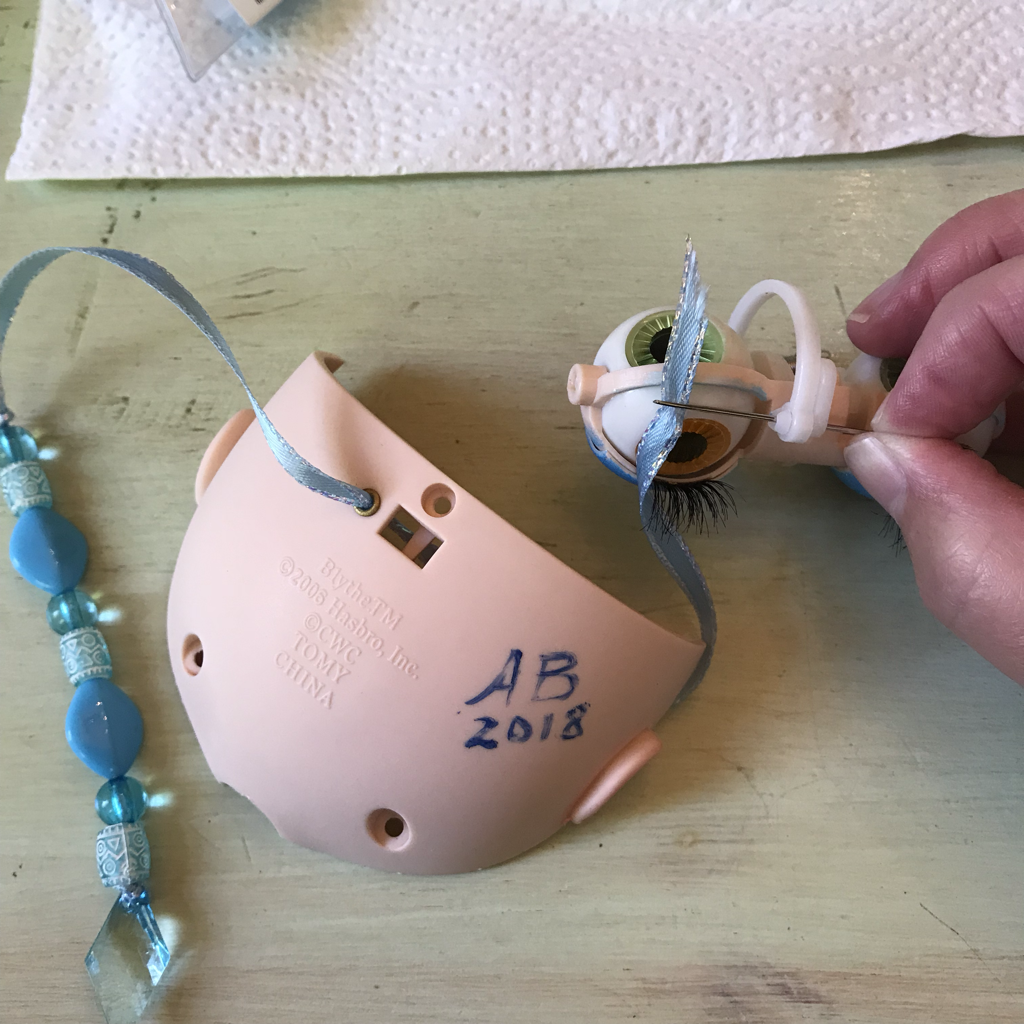 Find two strings or narrow ribbons at least as long as the original drawstring. If you want to embellish them with beads do that prior to insertion. Take the first string and thread it into the back of the head through the round hole next to the rectangular hole. Then thread it through the half-circle shaped piece on the back of the eye mechanism as shown. It can be helpful to use a sewing needle to get it through the hole. Tie the string in place using a double or triple knot so it doesn't come undone. 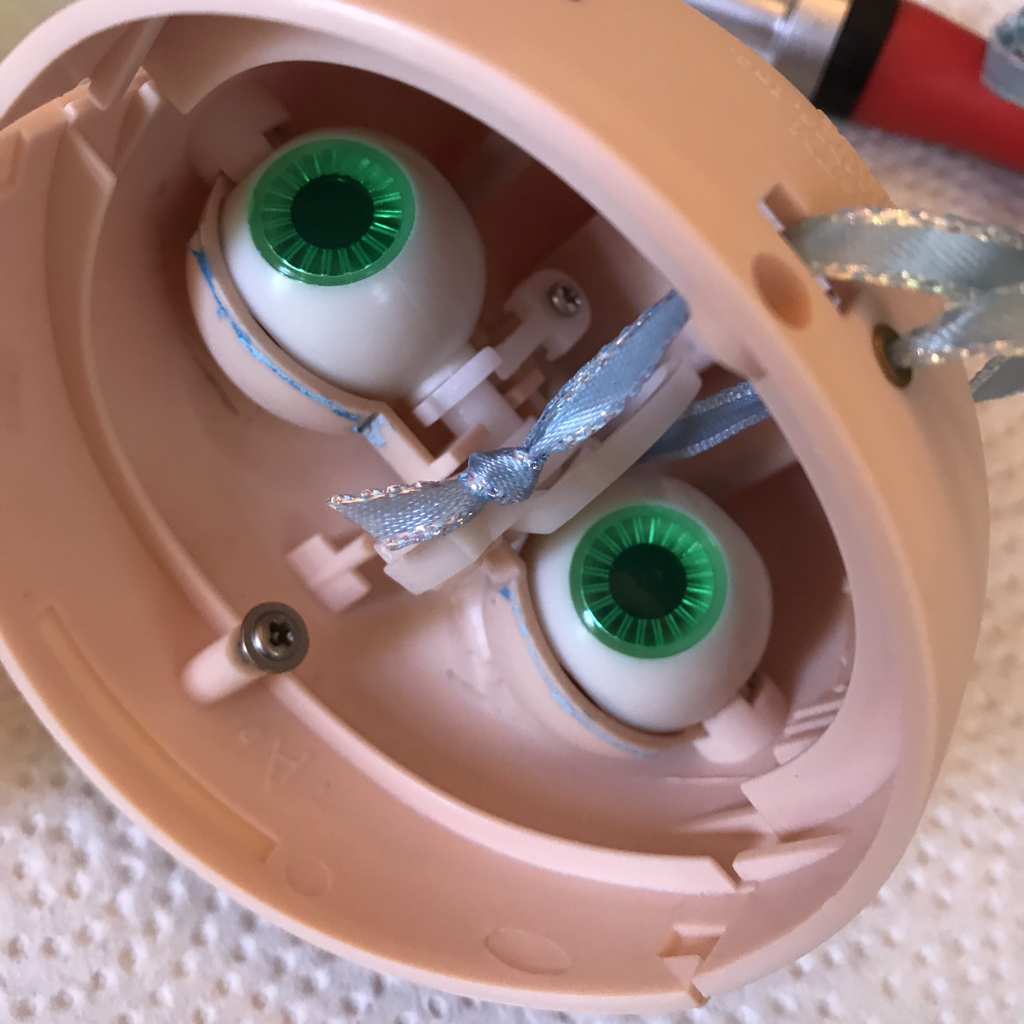 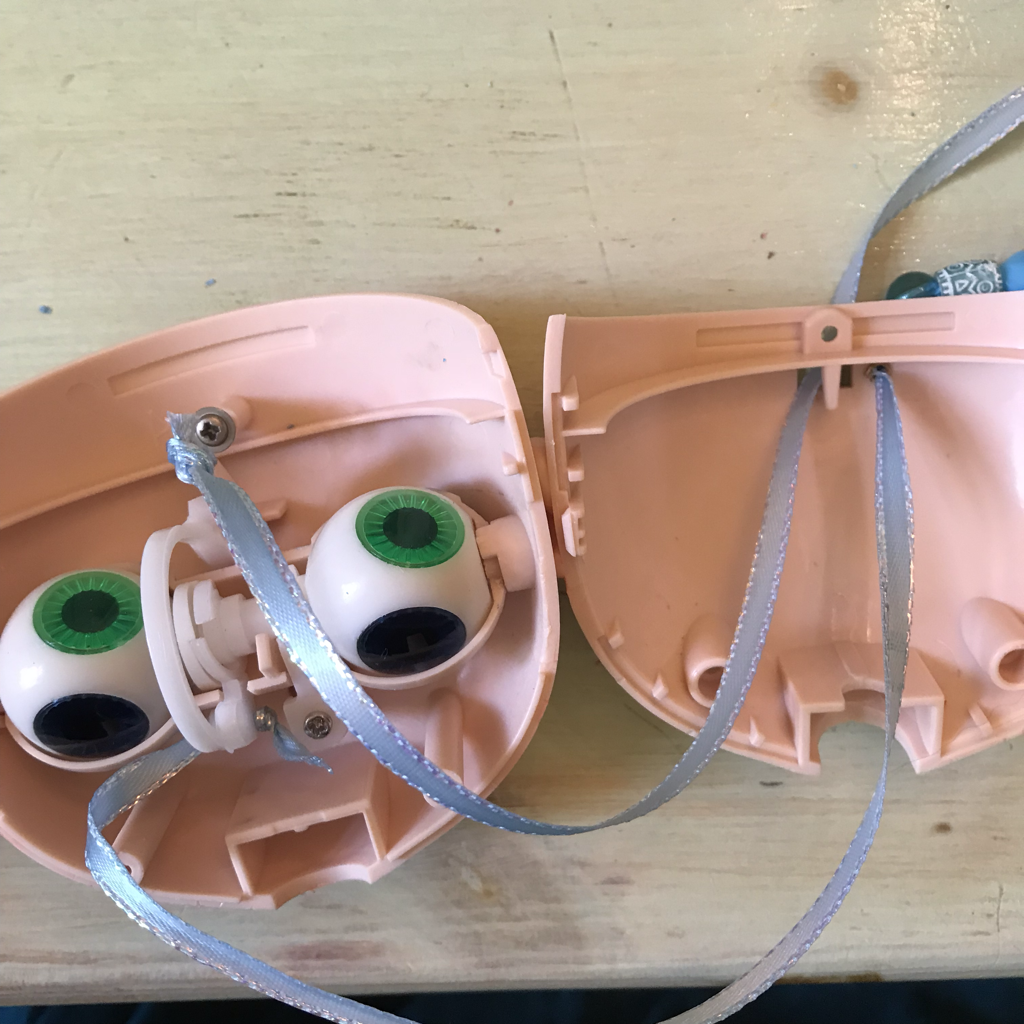 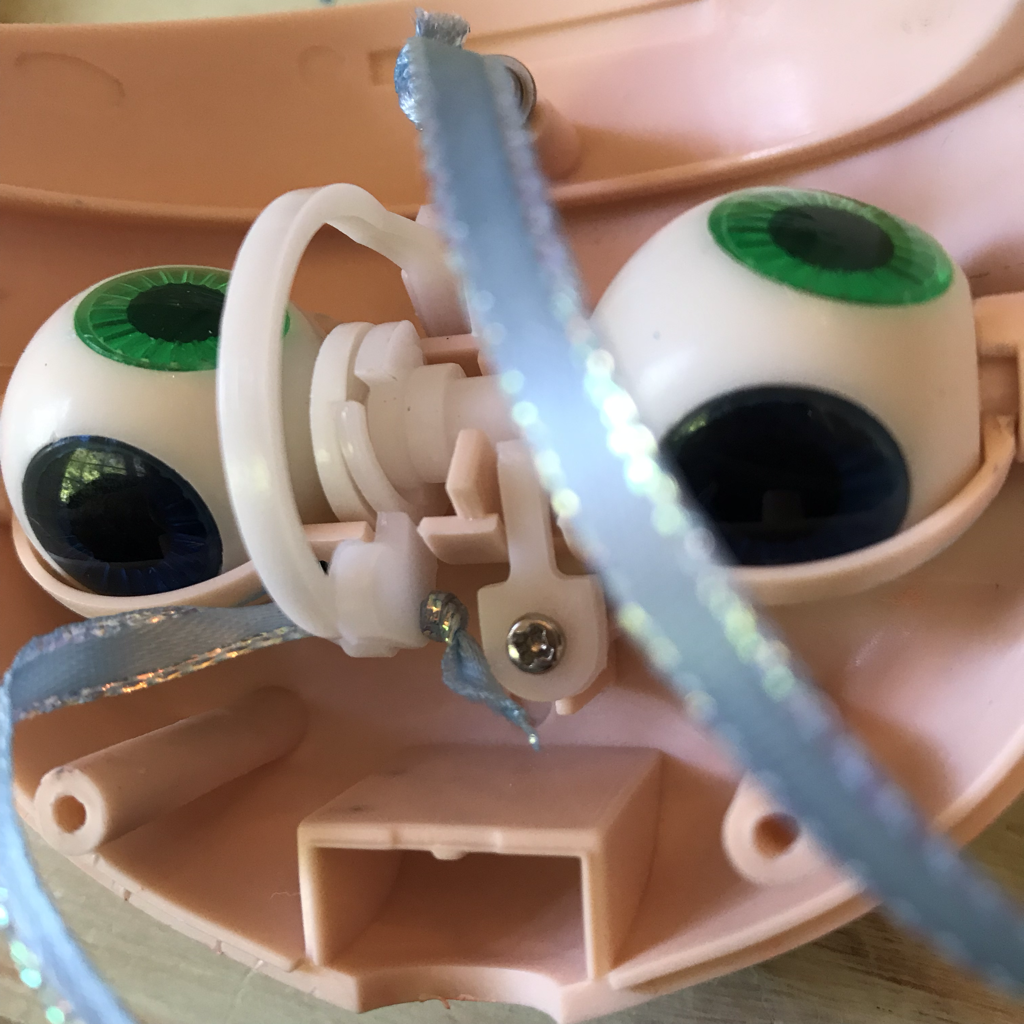 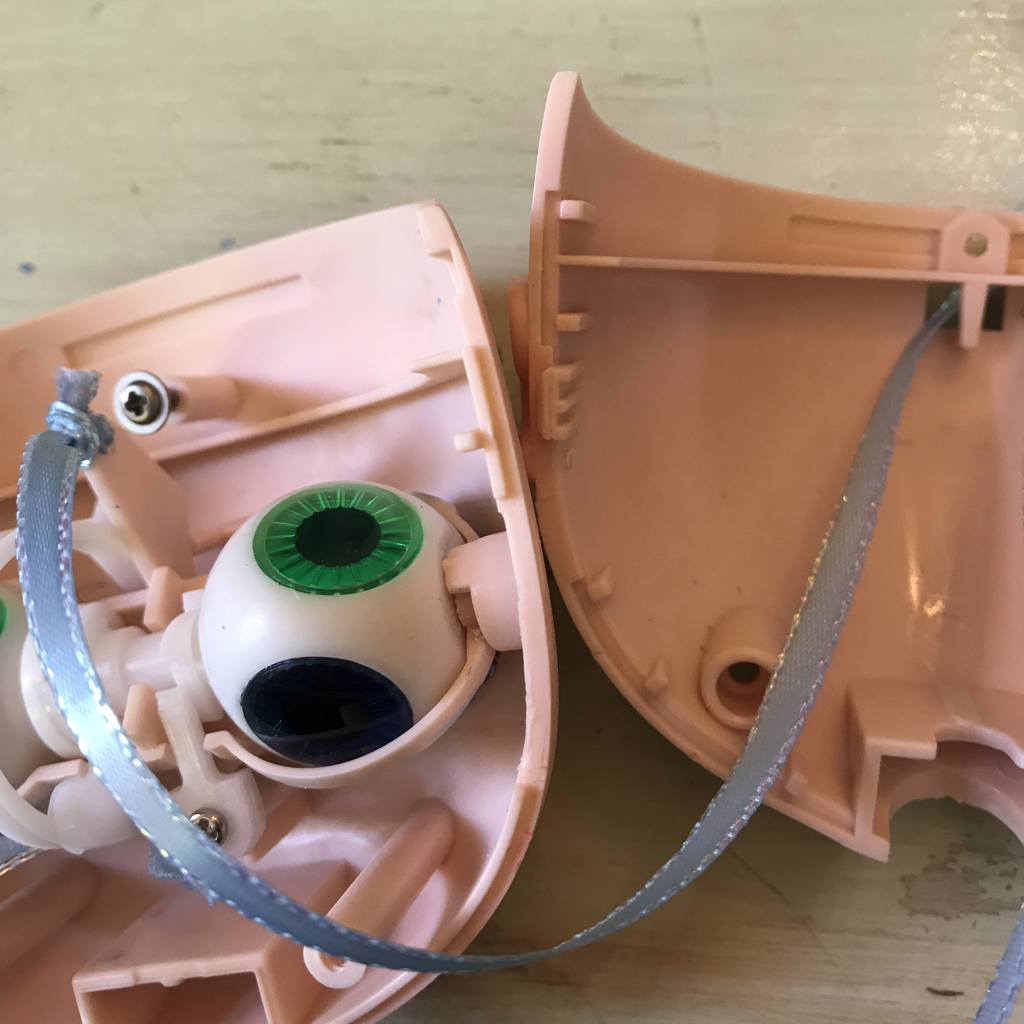 When you have the first drawstring inserted you can replace the eye mechanism in the front of the face by just pushing the little pegs on each side into the tubes in the sides of the face front. Just insert one at a time. Take your second drawstring and thread it through the rectangular hole in the back of the head. Bring it into the head and tie it to the triangular shaped piece above the eye mechanism as shown (tie it to the hole where the spring was attached). I've shown this from several angles to give you a good idea of the way the strings are attached. When the strings are tied in place re-attach the paddle shaped piece under the eye mechanism. 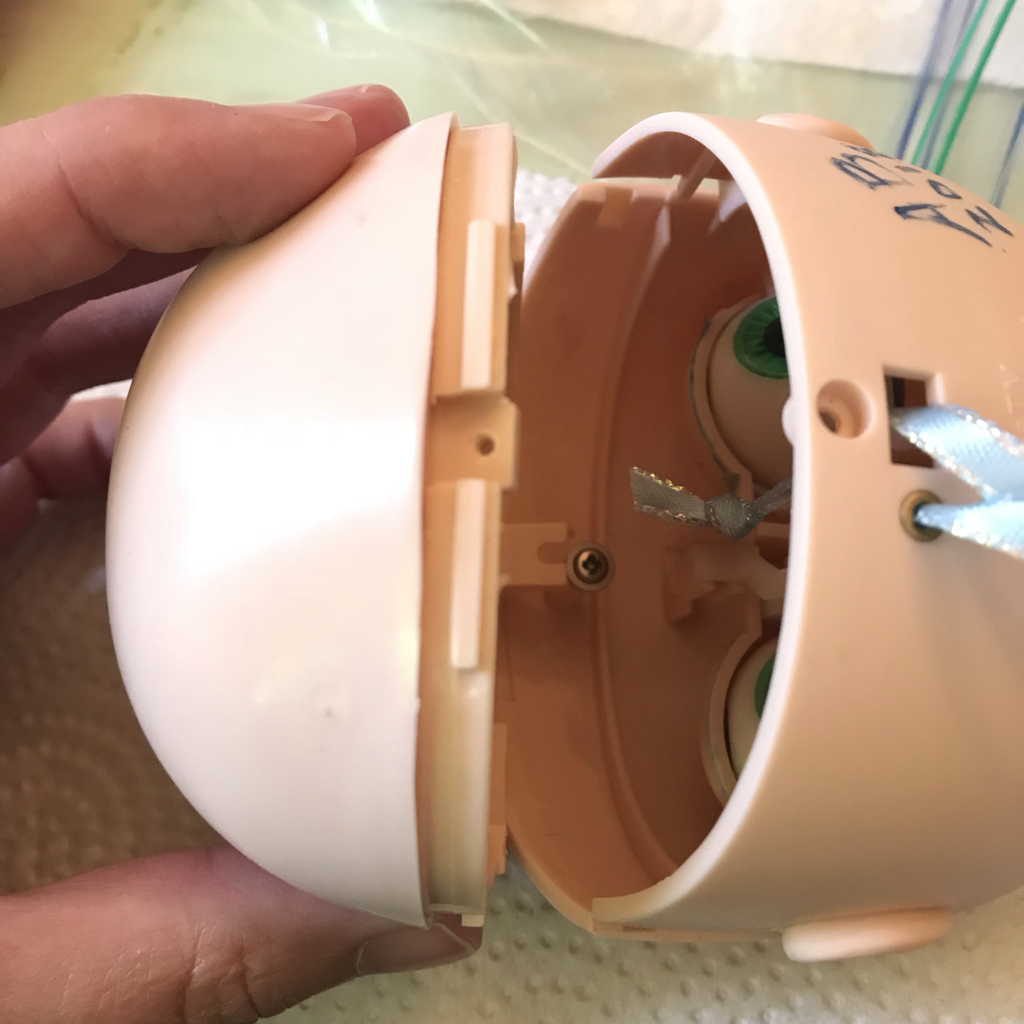 Replace the scalp and the back of the head and screw them in place. The ribbons should appear as shown in the photos below. To work the eyes now you will pull one string to close the eyes and change the color/gaze and pull the other string to open the eyes. 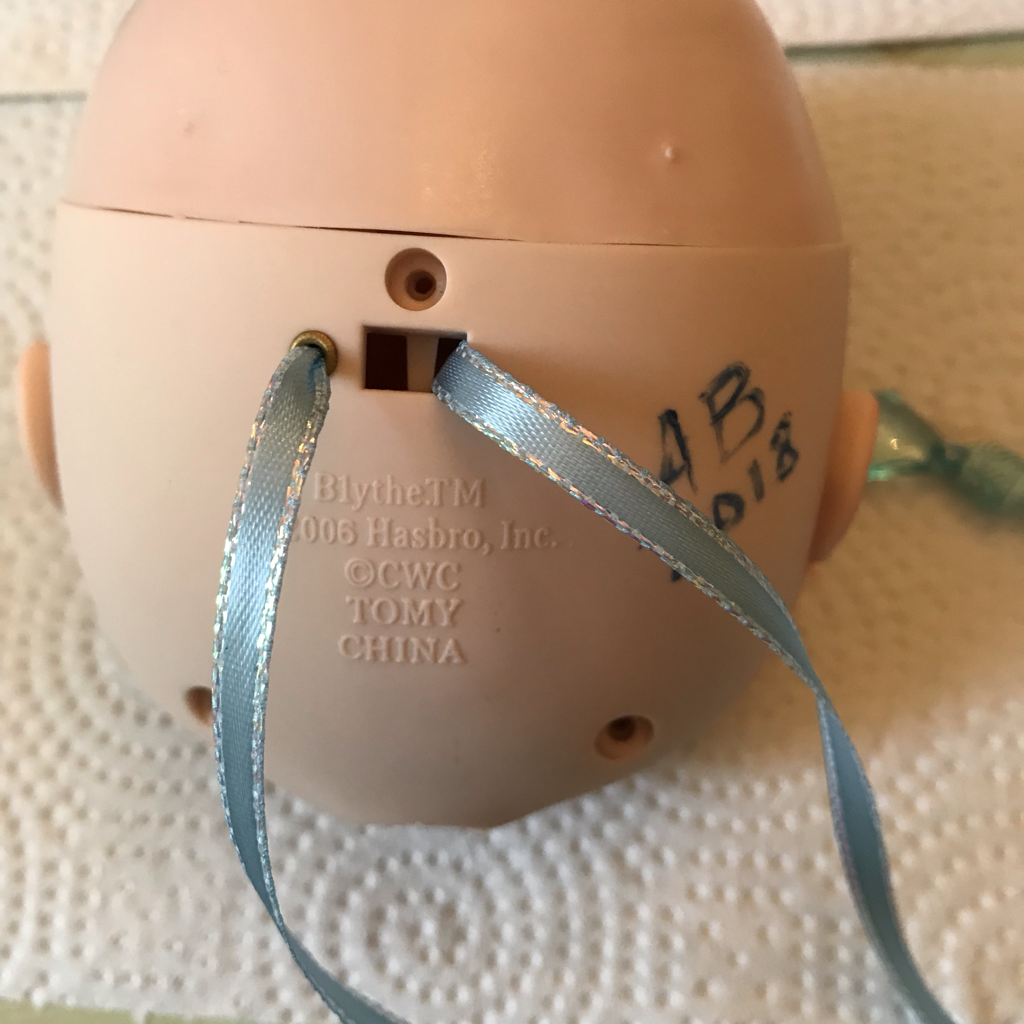 Initially I replaced the factory eyelashes and painted eyeshadow on the eyelids before I converted the eyes, but I found when I opened and closed them the paint all scraped off. So I made eyeshadow by grinding soft pastels into powder and applying them with a brush like eyeshadow. You can also use real human eyeshadow for this. Then I sprayed the face with Mr. Super Clear flat UV Cut varnish to set it. 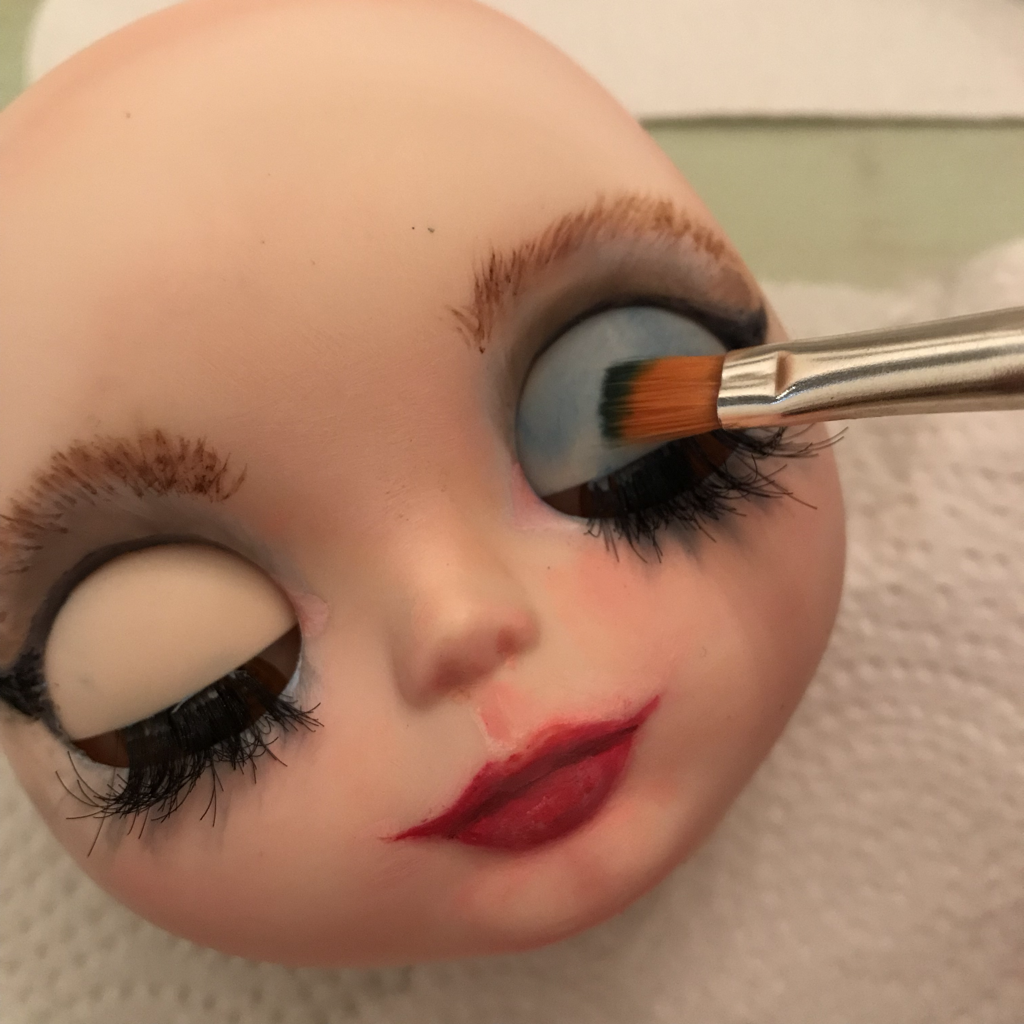 Now your doll can close her eyes as shown above! The photo below shows the Blythe face after eye conversion and with her face plate custom sculpted and re-painted. I typically glue hook and loop tape to the scalp and add it inside wigs so the hair can be easily changed, and it is also easy to find rooted scalps you can change out for a different hair color and style. This particular doll has her original eye chips. See my eye chip replacement tutorial to see how to change the eye colors from the factory options. 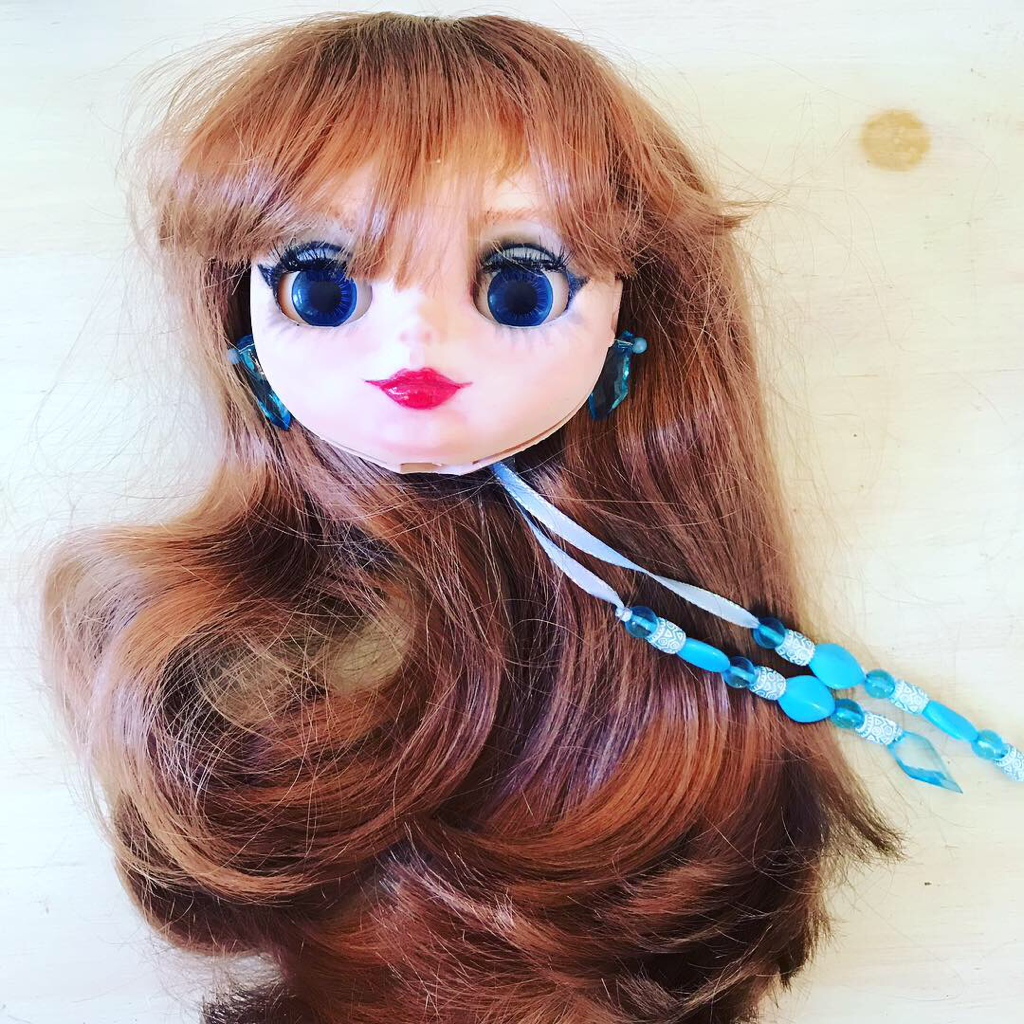 Please remember, I am happy to create a custom Blythe just for you! I also sell eye chips, bodies, and other Blythe conversion supplies, as well as ready-made custom Blythe dolls, in my shops. Link to all my shops from the Home page.
0 Comments
Leave a Reply. |
AuthorMy name is Amanda, but my childhood nickname was "Mandaline". I am a mother of three turning my passion for creating into a full-time business. Archives
April 2024
Categories |
 RSS Feed