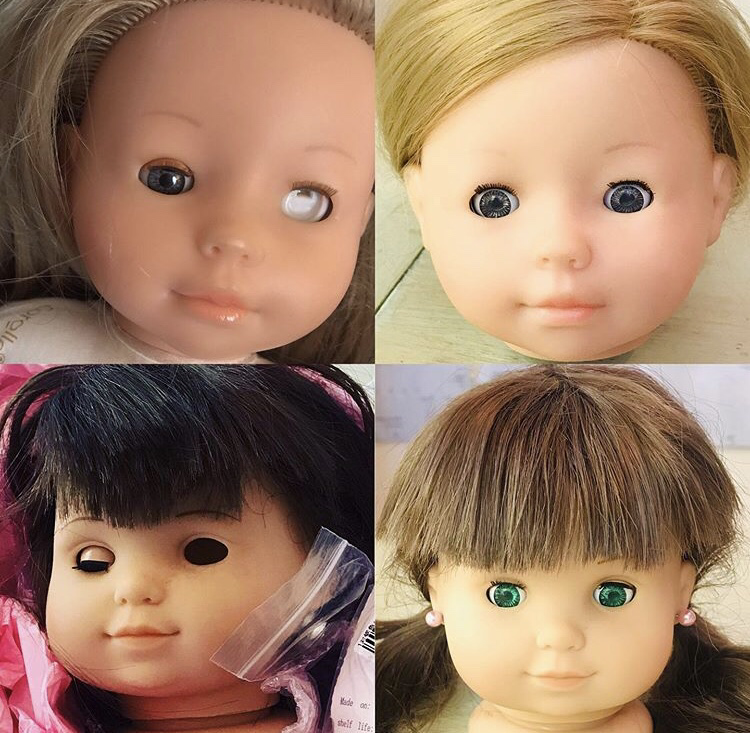
 Last week I had two new-to-me patients in my doll hospital: the 14 inch Miss Corolle Classic doll and a Bitty Baby Twins doll. Both these little ladies needed eye transplants. The Bitty Baby was partially repaired at home but the owner couldn't get the second eye in and sent the doll to me to finish. She was the second person in as many days to have trouble inserting the second eye into a Bitty Baby. I am not sure what the problem was because the eye popped right in for me. If you are having trouble with your Bitty Baby I suggest you review the tutorial. Bitty Baby takes a Margon size 13mm eye, available in my Etsy and eBay shops (link from the Home page). I find rubbing a bit of baby oil or petroleum jelly on the back of the eye helps with insertion. Miss Corolle was a lot more difficult so I was glad the owner sent her in. I didn't think to take photos but I made notes of some particular issues with that doll. 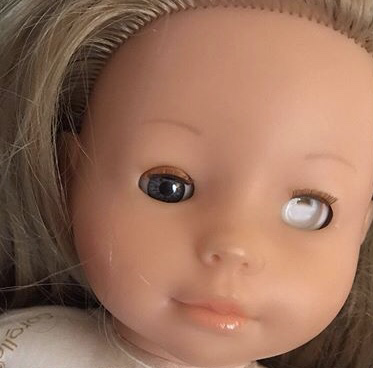 I believe this is the "Miss Corolle" classic doll. There are a few different 14 inch Corolle dolls and this one is the older-looking body and face rather than the baby type doll. Miss Corolle lost her iris. Unfortunately the only solution is to replace both eyes, unless you were to find the same doll from which you could harvest an eye. This doll, like the 18 inch American Girl, does not use a standard eye size. Her eyes are wide but the case is shallow. In the Margon replacement eyes she takes a size 10mm. You may remove the eyes using the method illustrated in the tutorial above, except that since this doll has rooted hair you will need to line the inside of the head with an oven roaster bag before you fill it with water. When the head is warm the eyes pop right out. Her vinyl head fits on a hard plastic neck so there is no reason for a drawstring; you can just pop the vinyl head right off the neck piece. 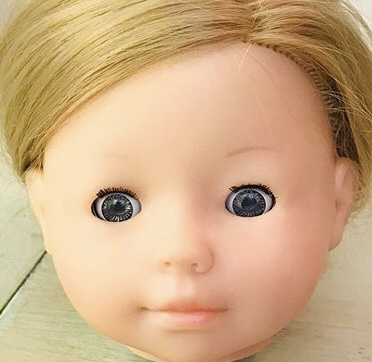 The Margon 10mm eyes are too tall for the eye pockets so you can't use the boil method to insert the new eyes. You will need to use my cut method. You will need to remove the ends of the vinyl eye pockets inside the head. This will result in a vinyl tube with an open end inside the head. The fit will still be tight. I gently heated the eye tubes with a hair dryer. Then I used a curved hemostat to place the eyes on the tube and push them toward the front. Then I straightened the gaze so both eyes looked in the same direction and sealed them to the tubes with Aleene's Tacky Glue. When the glue dried I popped the head back on the neck and sent her home. Although it was a difficult repair I believe the doll turned out beautifully! This doll looks to me like the American Girl Wellie Wishers size clothing would fit her if you find one without clothing. My traditional eye repair kit (not the American Girl kit) will work for this doll, but if you have trouble you can always send your doll to my hospital using the form below. 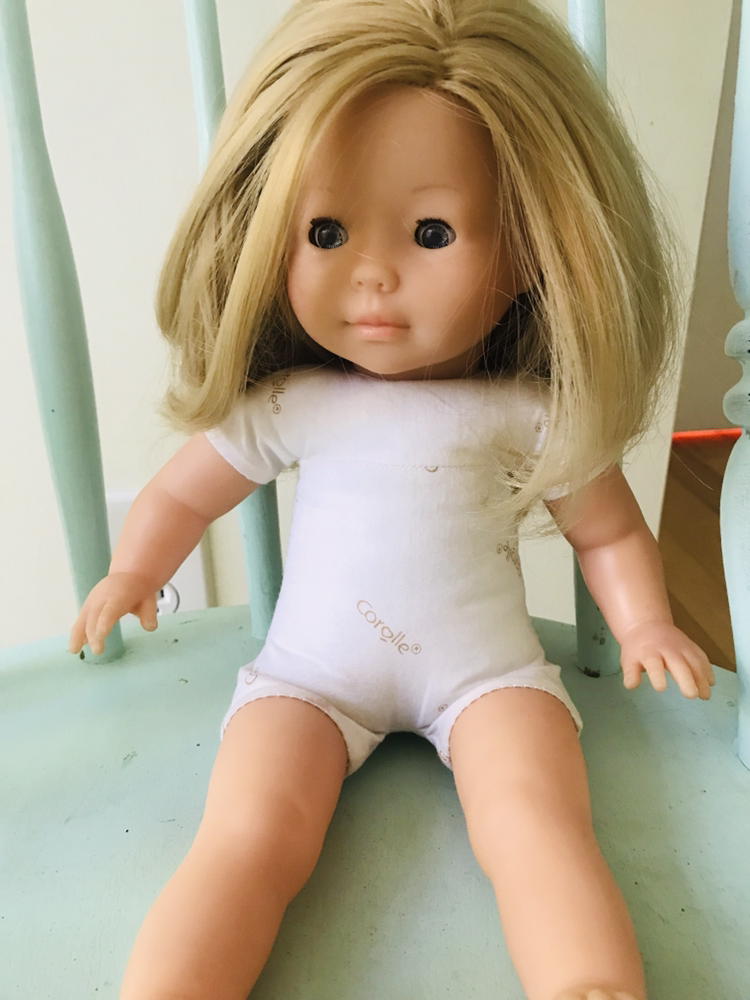
0 Comments
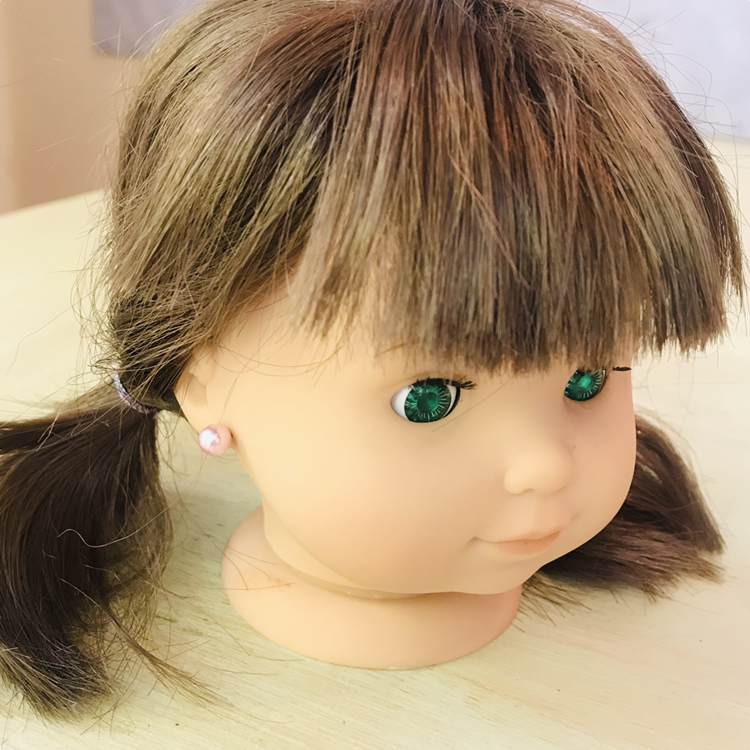 Today in my doll hospital I got a new patient, a Bitty Baby Twins dolls named Harmony. Harmony needed an eye replacement and hair styling and while she was here her owner wanted her ears pierced as well. The American Girl Hospital will pierce the 18 inch dolls' ears but they won't do the Bitty Babies' due to earrings being considered a choking hazard. So before you proceed please consider if your doll will be a play toy and don't pierce the ears until your child is five years or older and you are confident they won't put the earrings in their mouth. 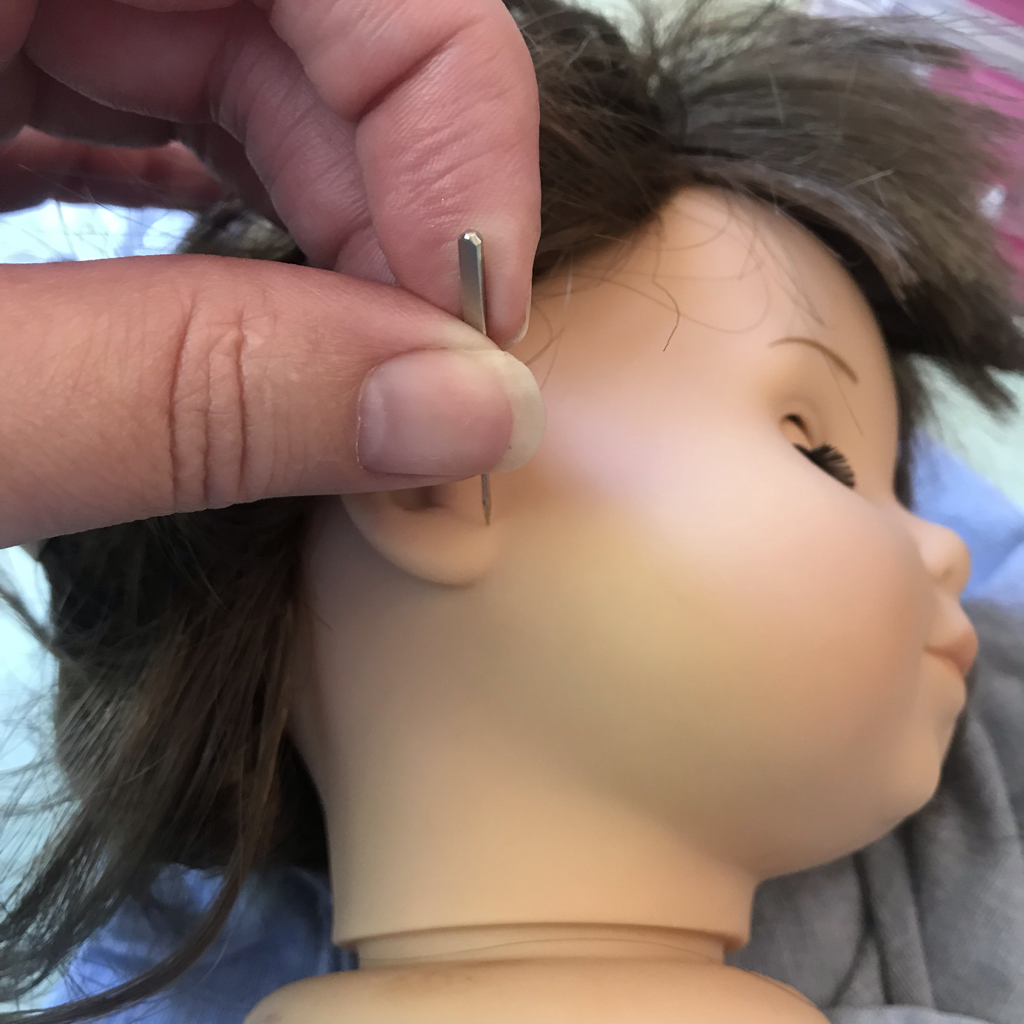 Choose the spot where you want to pierce the ears and scratch a little mark there so you can make sure the placement is even. It's easiest to put the earring just at the edge of the ear lobe rather than in the center of the lobe the way human earrings are placed. You want the earring to look like it's in the ear but not to have to pierce the thick ear vinyl. Choose the thinnest spot as close to the ear as possible. I use a sewing machine heavy duty needle for both the marking and the piercing. For vinyl dolls, it can be helpful to fill the doll's head with hot water prior to piercing to soften the vinyl. I forgot to photograph that step, but this doll's head was still soft from her eye replacement when I did the piercing.  Bring some water to a boil. This step is also mostly for vinyl, not resin or hard plastic dolls. You are going to use the hot water to heat the needle. 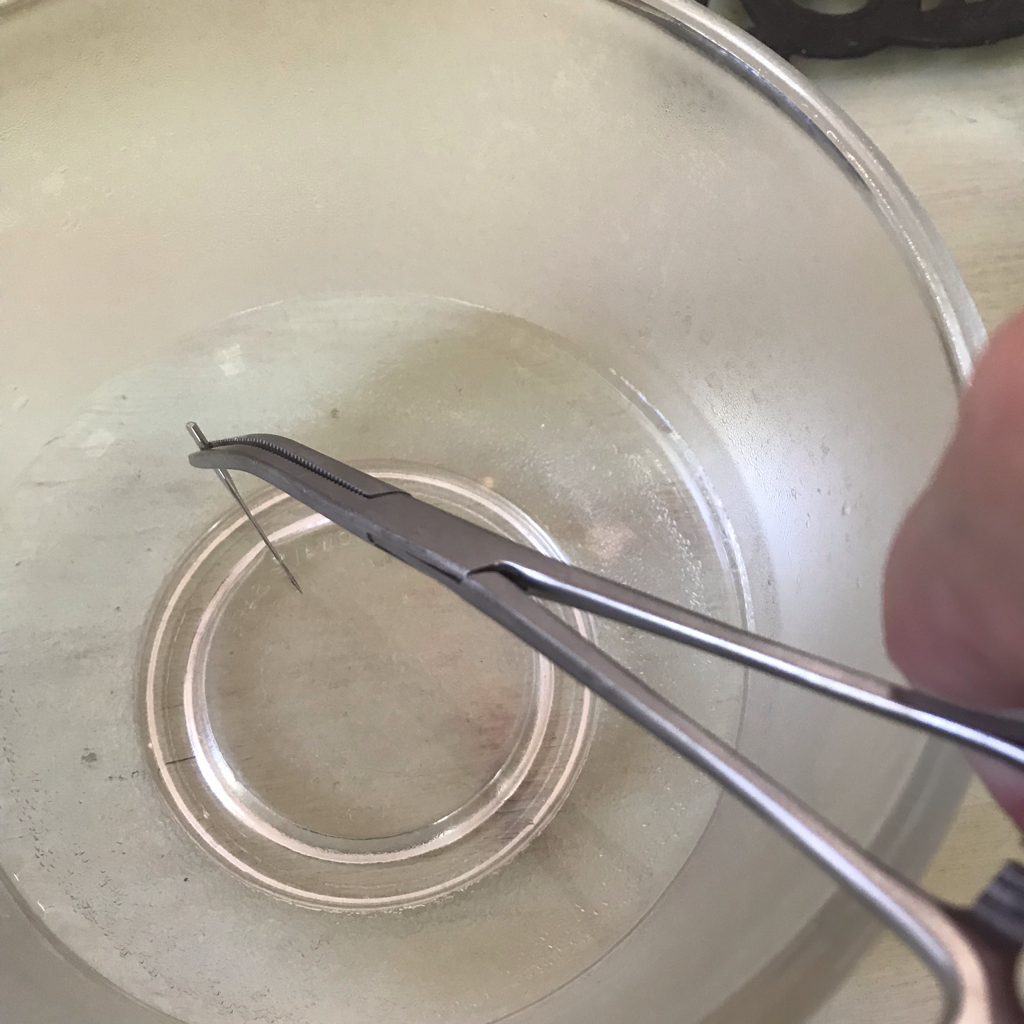 Place the needle in the hot water for a few minutes until it is very hot. Use a hemostat or other tool to hold the needle so you won't burn your hands. If you are piercing a hard plastic doll you will probably need to heat the needle by passing it through a candle flame in order to get it hot enough. That method will cause a black mark on the doll's face where you pierce it unless you wipe off the needle before you pierce the doll. Be careful not to get burned! 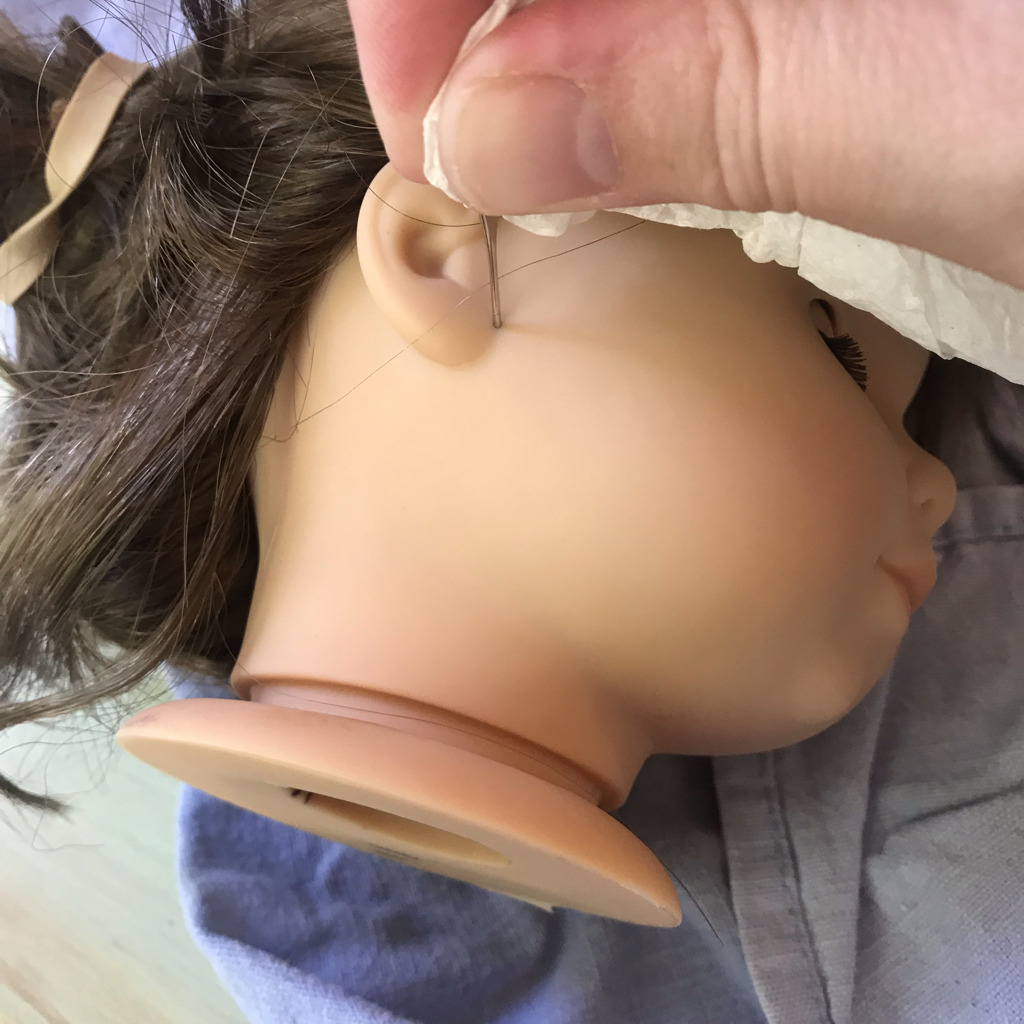 The needle should be so hot it's difficult to hold, so I use a napkin or cloth like an oven mitt to protect my fingers. Press the needle steadily and forcefully into the spot you marked previously. Press until the needle breaks though the vinyl. 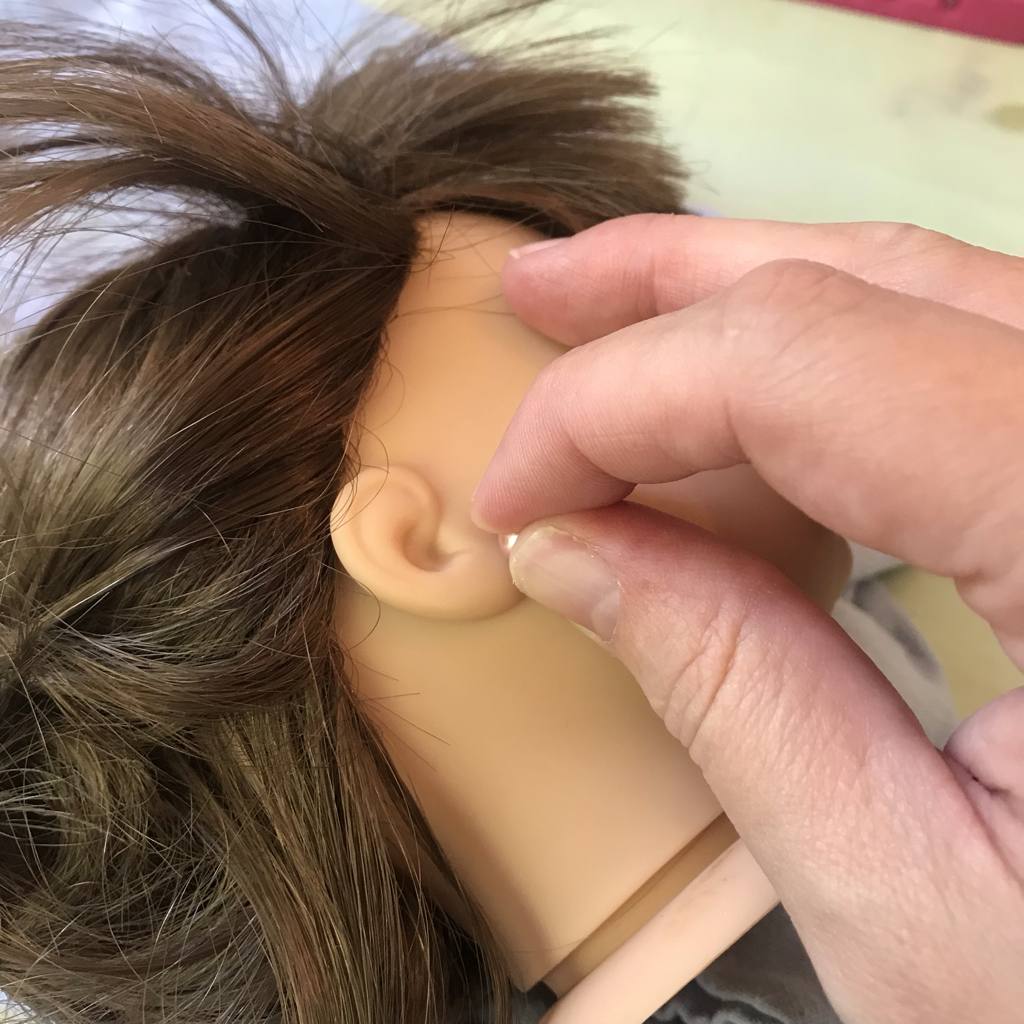 Now you may insert the earrings. It's helpful to do this while the vinyl is still warm. If you are doing it later you can heat up the earring posts beforehand the same way you heated the needle. If you are going to keep the earrings inserted all the time it's important you choose gold or gold-plated posts. Other metals, including sterling silver, will oxidize and turn your doll's ears green. I use human earrings or make earrings myself from gold-plated posts. You can use wire cutters to trim the posts if they're too long. If you're having trouble with the earrings falling out you can bend the tip so it's square. You turn it while you insert the earring and it will hold itself in. This is how the Revlon doll earrings are inserted and that's why it's important to cut those posts before you remove the earrings. If you just pull the Revlon doll earrings out of the ears you will tear the vinyl ear. 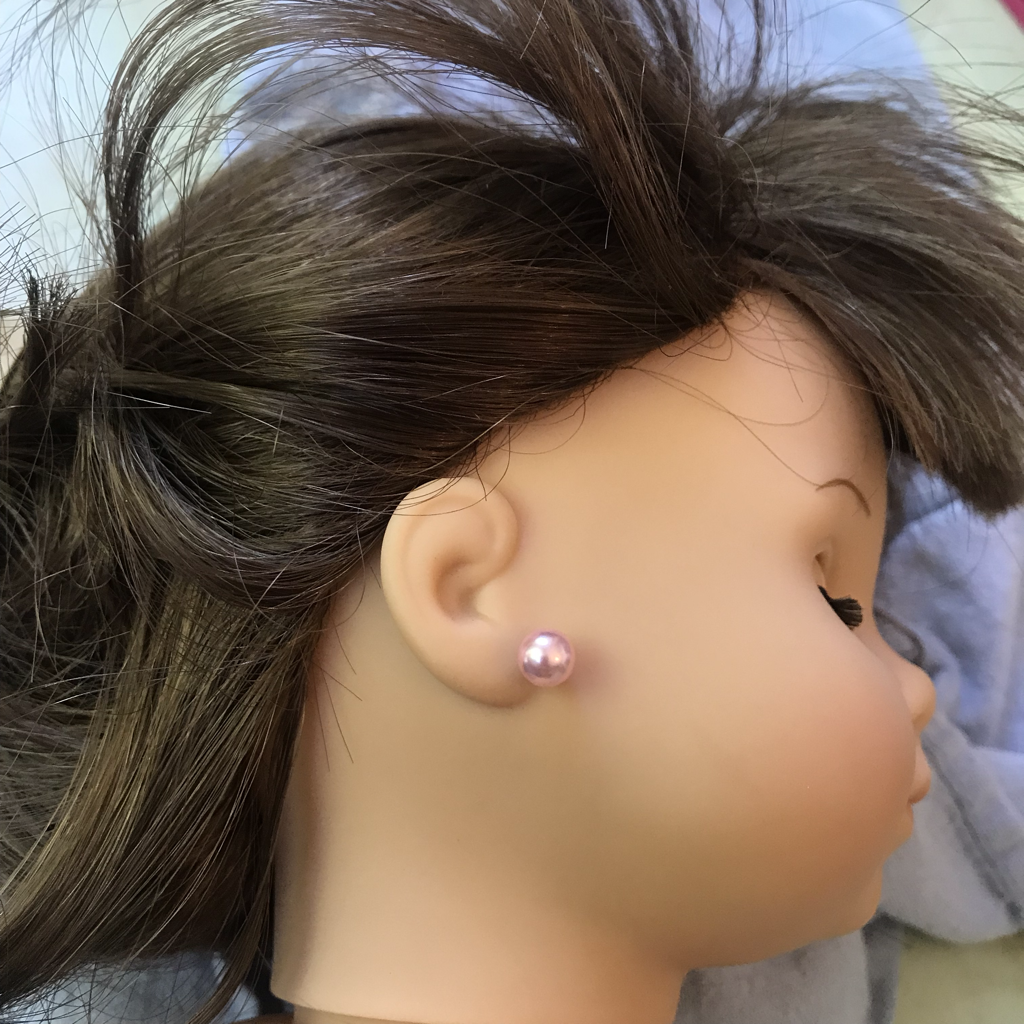 Harmony's owner chose pink faux pearls for her and they're very cute! She's all fixed up and headed home. You can use the doll repair request form below to ask for a repair or service, such as ear piercing.  |
AuthorMy name is Amanda, but my childhood nickname was "Mandaline". I am a mother of three turning my passion for creating into a full-time business. Archives
April 2024
Categories |
 RSS Feed