
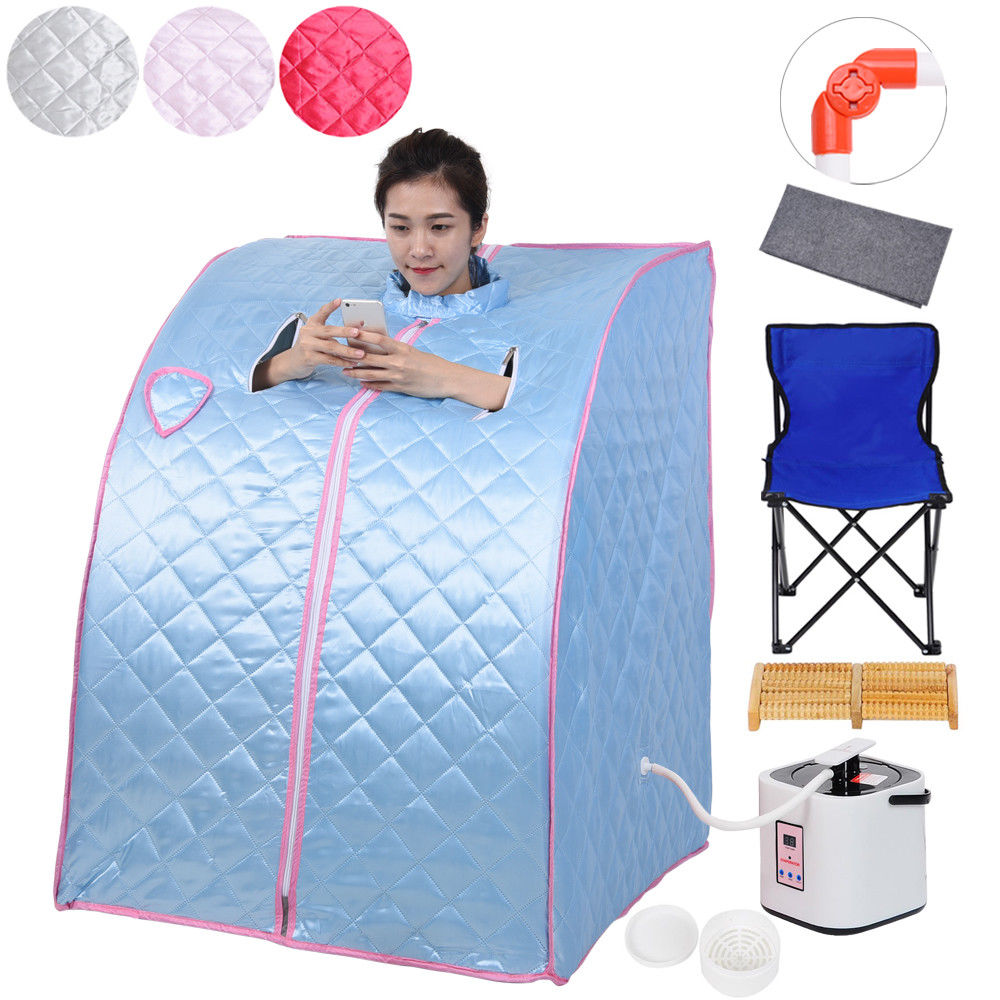
 If you've been watching my social media you know today my personal sauna arrived. I got it all assembled but then I got a migraine with visual disturbance and couldn't see out of my right eye so I went to lie down with an ice pack. When I woke up we had swim team practice despite the torrential rain from Alberto, so it wasn't until after 8PM that I got to try the sauna. I was worried I had wasted my money on a product that wouldn't really work, but actually it is really nice! I did something to my back two weeks ago working in the yard and sitting in the sauna is the first time it's relaxed and stopped hurting since. I used essential oils in the evaporator and steam was hot enough it felt exactly like a real sauna. I worried it would be too small for me but even my husband, who is 6'1" fits in it. After my sauna I went and sat out in the tropical rain to cool off and now I feel fantastic! I have a 5 minute video review on my Facebook Page and a shorter one on my Instagram. I found some on eBay for you and May 30th I have a coupon you can use for $15 off. *Please note, the one I've shown here is similar to the one I got but even better because it has a frame with collapsible joints; mine has to be completely taken apart and re-assembled each time and I wish I'd seen this one before I bought mine! There are even more expensive ones that say they are Infrared, like this one, if you have a bigger budget and want the Infrared advantage for weight loss. *Please note, the links above are affiliate links. It costs you nothing, but if you buy any product (not specifically one of these) from eBay within 24 hours they will pay me a small amount for directing you to their site. Affiliate links help keep my tutorials and reviews free for you!  You may use the coupon code P15HOME for $15 off either of the saunas I've linked here, but you must pay for the purchase in the eBay Mobile App. Don't have the app? Add the sauna to your cart on the full site, then download the app and complete the checkout on there. Don't forget your coupon code! It's good through May 30th, 11:59 PM, Pacific Time. You can add more than one item to your cart to reach the $75 threshold to use the coupon.
7 Comments
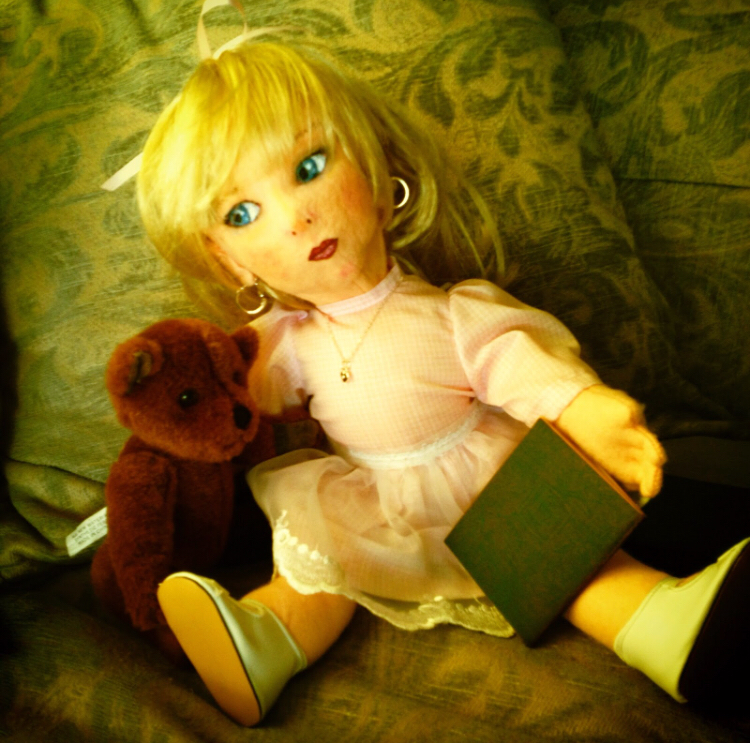 I've been doing a lot of soul-searching lately, because things have been really slow in my stores. I haven't had a sale on any platform in two days, despite doubling my number of eBay and Amazon listings and starting the 30 Minute Method on Poshmark. I would blame it on eBay's widespread new update, as they completely revamped the entire platform and that kind of stuff often takes a while to get back up to speed, but it's every site. It's scary, because the last time I remember a slowdown like this was right before the economic crash that led to the Great Recession. Just like today, I would read about how the economy was booming and wonder what I was doing wrong. I'm not an economist but I've been selling for a lot of years, so take it for what it's worth. Thinking back, however, made me realize it's Atelier Mandaline's seventh anniversary this month! And not only that, I've come an incredibly long way. Seven years ago I was home with three young children. The Body Shop at Home closed leaving me, as an independent consultant as well as freelance graphic designer for their headquarters, out of not one but two jobs. I was selling occasionally on eBay but the throes of motherhood left me little time for it or anything else and I felt like I was losing myself. I had recently become interested in doll making and repair and taught myself to make pressed felt dolls. I decided to write a blog to document my learning process and also to force myself to use my art and writing degrees with some accountability and regularity since I would presumably acquire followers. My very first post was about my obsession with re-creating Edith from The Lonely Doll books, published on May 10, 2011. Mandaline Artful Living, as the blog was then known, was born and would grow into the Atelier Mandaline brand, collection of shops, social media pages, and finally, this website. 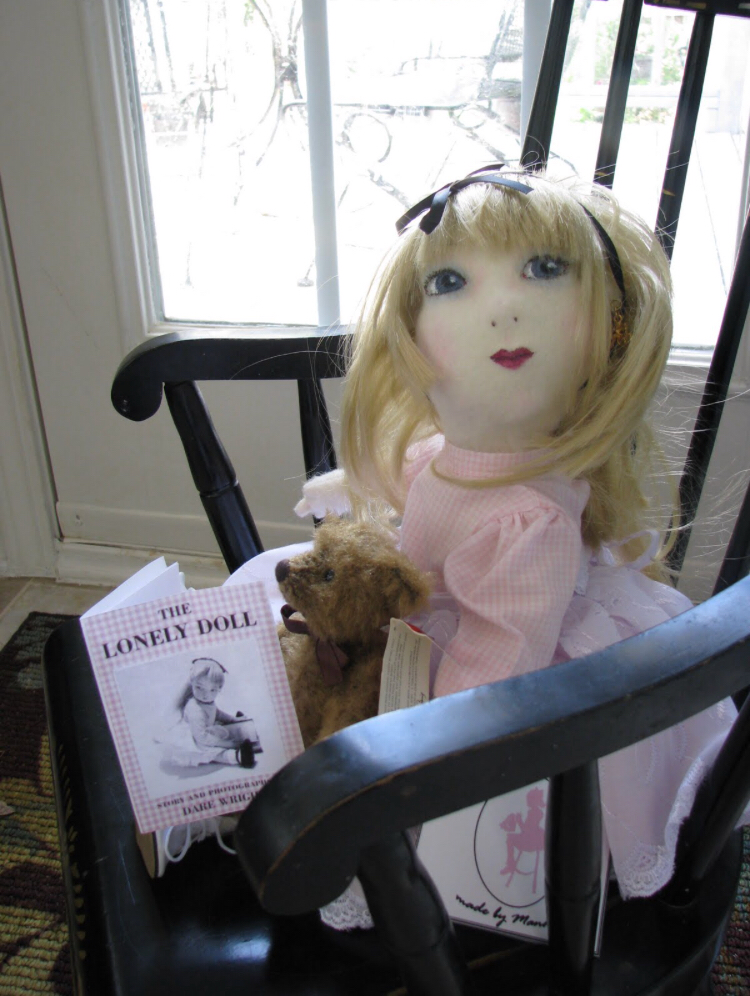 I never imagined too many people would be interested in my doll making, but now I have stores on eBay, Facebook, Etsy, Poshmark, Young Living, and of course this website, and I sell on Mercari and Amazon too. My blog has hundreds of thousands of readers from around the globe and I have thousands more followers on Pinterest, Instagram, Facebook, Poshmark, and Vero (I'm up to nearly 20,000 on Poshmark alone!). My offerings have expanded to include everything from doll supplies to my own fashion boutique. I'm still struggling to find a reliable manufacturer to help me expand my website shop but I feel really proud of myself. I built my brand and bootstrapped my business entirely by myself and I did it without taking on any debt through the Great Recession and while raising three kids, two of whom had to work through (and one is still working through) daunting special needs. My business and brand aren't the only things to experience impressive growth. When you compare the first felt Edith doll I made (above) with the second one in the cover photo you can see how much I was able to improve my skills (in photography as well as doll making), and those dolls were only made a few months apart. Nowadays I sometimes amaze myself when I save dolls that I would have just thrown away in the beginning and my production speed is significantly faster. Of course, much of the improvement in speed comes from no longer dealing with a two year old! I always wanted more children and would be thrilled to have another baby, although I've given up on that dream, but I have to say it is so much easier to get things done now! I have to say, although I may have built my business and brand alone, I absolutely could never have reached my current level without all of you. My readers and early, blog followers, my customers, all those who took me under their wings and mentored me and gave me advice and became my wonderful friends and in some cases even sent me gifts and free inventory, I will never be able to thank you adequately. Even the Internet trolls who sent me hate mail when I didn't do well enough or made an identification mistake or when I over- or under- restored a doll in their opinion, thanks to them too, because they forced me to improve my game. They, and all of you, made me stronger and better. I'm not going to let a few bad days take that away from me. I'm going to keep going, improving, and growing, as I always have.
As a special thanks to you all, I am having a huge sale. You will find extensive markdowns on eBay, Etsy, Mercari, and Poshmark through Tuesday, May 29th, even including some of my newest pieces, such as those in the slideshow. You can link to all my shops from the Home page. I have so many new products planned. I even have a new Edith version in the works, so I hope you will keep watching. 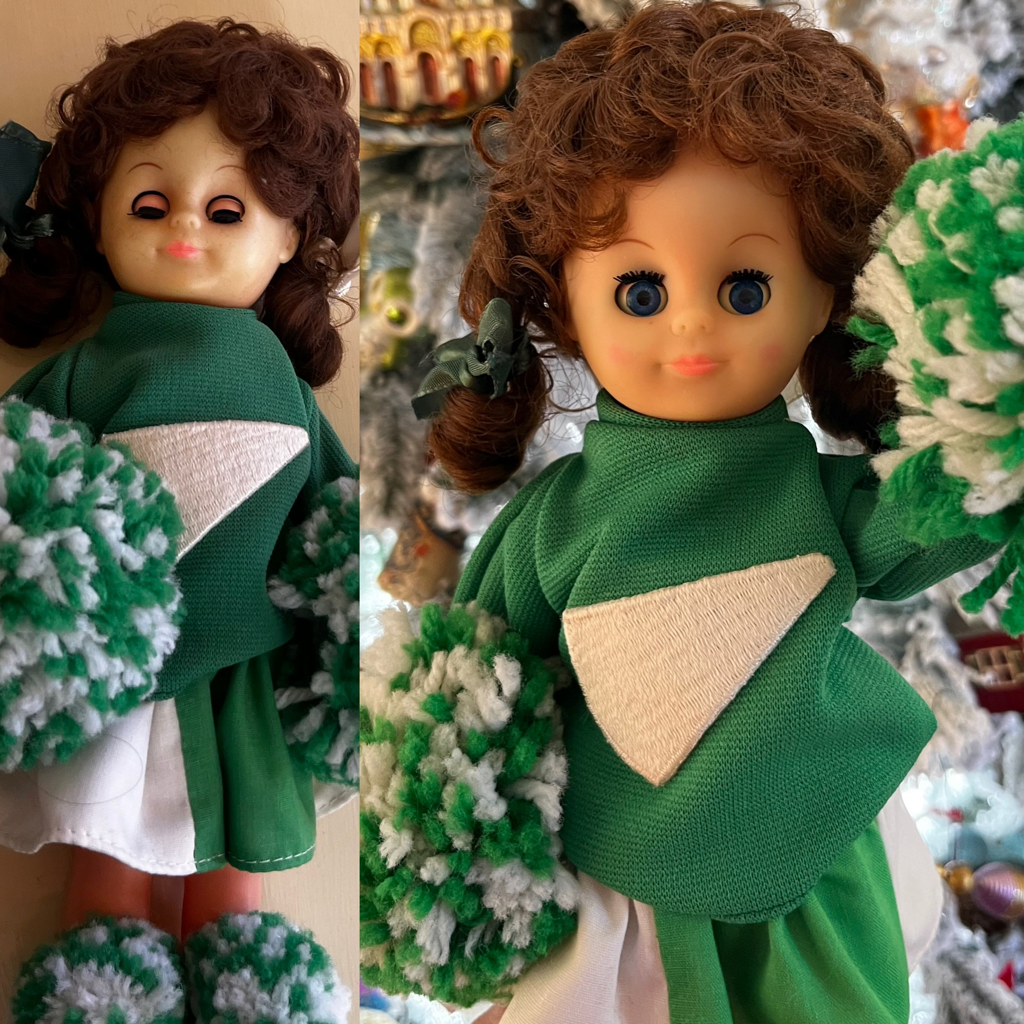 It's been a few years since I've written about my first baby doll, the Ideal Baby Dreams Velvet Skin doll from 1975. I was only one year old when I got my doll but I remember her well, now at least. For many years she was lost to my conscious thoughts, but I would have a recurring dream about her. In the dream I would leave my baby, who was always dressed in a little pink bunting gown with a pointed hood, on the floor in front of the door (I know, I wasn't a great mother) and when I went back to get her she was gone. The house in my dream was our house in California. I can barely remember that house when I'm awake but when I had that dream it would materialize, as clear as day. It took me a while to realize the "baby" was a doll, and a real doll at that. I said something about the dream and my mother explained it was a baby doll whose face started peeling off so she threw it away. This trauma buried itself in my brain I guess, emerging in sleep some thirty years later. I'm not a psychologist, but I realized this dream was about more than just the doll. Shortly after that loss I suffered a much greater loss, my entire world, when my father died and we moved to Ohio to live with my grandparents. By the time I was thirty-six I was dreaming about the doll almost nightly and waking with a terrible sense of grief. I decided to try to find her. The trouble is, my mother didn't remember her name and I could barely even remember what she looked like. I remembered she had a fuzzy face and wore a pink bunting with a pointed hood. In my memory she was a cloth doll, but my mother told me she was plastic with flocked skin. I searched and searched eBay, blogs, doll forums... this was either before Pinterest or before I was aware of Pinterest. Finally one day I struck gold. A wise eBay seller who had the original doll mentioned her flocked skin and pink bunting in the listing title and led me to her: Baby Dreams Velvet Skin by Ideal. Keep that in mind if you sell online, especially vintage stuff: the person seeking your item may not remember anything about the brand or name, but just the physical appearance, so you want it in your title! 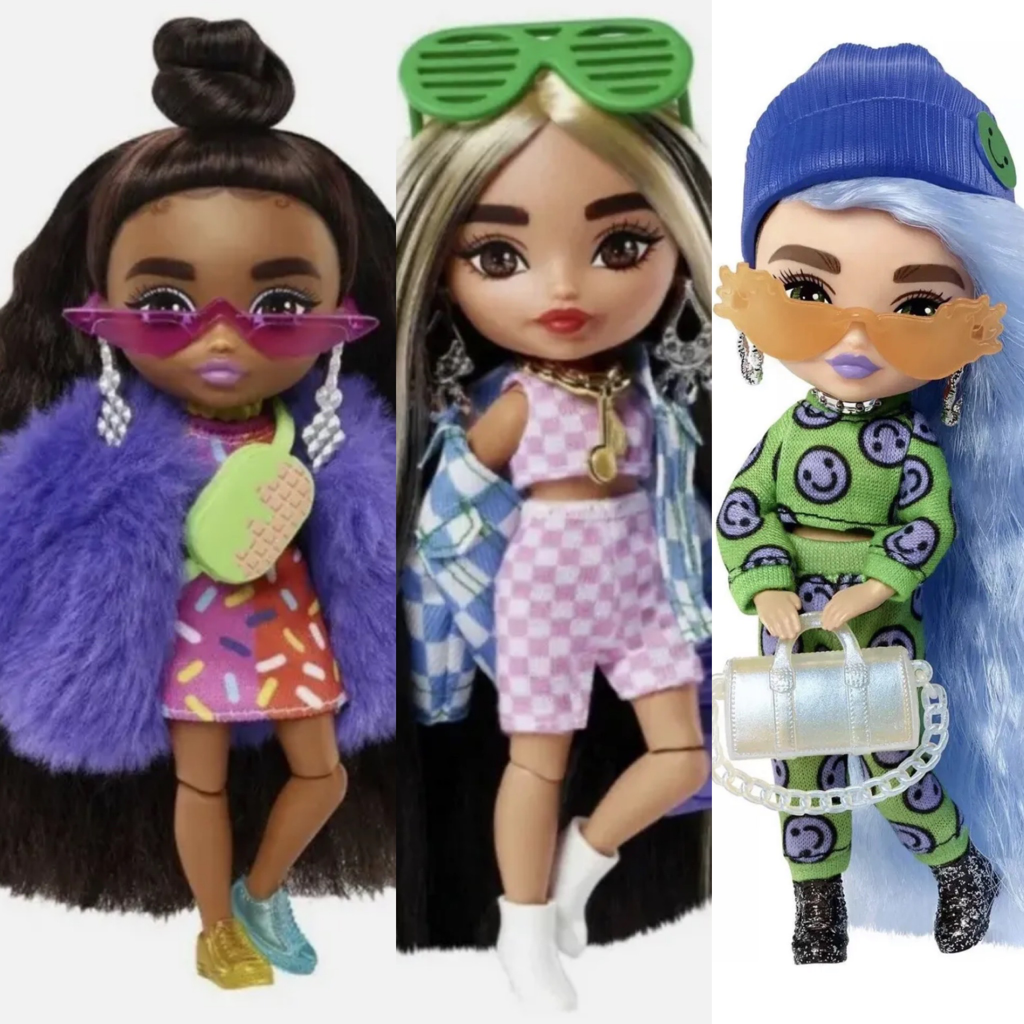 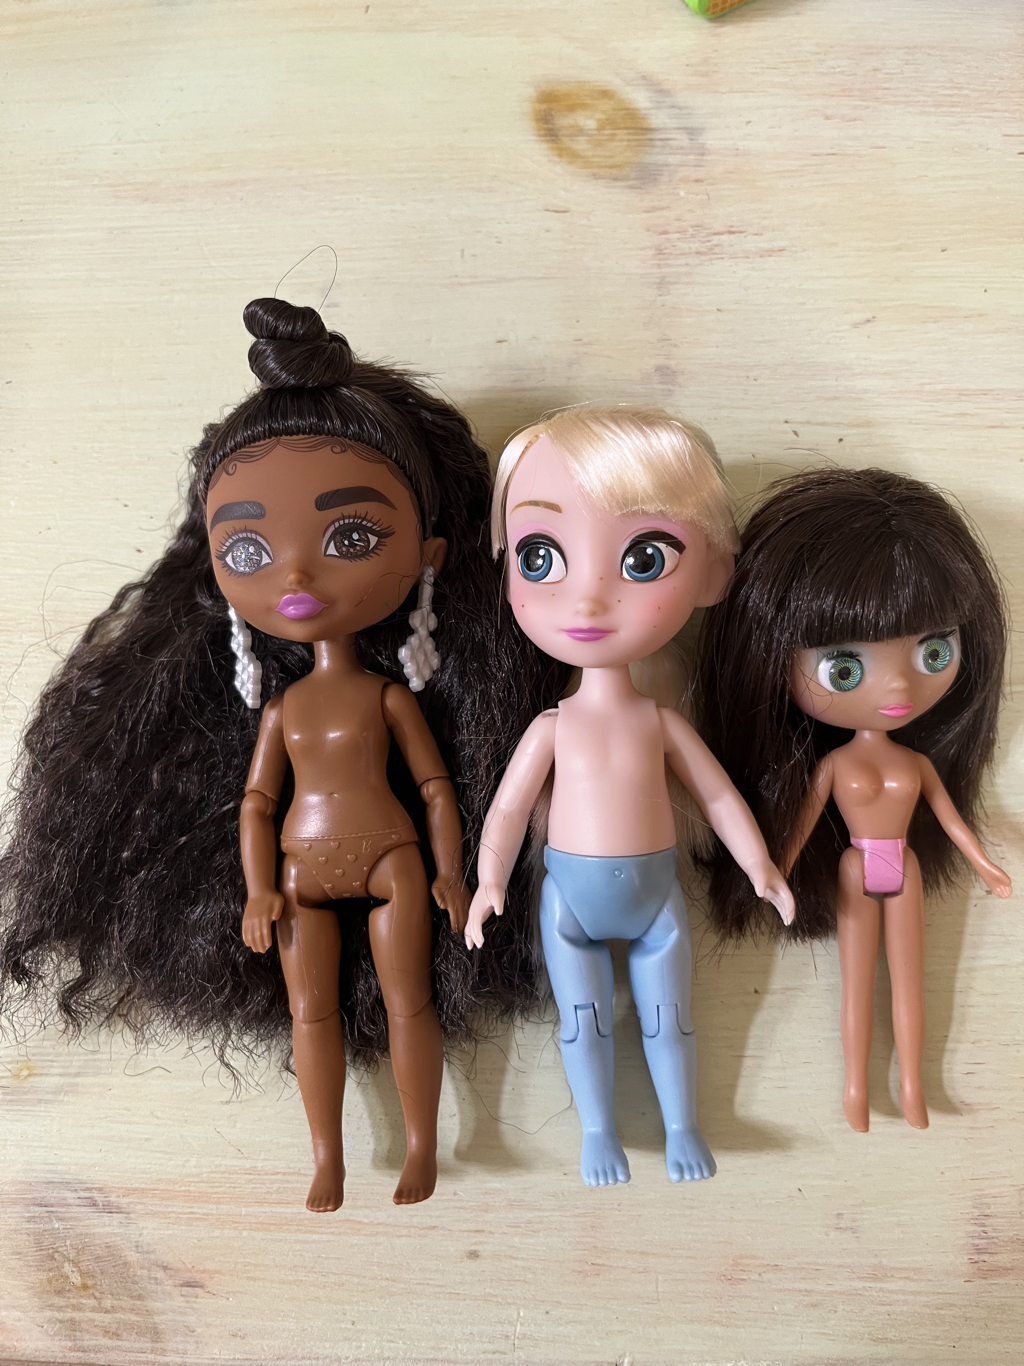  As it turns out, most Baby Dreams dolls ended up looking like the one shown here or even worse, and most mothers threw them out, so they are super rare today. The doll I found on eBay cost almost $400 and I couldn't afford her. I saved the search on eBay and one day I was able to find one I could afford for myself. And then I didn't have that dream anymore! I let my daughter get the doll out and hold her occasionally but mostly she just sits upstairs, keeping the dreams at bay. Since then I've found and restored exactly three more Baby Dreams, including this one. They typically sell almost immediately, and in one case before I even got her listed (someone read about the doll on my blog and made an offer on it, including shipping to Australia!), so if this is a doll you're interested in you should watch my shops or message me. In case you have one of these dolls to restore I am going to show you step by step how I did it. 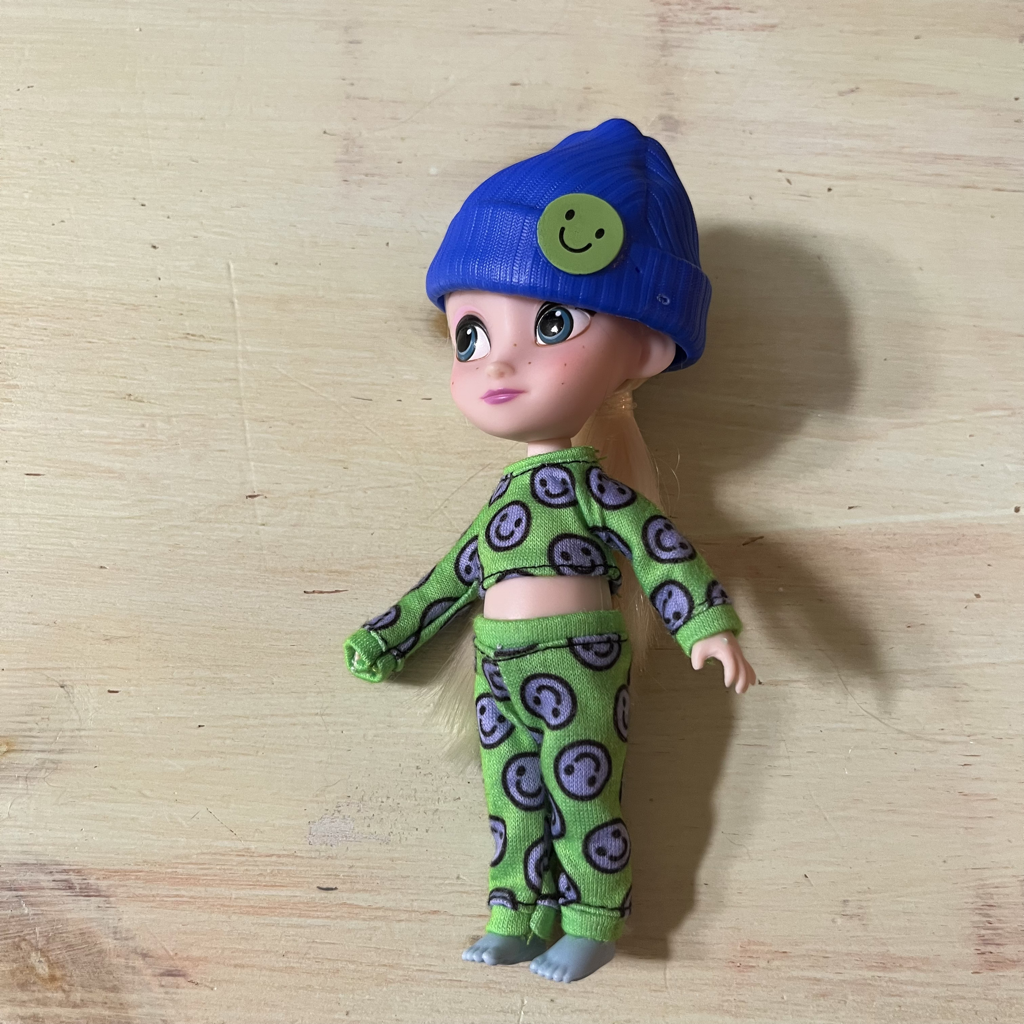 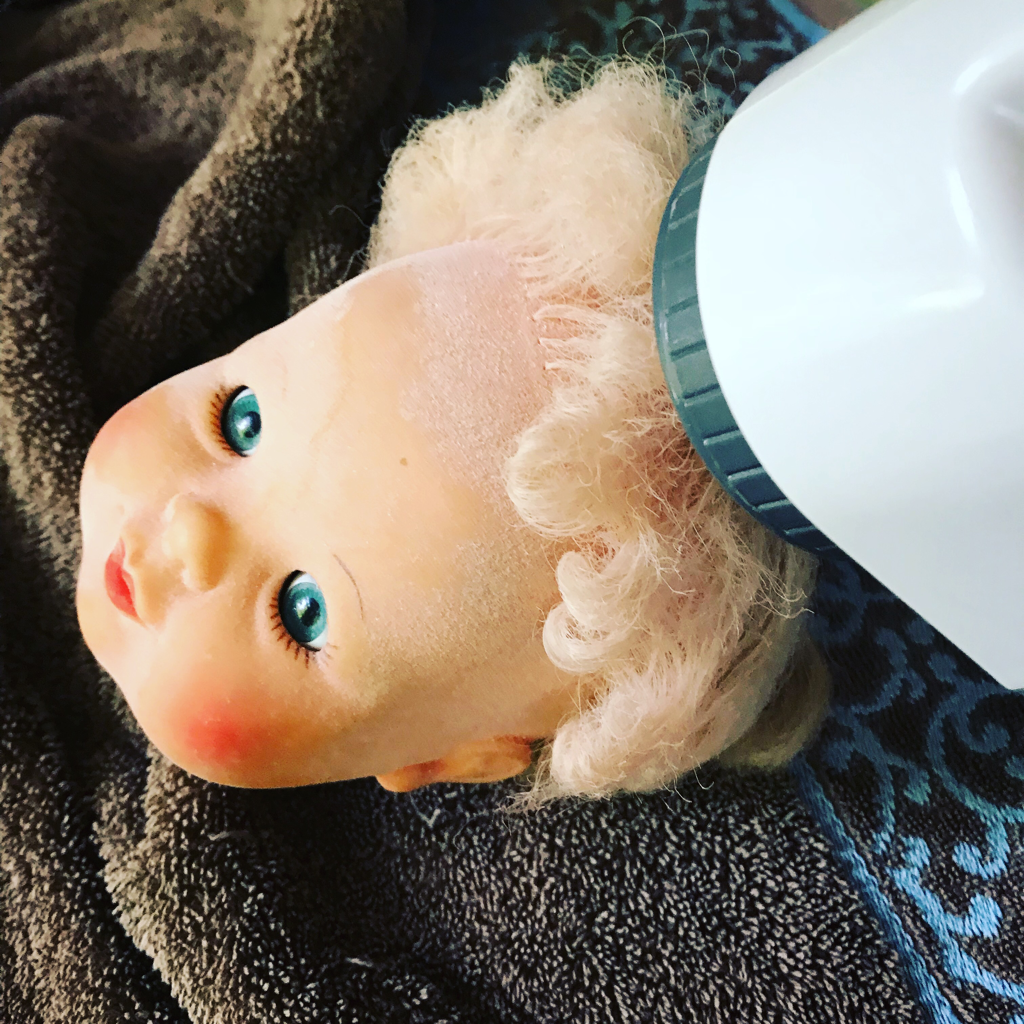 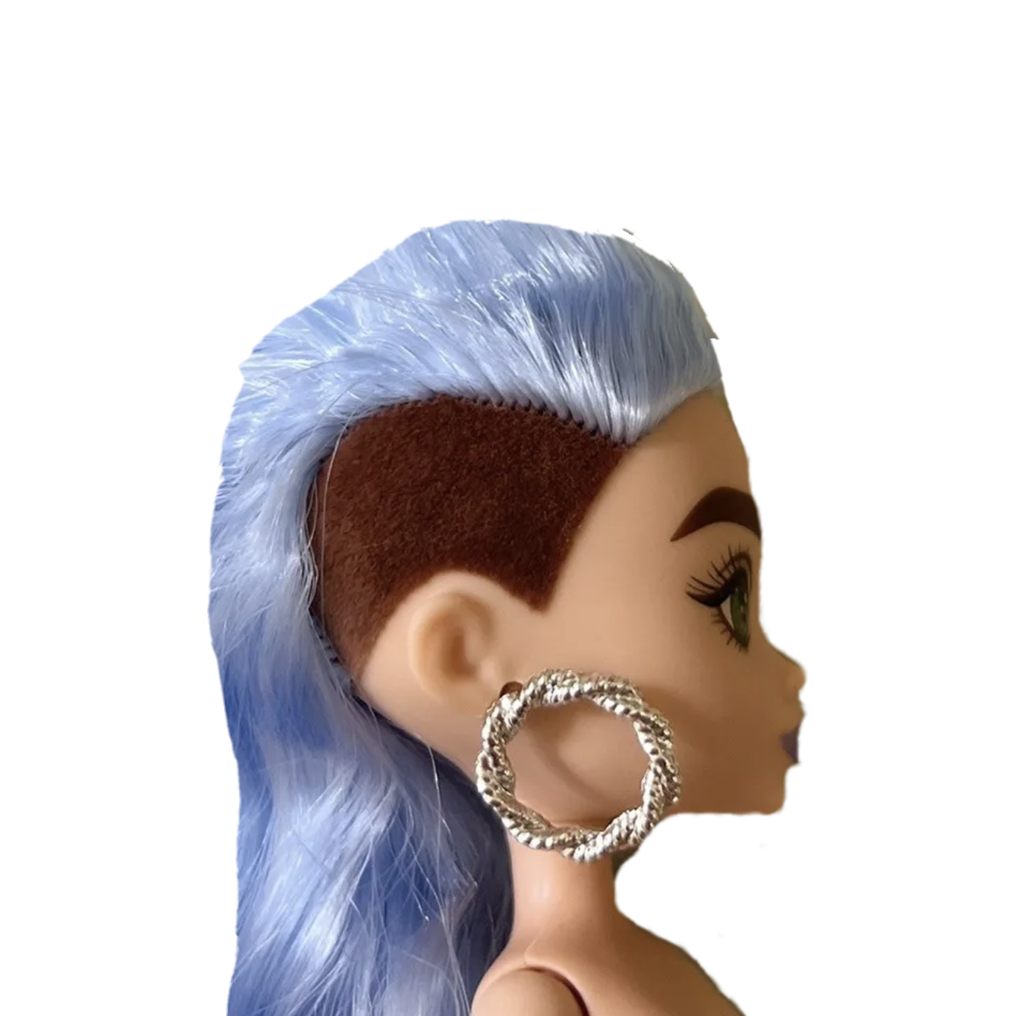 I started the restoration by removing the doll's head by cutting the zip tie in the neck. I removed the stuffing from the body and washed the body repeatedly. Then I sprayed the body with lemon essential oil, hydrogen peroxide, and water and set in in the sun to bleach it for a couple days. The body had some thin spots so I darned them with matching thread. While the body was sunning I brushed the hair out with a wire doll brush. Then I soaked it in hot water mixed with fabric softener and set it in pin curls. After I removed the pins I could see the ends of the hair were still really fried. Someone melted the tips of the synthetic hair fibers with a blow dryer or curling iron. I thought I would end up having to re-wig her, but I decided to try one last thing: my fabric shaver. The fabric shaver worked perfectly! It reminds me of the infomerical product from the 80s or 90s, the Split Ender. I loved that thing! As I shaved the fabric I realized I could solve a problem that stumped me: where to get flocking powder. You can find flocking powder with stamping and scrapbooking supplies but it always seems to come in bright colors, not flesh toned. If you have a Ken with flocked hair that powder is fairly easy to find online, but no one I found makes skin toned powder. This baby has pink-ish blond hair, just the same color as her original flocking, so I kept the shaved bits from the fabric shaver. I didn't have enough so I shaved one of my sweaters that needed to be de-pilled and saved that powder too. 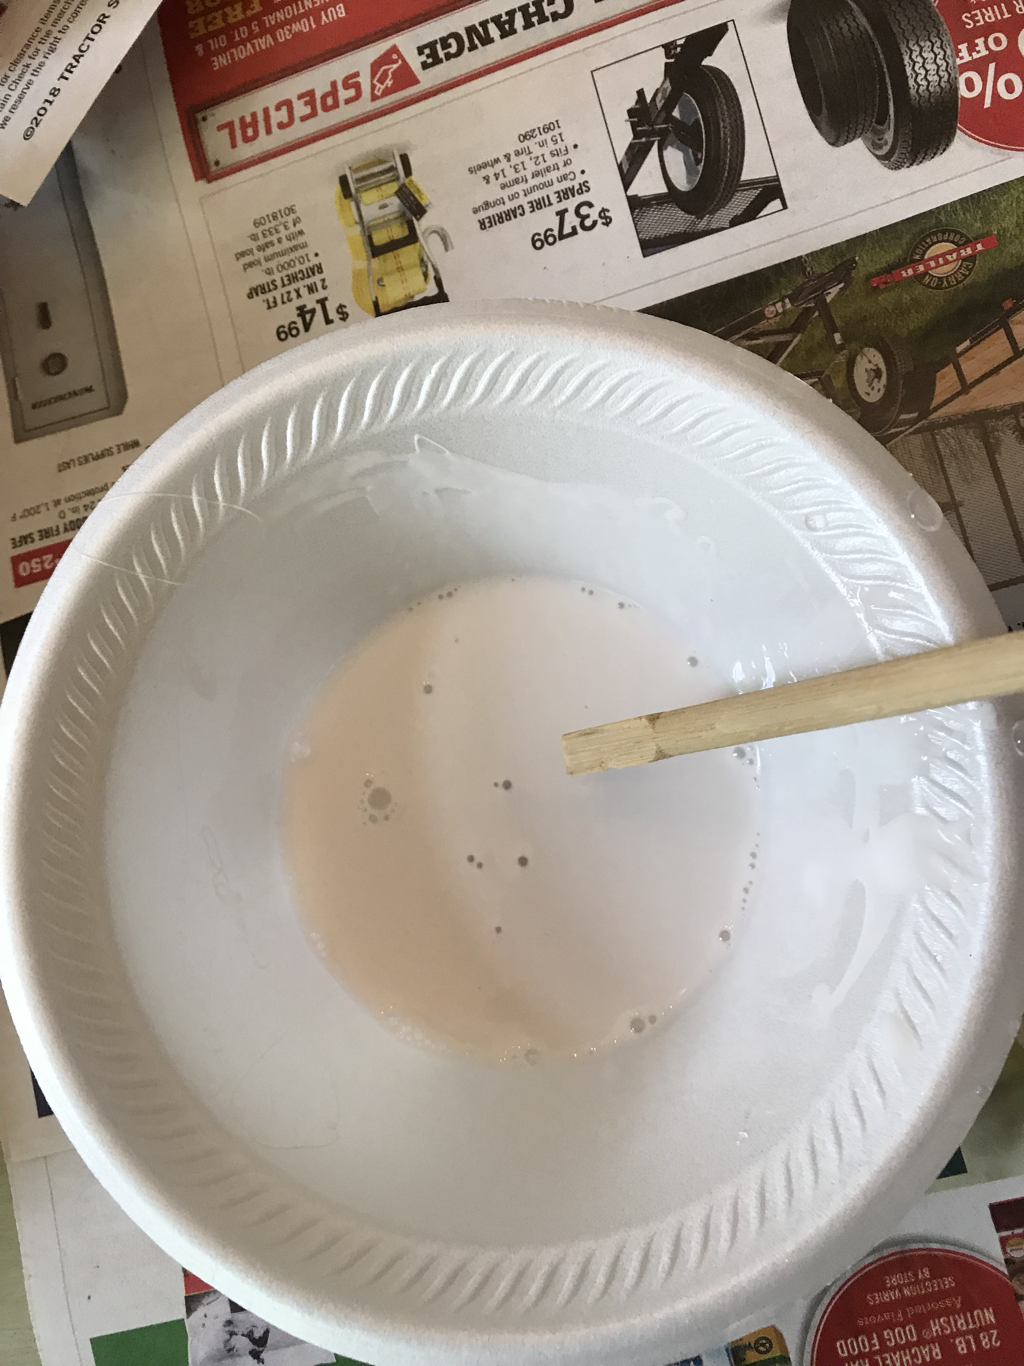  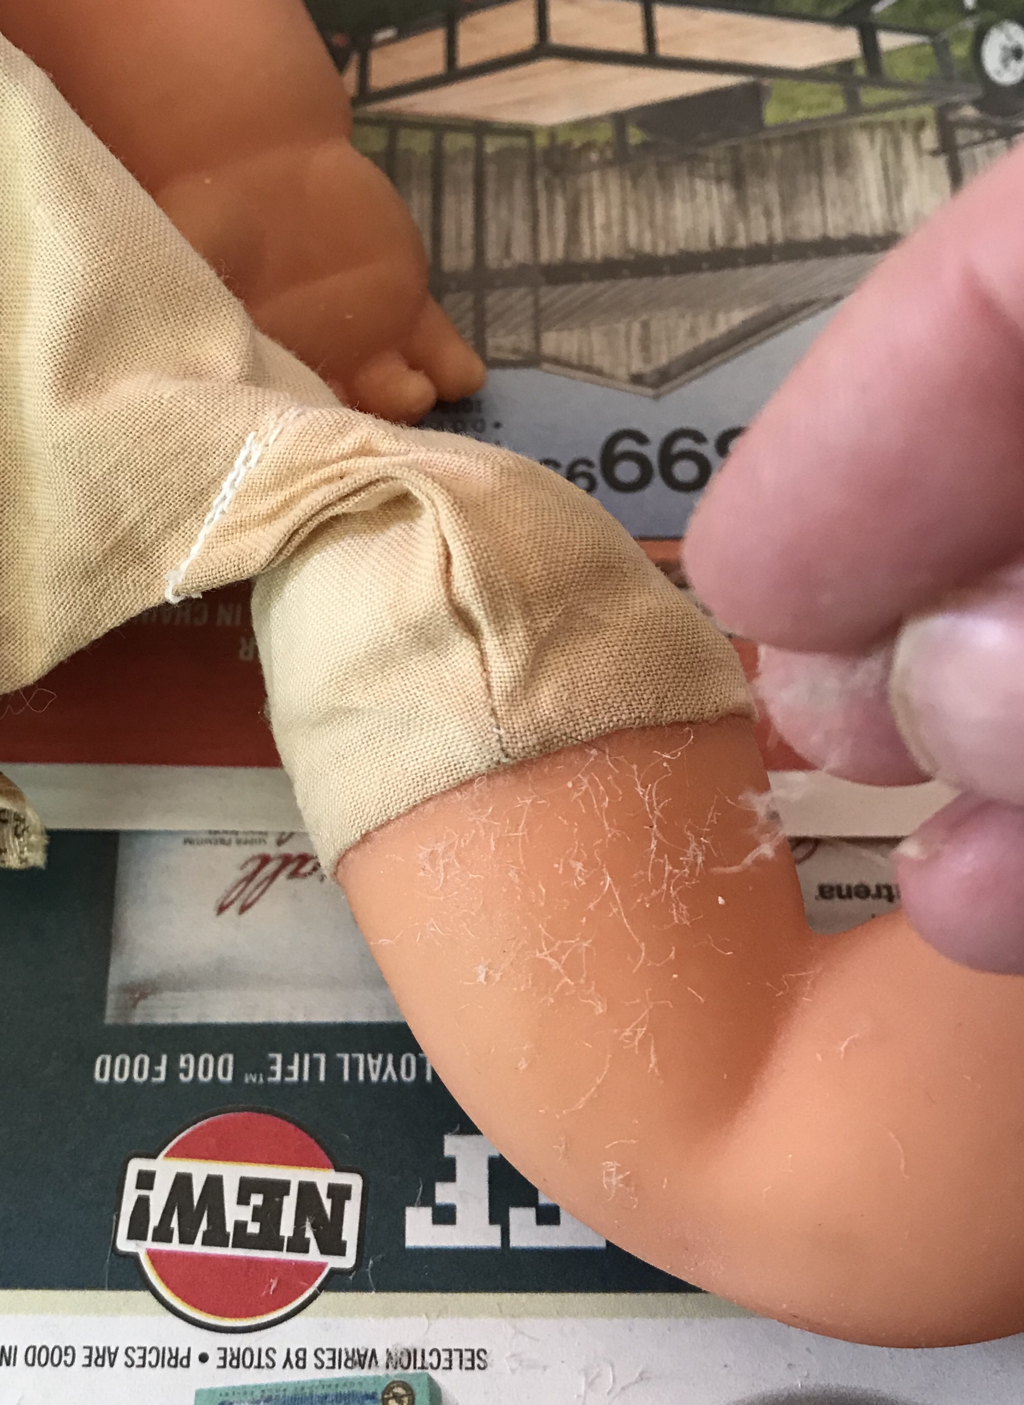  Once you have your flocking powder you need to decide when to apply it. You will need to clean your doll. You can clean her with gentle soap, such as baby shampoo, dish soap, gentle laundry soap, etc, and warm water. Use a soft cloth to avoid removing the original flocking. Most of these dolls need more intense cleaning than that. If your doll has peeling flocking or flocking with brown edges you need to remove as much of that as possible and get the skin underneath clean. You can scrub those areas with a Mr. Clean Eraser or dish scrubber. If you are able to remove all discoloration you can flock the missing areas and move on. If you need to paint the doll you can do that either before or after you paint. As you can see, my flocking powder is larger than the original so I decided to paint after flocking. Water down some white water-soluble glue and apply it to one small area at a time with a makeup sponge. Sprinkle flocking powder over the glue as if you are applying glitter. Shake off any excess. My sweater flocks stuck together too much to sprinkle them so I dabbed them over the wet glue. Allow the glue to dry before turning over the limbs and flocking the other side.  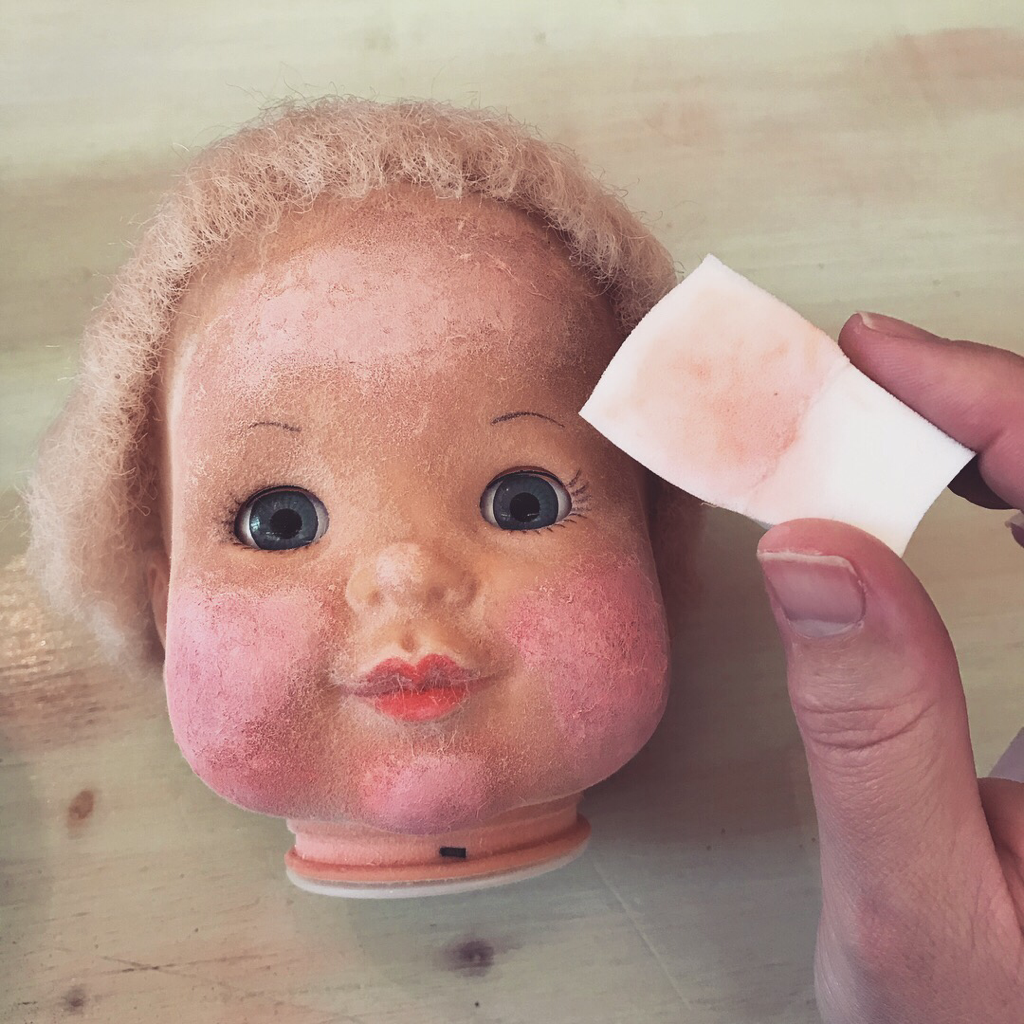 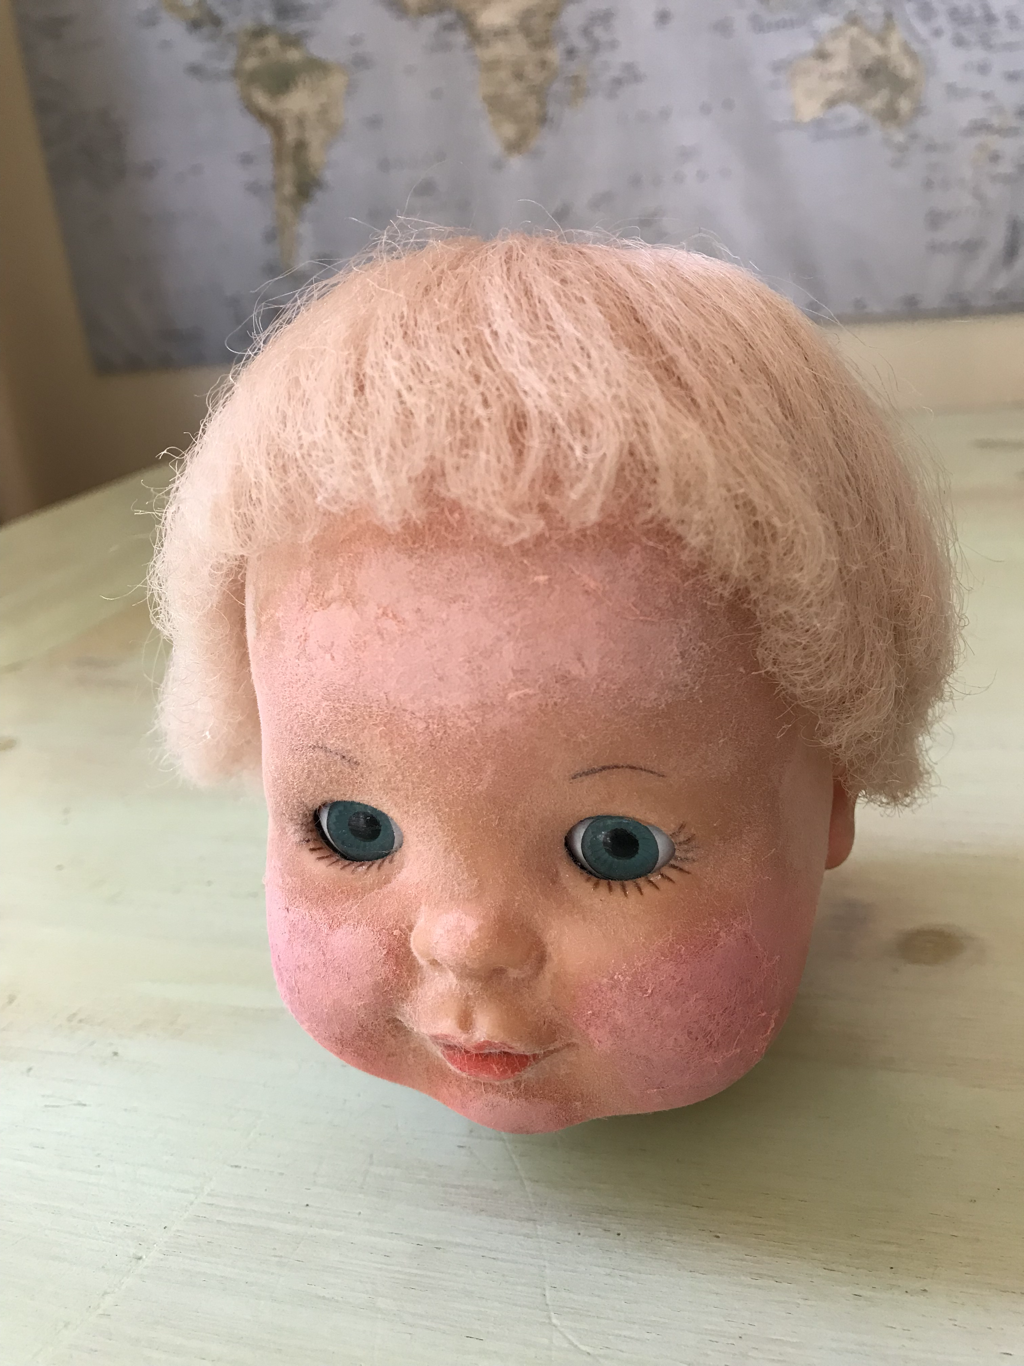  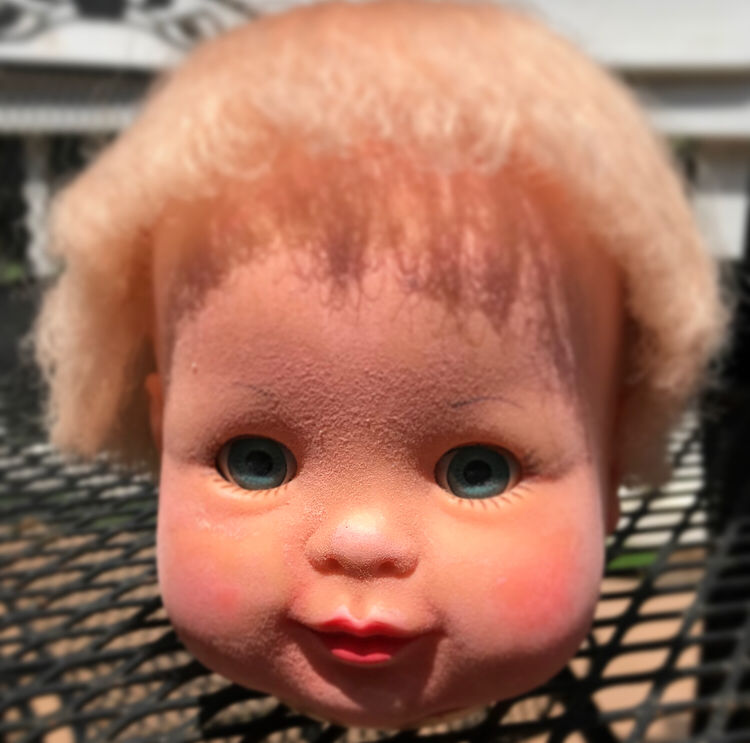 When you are done flocking the skin you will either be finished with your doll or ready to paint her. I still had painting to do since the forehead and cheeks had brown stains I couldn't remove. I thinned out water soluble oil paint to make a wash and I dabbed it on the skin in small dots, to look like the flocking. This process is called stippling. You can use a stencil brush if you have it but a hard bristle flat brush works fine too. When the first coat was dry I went over the face again with a makeup sponge to dab on the paint wash. Then I repeated this process twice more until I covered the stains and got the paint even. 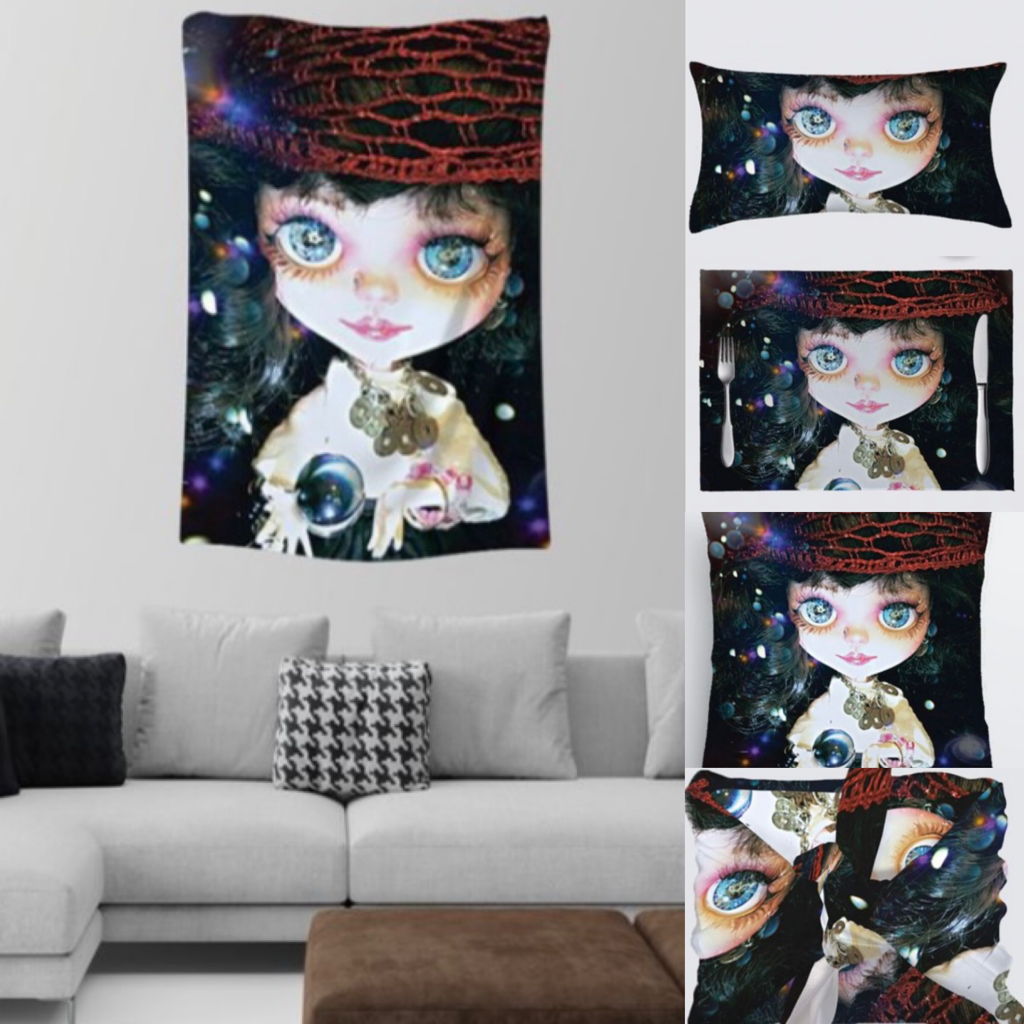 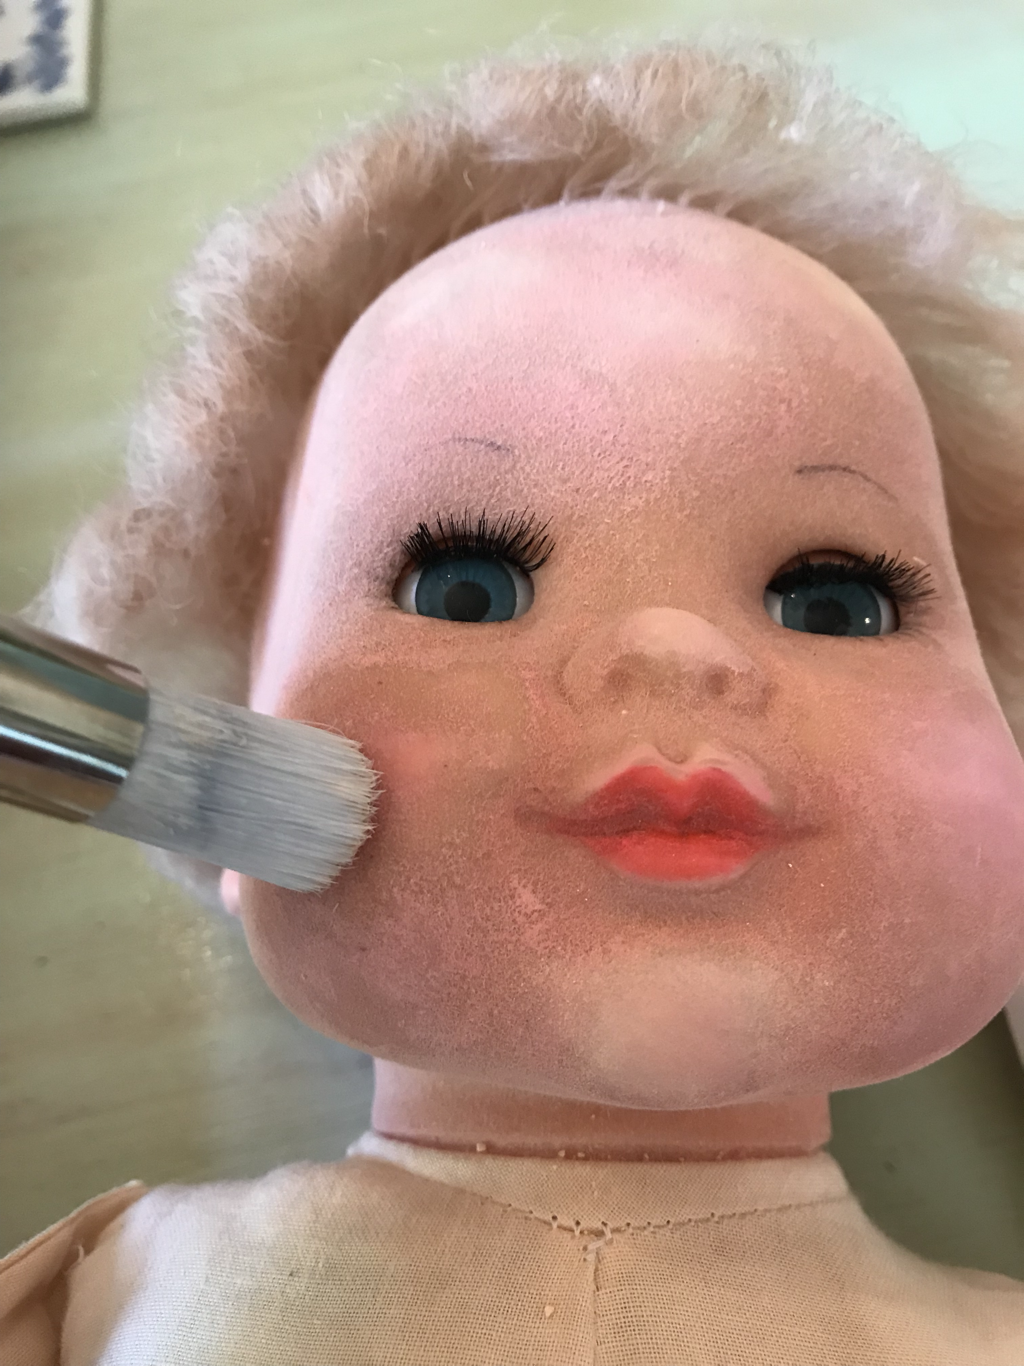 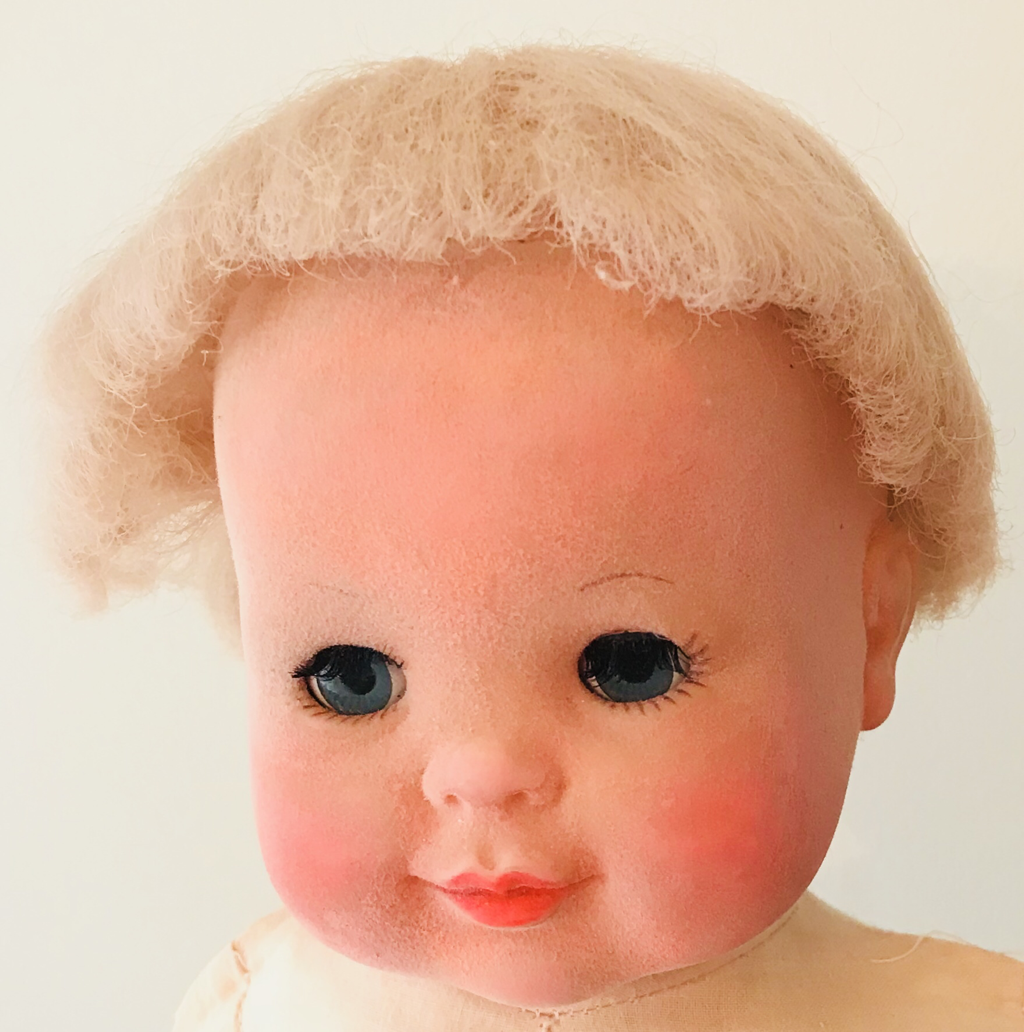 Once the paint was dry I went ahead and replaced the missing eyelashes. The hair was still not great looking so I wet it and pin-curled into its original 70s bowl cut again. The face still wasn't as even as I wanted so I crushed up some artist's pastels and applied those with a dry stencil brush. I dipped the brush in the powder and stippled it over the face and then smoothed it by moving the brush in a circular pattern over it. Although you can still see a slight difference in texture and color on the cheeks, forehead, and around the nose and lips, it's certainly much better than it was. You have to look pretty close to notice it; for a display the doll looks really good. I want her to be able to withstand gentle play, however, and not just be for looks, so I broke down and ordered a bottle of Mr. Super Clear Flat UV Cut spray varnish. This Japanese varnish is famous in the doll world but really expensive. It was totally worth it, however, as not one bit of pastel or flock is rubbing off after coating the face and limbs.
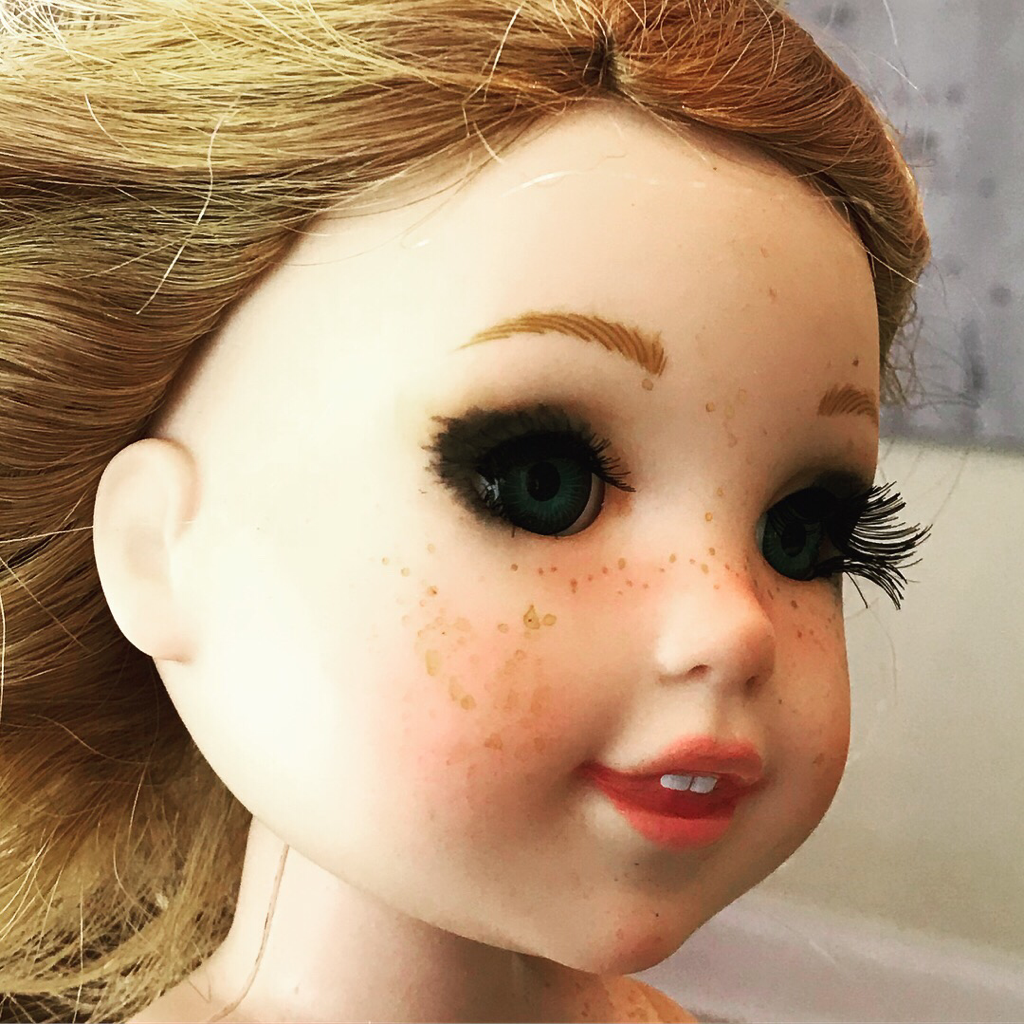
Next I am going to sew a replica bunting for Baby and then she will be ready to sell. I hope you will look for her in my shops: link from the Home page. 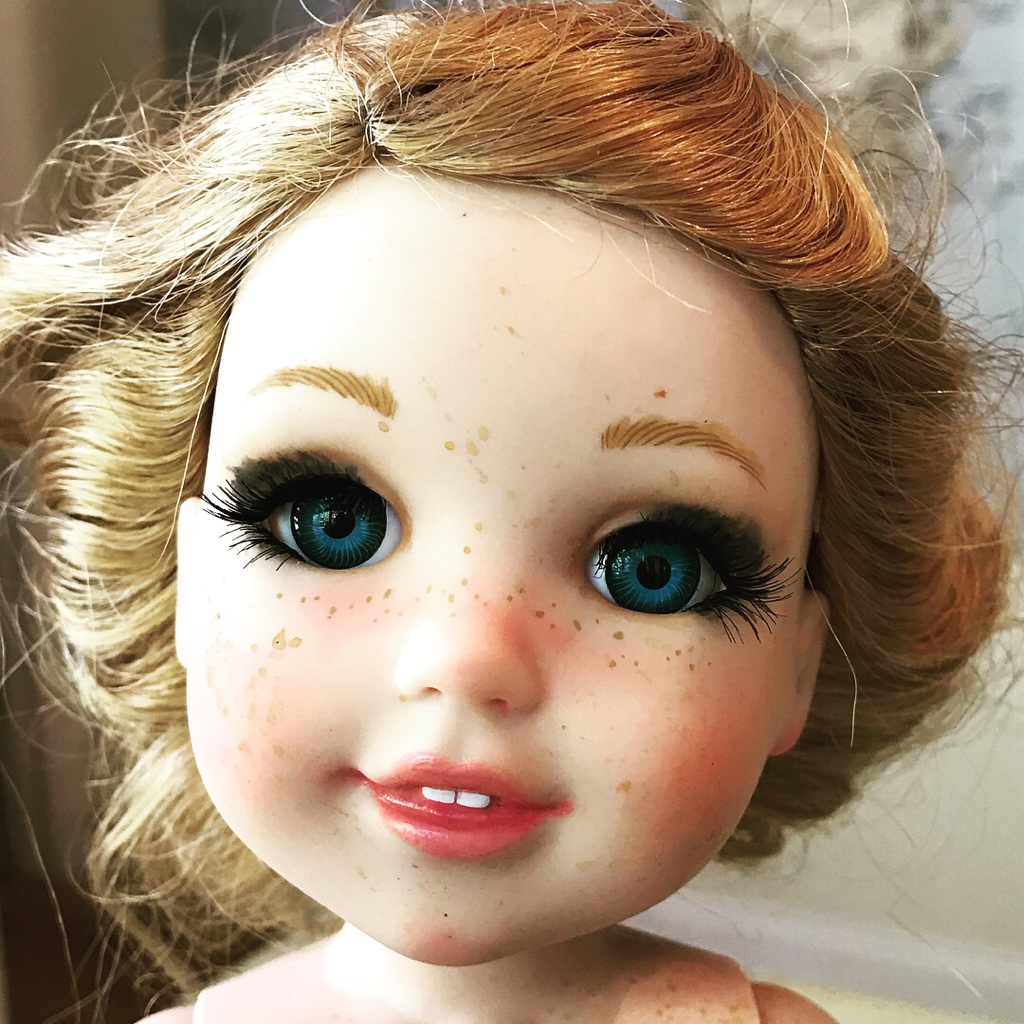  Today I'm going to show you two different ways to add eyelashes to fixed-eye dolls. This is a useful trick to make your doll look more "real" or to camouflage an eye that's not a tight fit. Technically, you could use this method for dolls with sleep eyes as well (it would solve the problem of my Margon eyes that don't quite fit the American Girl dolls) although I think it's kind of weird. I know it's really popular in the custom AG world to paint dramatic lashes all around the doll's eye, but then when the eye closes the doll has these lashes above the eyelid. So she has hairy eyelids? Yuck! I decided to go for the dramatic look with my custom Elsa AG but I converted her eyes to fixed eyes after I added the lashes. I'll go over that in a separate tutorial. Anyway, though, if you aren't bothered by the hairy eyelid look go ahead and use this tutorial to add extra lashes to your sleepy-eyed dolls as well! To find out how to replace missing lashes in sleep eyes go to that tutorial: https://mandalineartfulliving.blogspot.com/2013/04/how-to-replace-doll-eyelashes-tutorial.html 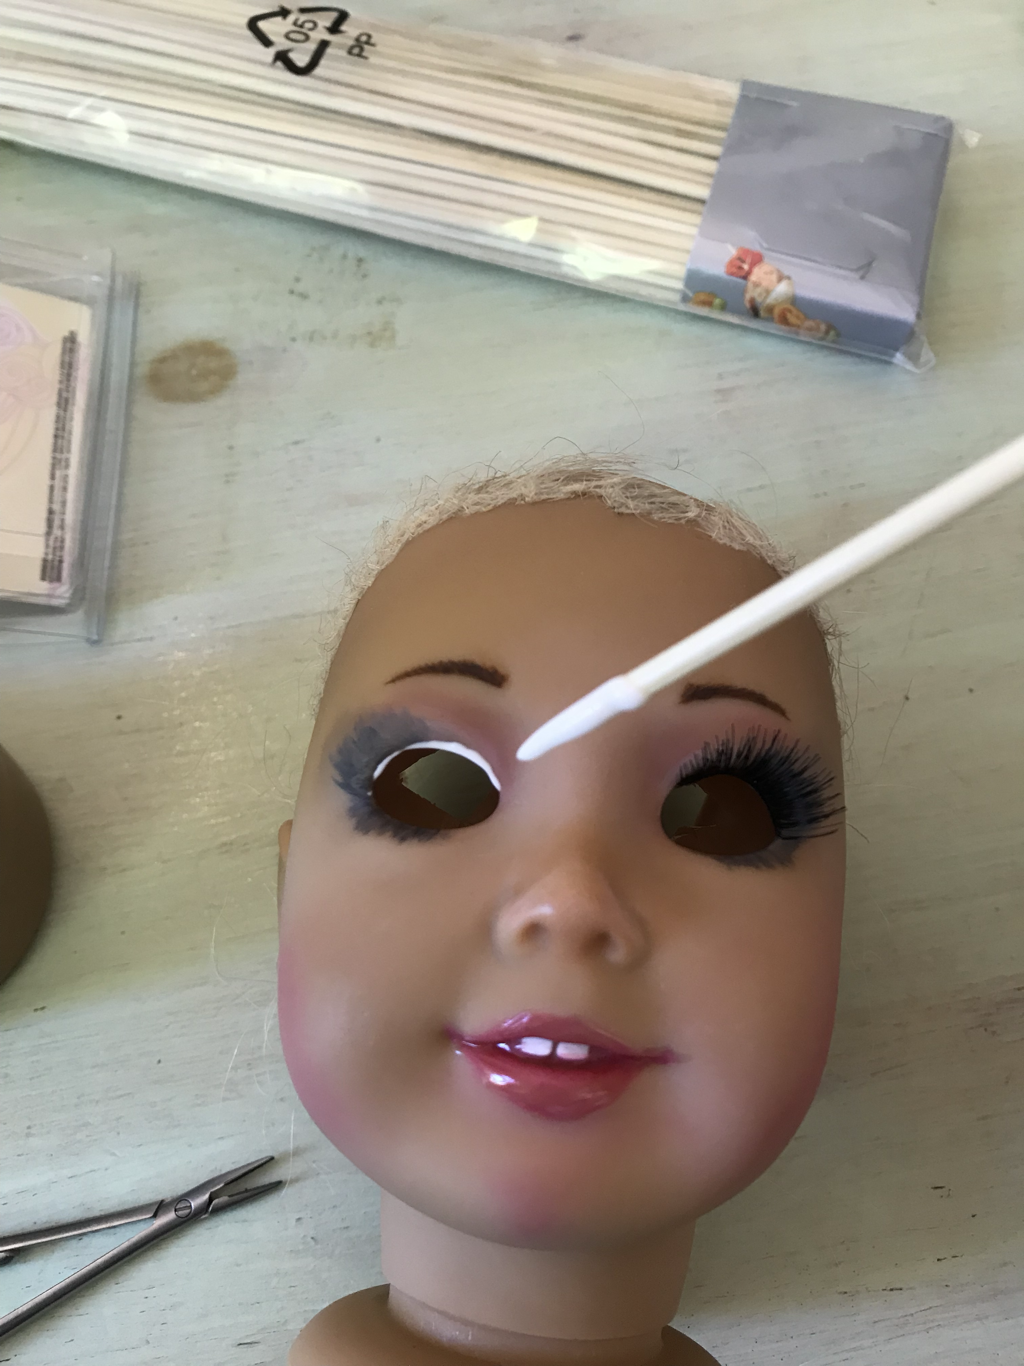 You can add eyelashes either before or after you insert the eyes. I tried both ways and I much preferred adding the lashes after the eyes were in place. You can use drugstore false eyelashes for humans or you can buy doll lashes by the yard or individually. I have a large selection of doll lashes in different sizes and colors in my eBay and Etsy shops. You can link to the shops from the Home page. If I'm replacing lost lashes in sleep eyes, such as on a Cissy or AG doll, then I prefer the human lashes or individual doll lashes because they have a sticky edge that helps position them before I glue them. Adding lashes to a head, however, seems like it would be easier with the doll lashes by the yard because the glue is on the wrong side if you use human lashes and you will probably need to cut the human lashes down. I did use human lashes for both dolls shown here, but next time I would consider the doll lashes instead. To begin, cut your lashes to the size you want if you are using the human or bulk lashes. Then add a bead of glue along the eye socket. Although it is water-soluble, I prefer Aleene's Tacky Glue because it is thick enough to stay in place.  Next, insert the lashes and push them into place. I used bamboo skewers for both these steps. You will have to hold the lashes in place for a while until they are set. If you want to add lower lashes, repeat the steps above, except turn the lashes over so they curve down away from the eye and not up into the eye. Allow the lashes to dry thoroughly before you try to insert the eyes, like overnight. Don't assume they are dry enough after a half hour and try to put the eyes in because you will end up with a gluey mess and have to redo them. That may or may not be a true story... Once the eyes are inserted you can trim the lashes to the length you prefer and fix any face paint that may have gotten smudged during the aforementioned gluey mess. 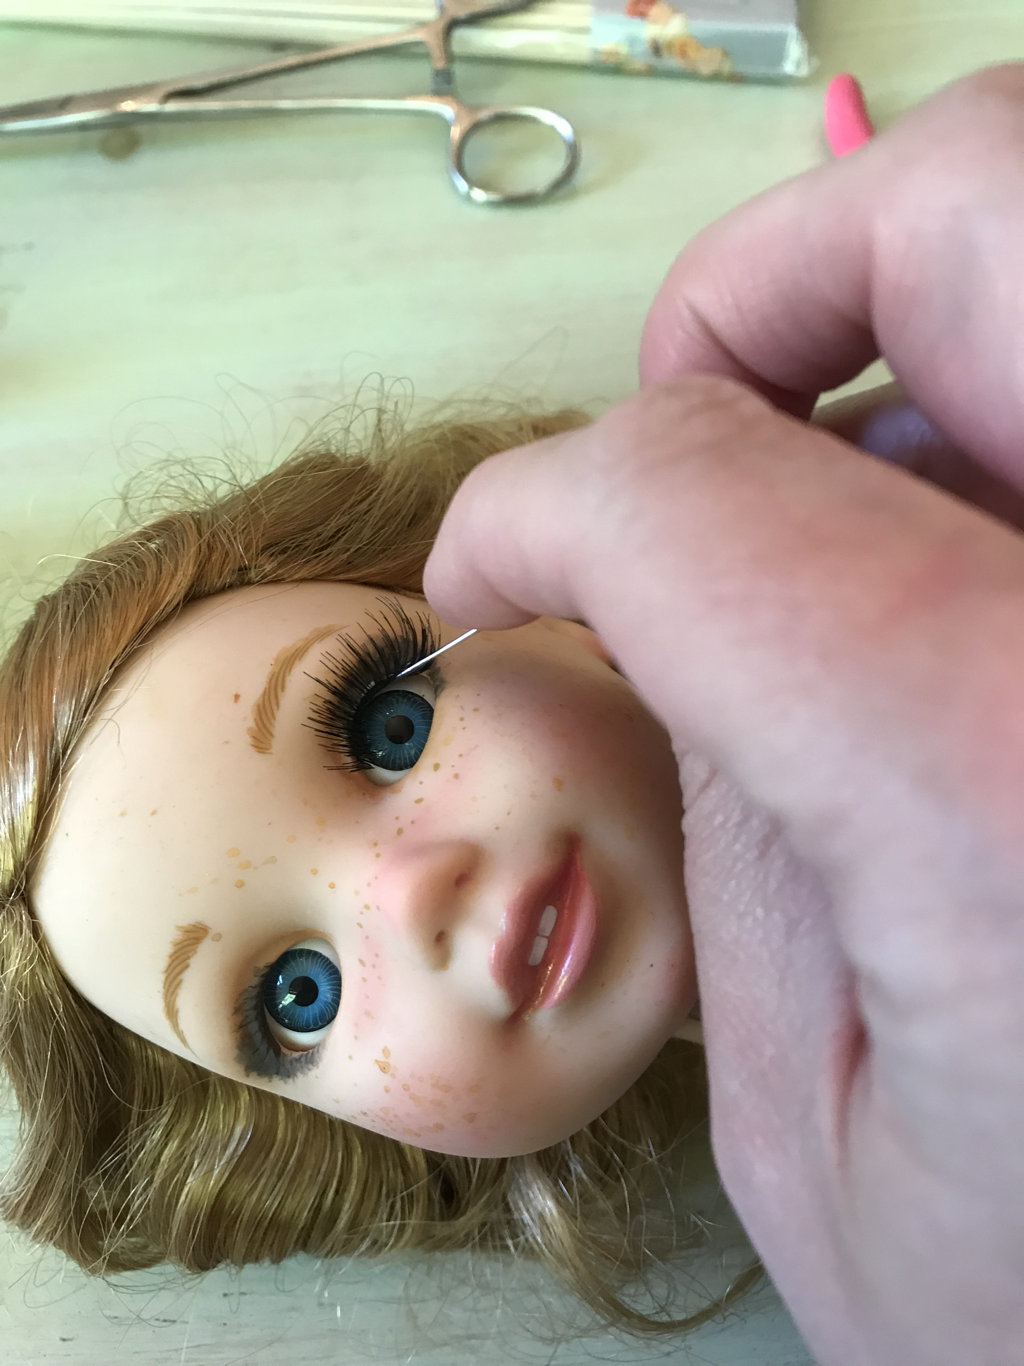 I found it much easier to insert eyelashes once the doll's eyes were already in place. The eye helps position the eyelash. Just as before, decide on the type of lashes you want and cut them to the length you need. Carefully apply the glue to the eye socket. The glue should be just inside the eye socket, not out on the face. You may want to use a straight pin instead of a bamboo skewer so you have a smaller tip and can avoid getting glue on the eyeball. 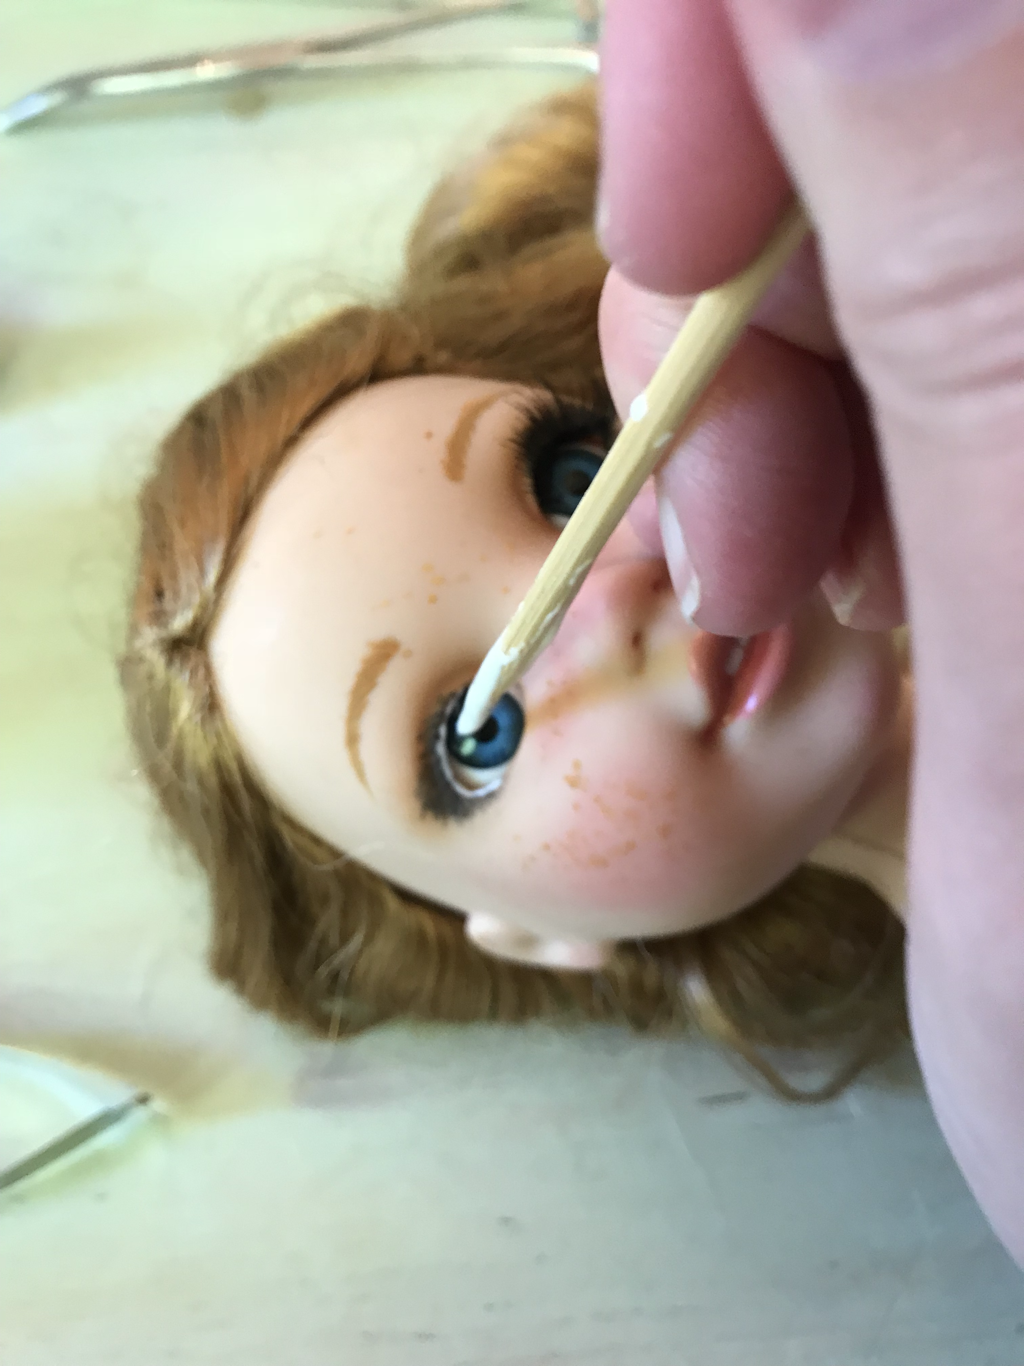 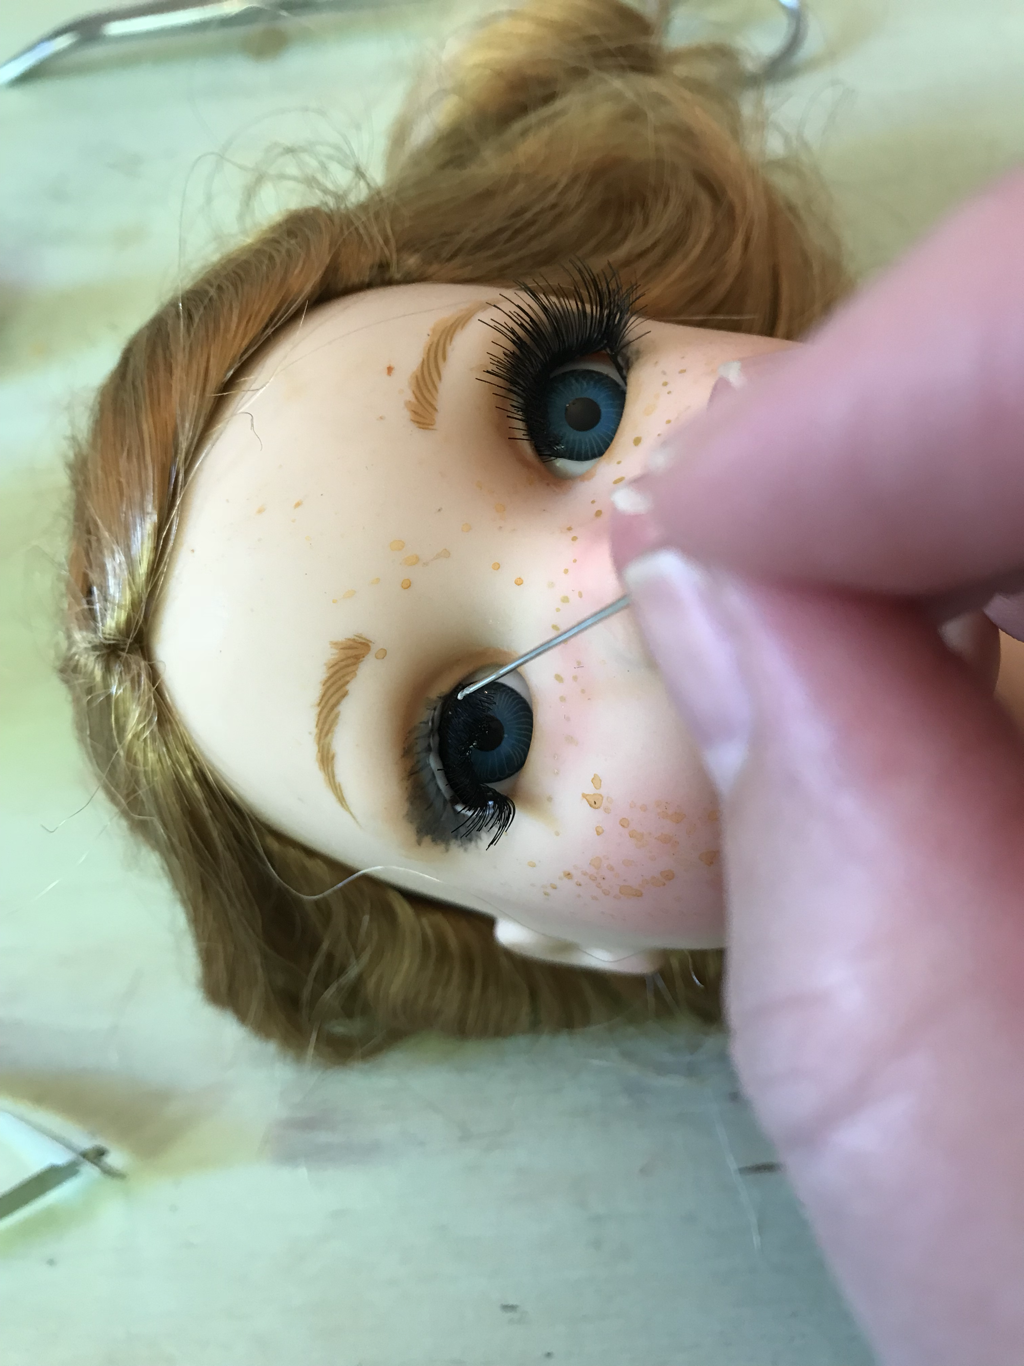 Insert the lashes and push them up into the eye socket with a straight pin. You want to sandwich them in between the eye and the socket. Hold them in place until the glue is set. If you did get any glue on the eyeball you can clean it off once the lashes are dry. Another reason I prefer to use thick white glue is it is easier to clean off the doll if you make a mistake. If you get super glue on the doll's face or eye you're going to have to scrape it off or use harsh paint thinner or something to remove it and you could easily damage the doll or the eyes. 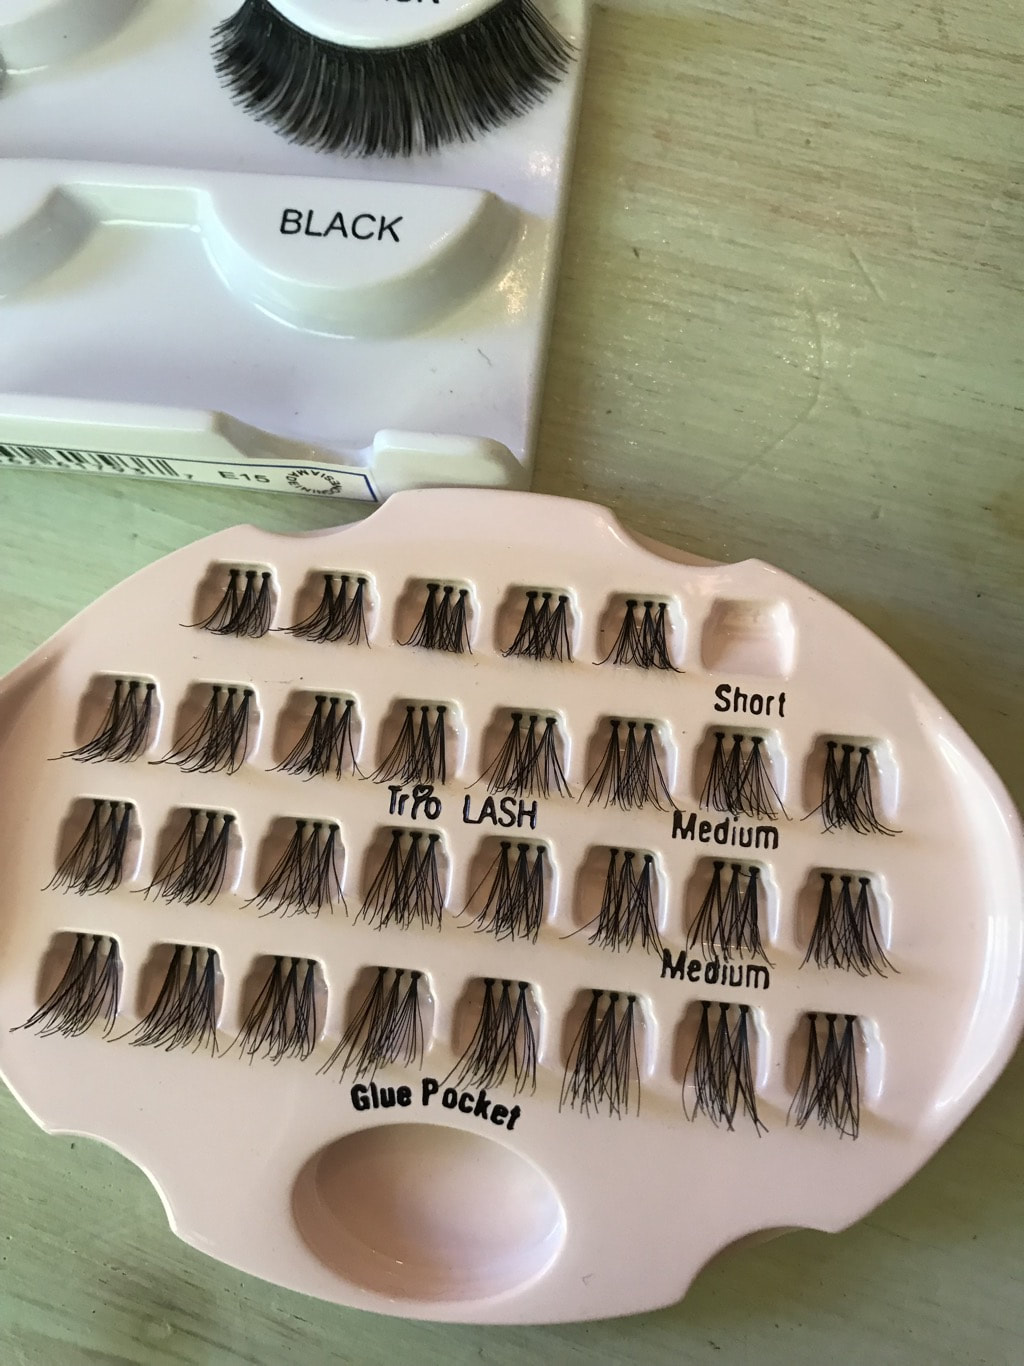 I decided the full lower lashes I added to the first doll were a bit much. I ended up having to trim and thin them quite a bit. So for my second attempt I decided to use human mini lashes on the lower lid. These are false lashes for humans but I love them for replacing doll lashes when only a little chunk is missing and they are great for smaller doll eyes as well. I inserted these just as I did the upper lashes.
As you can see, the red-haired doll is just about done. She's going to be Anna from Frozen. I thought it was appropriate to use a Wellie Wishers doll for the little sister, since she's just two inches smaller then big sis, Elsa. I just need to make her clothes and add the white streak to her hair. Both these dolls will be for sale in my shops soon, so I hope you will be on the lookout. You can also buy doll supplies like the eyes and lashes I used for both dolls. You can link to all my shops from the Home page.
|
AuthorMy name is Amanda, but my childhood nickname was "Mandaline". I am a mother of three turning my passion for creating into a full-time business. Archives
April 2024
Categories |

 RSS Feed