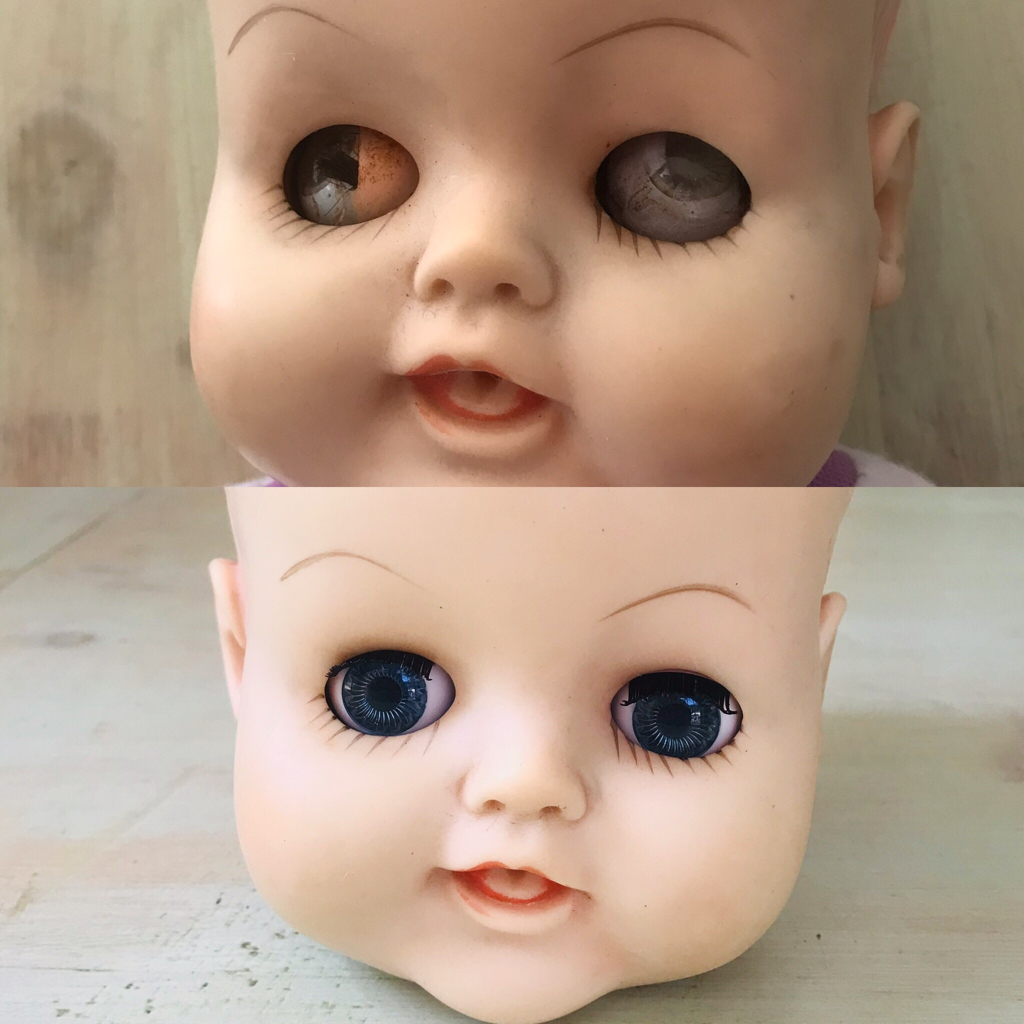
 At long last I am back to my blog! This summer has been something else. Our son's soccer team won the division championships, extending the season so it overlapped with the swim team season. Now swim team is nearly over and we are the champions in that league so far. We spent a week at the beach, not exactly a relaxing week, as we biked 10 miles and walked at last 2 miles each day as well as fishing and kayaking, but a fun week. I think I may have even lost a little more weight while on vacation, although my scale is broken and my new one hasn't arrived yet so I am not sure. It has actually been terrific to be away from the tyranny of the scale and just focus on my fasting and diet and enjoying activities I love. Maybe I won't open the new one for a while! I'm going to be out of town again next week so I thought I would squeeze a tips post in while I'm home. Today I want to talk about one of my top tools for doll restoration: the curved hemostat. 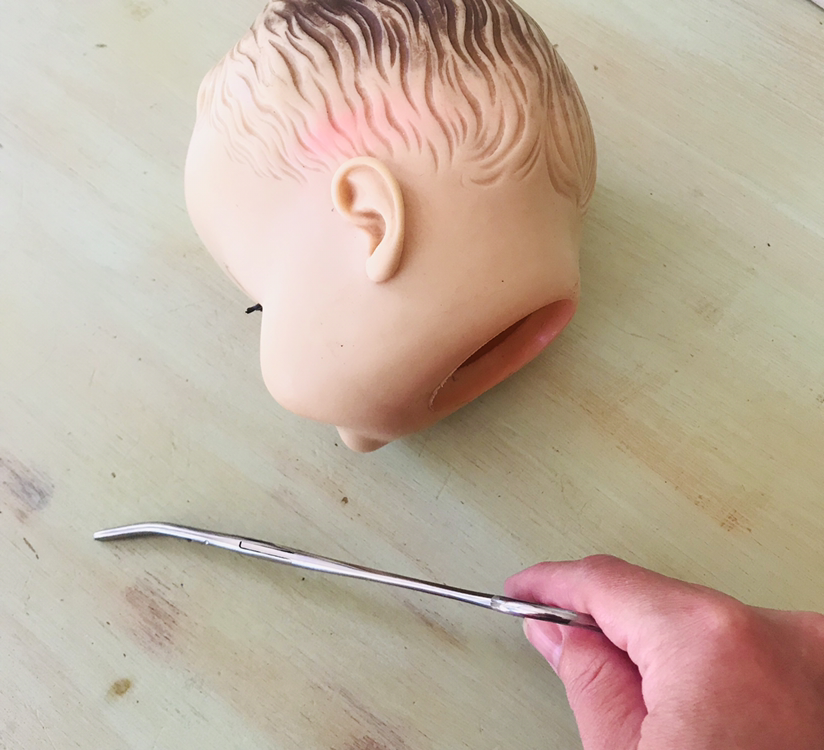 I always recommend hemostats as a necessary tool for doll stringing, but they are really useful for eye restoration as well. Many people who use my eyes have reported problems getting the eyes to look in the right direction after they insert them, especially if they're using the boil method. Other clients have trouble getting the eyes inserted into the socket from the inside. That's a particular problem with the Patti Playpal and similar dolls. My go-to tool in both these situations is my curved hemostat. A 6 or 7 inch curved hemostat will work great for a doll with a shorter neck. Dolls with longer necks may need an 8-10 inch length. You can purchase hemostats from my Etsy shop. 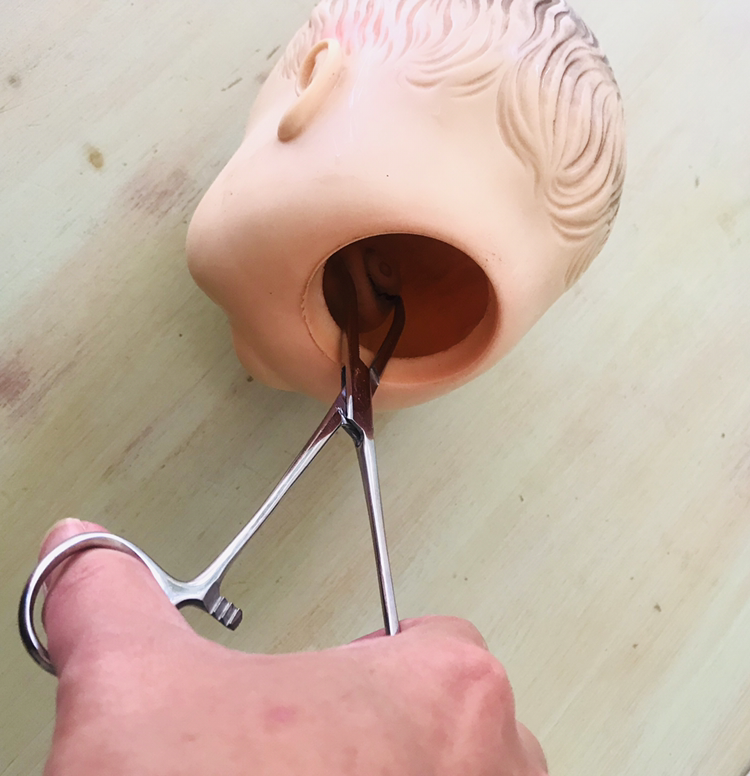 If you are having trouble straightening a doll's gaze from the front of the face you can grasp the back of the eye pocket with your hemostat and shift the eye that way. This method avoids the damage that can occur to the face if you are poking around the eyes with a skewer or other pointed tool. If you are having trouble grasping the eye rather than the socket you can cut a small slit in the eye pocket and open it just a little. That will allow you to grab the back of the eye to move it. Unless the slit is very tiny you will want to reseal it with tacky glue and let it dry. If you are having trouble getting the proper sized eye into the eye socket the hemostat can help with that, too. Just gently heat the eye pockets inside the head with a hair dryer. When the pocket is soft use the hemostat to grab the back of the eye and insert it into the pocket. Then use the hemostat to push the eye into the socket as far forward as required. 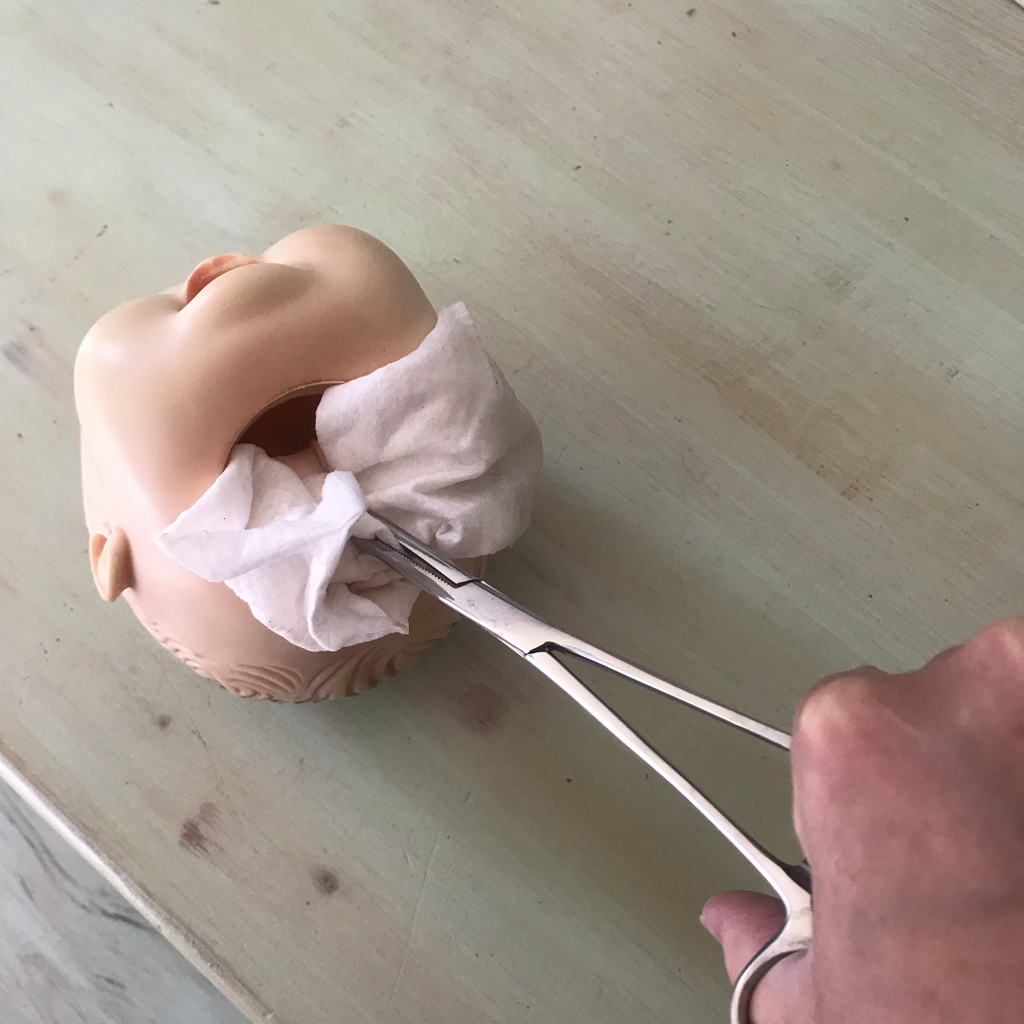 Many vintage dolls, especially drink and wet dolls, are dirty and moldy inside their head. This is residue from being fed with their bottle and washed by their little mommy. I take a paper towel or cleaning wipe and use the hemostat to hold it so I can reach all the way inside the head to clean and dry it out. 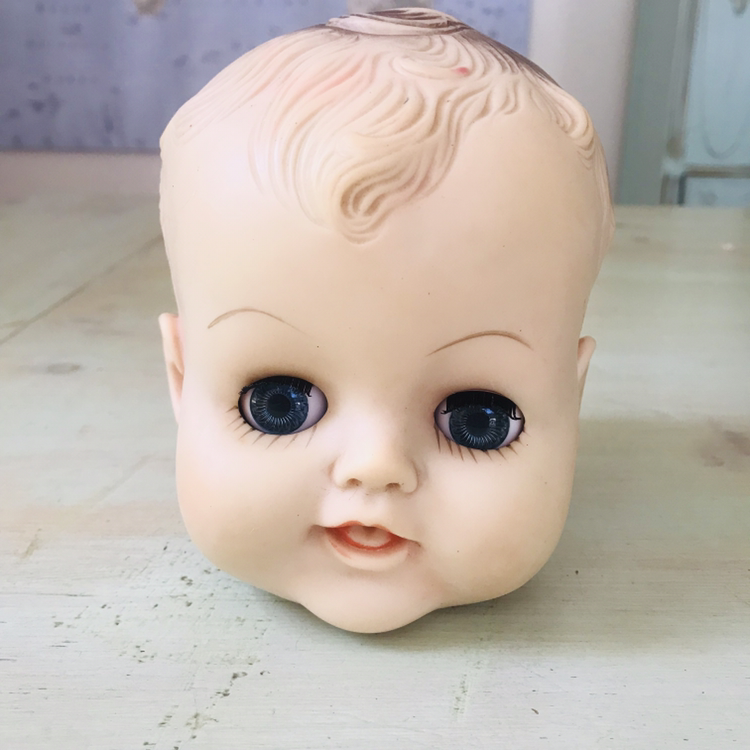 This baby doll is all ready to return home with her new eyes! Besides purchasing eyes, hemostats, and doll repair kits, you can go to my Etsy shop to contact me about repairing your doll in my hospital. My hospital prices are higher on Etsy since I pay them a commission but some people prefer to pay through an established site. You can also contact me through this website to request a doll repair using the contact form at the end of this post. In other Etsy news, I am now offering free domestic shipping on all purchases or bundles $35 or above! International buyers should contact me before purchase for a quote with the domestic shipping cost removed from the base price. My Etsy shop has really grown this year, even surpassing my eBay sales over the past few months. I can't wait to see it get even bigger as I implement all the new product ideas I have in my head! 
0 Comments
|
AuthorMy name is Amanda, but my childhood nickname was "Mandaline". I am a mother of three turning my passion for creating into a full-time business. Archives
April 2024
Categories |
 RSS Feed