
|
A couple weeks ago a client approached with me with a rush job: to repair an antique porcelain doll in time for Christmas so she could give it to her grandmother. The doll arrived in pieces, needing stringing, eyes, epoxy repairs, and replacement parts as well as clothes. I actually amazed myself by finishing the restoration in time! I don't usually repair porcelain dolls. The modern ones are mostly not valuable enough to be worth the time to repair and the antique ones are extremely scarce. These dolls were produced in Europe, mostly Germany and France, prior to World War I. During the war the factories were bombed and after the war ceramic doll production moved to Japan. The dolls themselves are fragile and didn't last long as children's toys, so nowadays these dolls are beyond rare! This doll's head is marked S&H with a Star of David. The star was originally the hallmark of K&R but they merged with S&H and another company, H&H. These were all German companies. The doll's body is a mishmash. The torso is traditional composition. The forearms and knee and elbow joints are wood, the hands are composition, and the rest is a strange kind of composition made of pressed cardboard with a coating over it. When I took the doll out of its basket brown stuff like dirt poured out of the body and I could hear something rattling around inside. Further inspection showed this was due to a mud dauber wasp nest inside the body, so it actually was dirt coming out! I used my trusty hemostat to chip the nest apart so I could remove it through the leg hole. I thought maybe the body was made of parts of different dolls. The head was repaired at some point in the past, very professionally, so I thought maybe the body was added then. However, a friend of mine told me the body looks like her doll's H&H body, so maybe it is original. Most of the time these dolls have kid leather bodies, so I don't know. The proportions are correct so maybe when the companies merged they used up their spare parts. The head and body were filthy so I used my go-to Young Living foaming hand soap to clean them up. You can purchase this from the Young Living link on the Home page. This soap is a terrific cleaner to get rid of dirt and grime without removing paint. Luckily I had one pair of eyes in stock to fit this doll. I'll add some tutorials showing porcelain doll eye replacement soon. One of the soles of the feet was missing. The legs are made of pressed cardboard so I used a piece of cardboard to replace the sole. I traced and cut it out and glued it on. Then I coated it with several coats of acrylic paint and gloss medium. I prefer to add a coating of oil paint over the acrylic but there wasn't time for oil paint to dry in this case. Always use a layer of acrylic on paper before using oil paint, otherwise the oil will eat through the paper and degrade it over time. I also had to replace some fingers and one elbow joint. For these repairs I used hard plastic epoxy. To strengthen the fingers I inserted straight pins into the hand and used them as armatures. I wanted to use a wooden bead for the elbow joint but I didn't have one large enough and none were available locally. I ended up covering a too-small wooden bead with epoxy to size it up. This wasn't an ideal solution because the acrylic paint doesn't stick to epoxy well and scrapes off the joint as you move the arms, but it was the only way to finish in time for Christmas. The main lesson here is if it's at all possible you want to order your repairs as early as possible so I can do the job as thoroughly as I'd like. My solution was to dress the doll in long sleeves so the joint isn't visible. 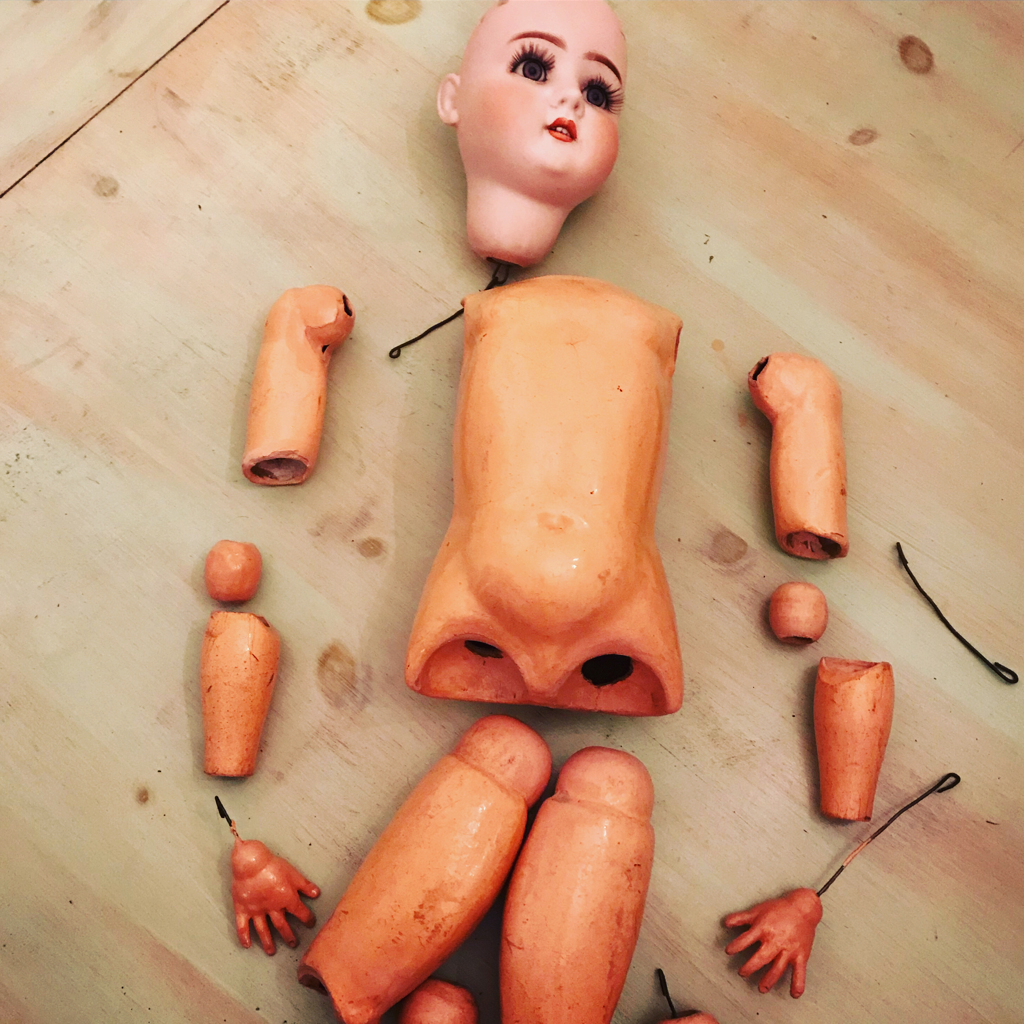 One reason I thought the body might be a hodgepodge of parts is the variation of the wire hooks attached to the hands. The wire on the right actually went through the elbow and prevented it from bending so I ended up cutting it down to the same size as the other one. 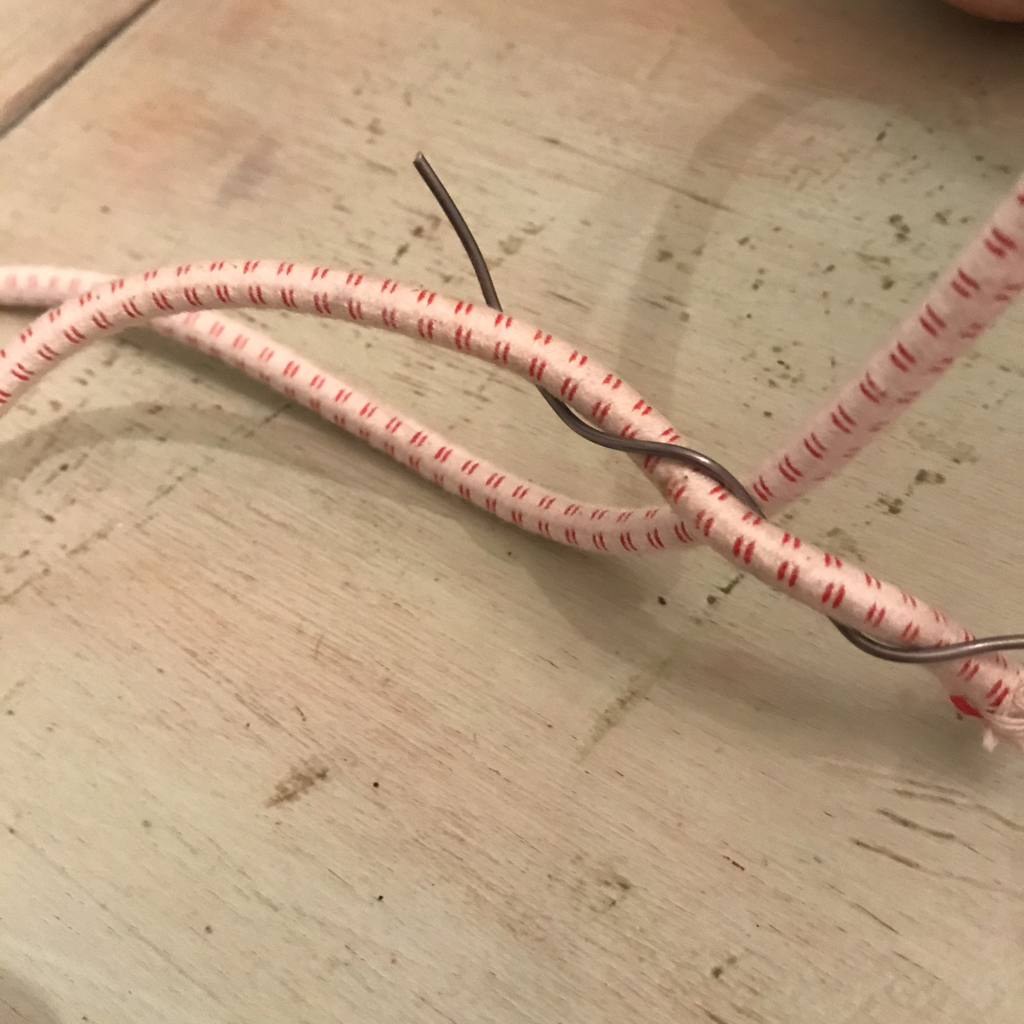 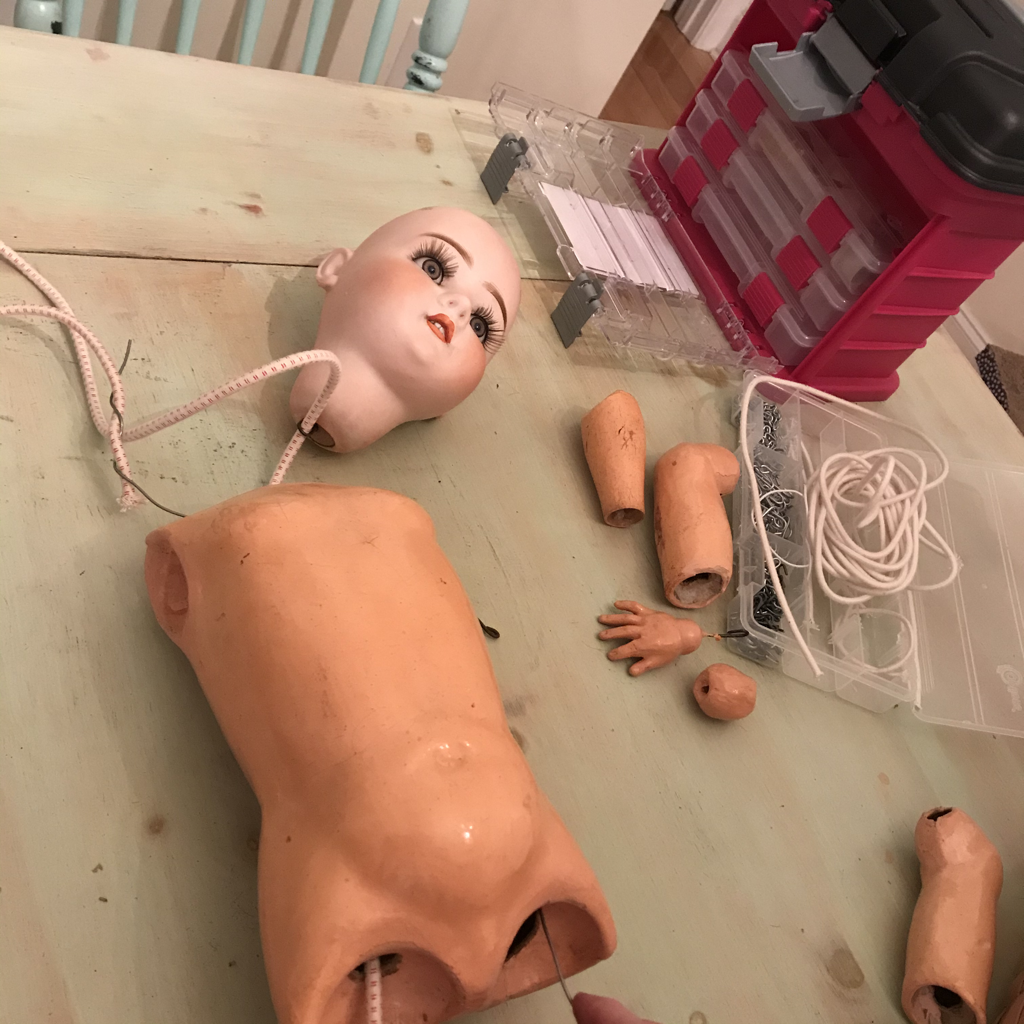 For really large dolls like this, where I can't reach across to grab the elastic I use a wire as a come-along to pull the cord though. I just wrap the wire around the elastic and pull the wire through with the elastic attached. 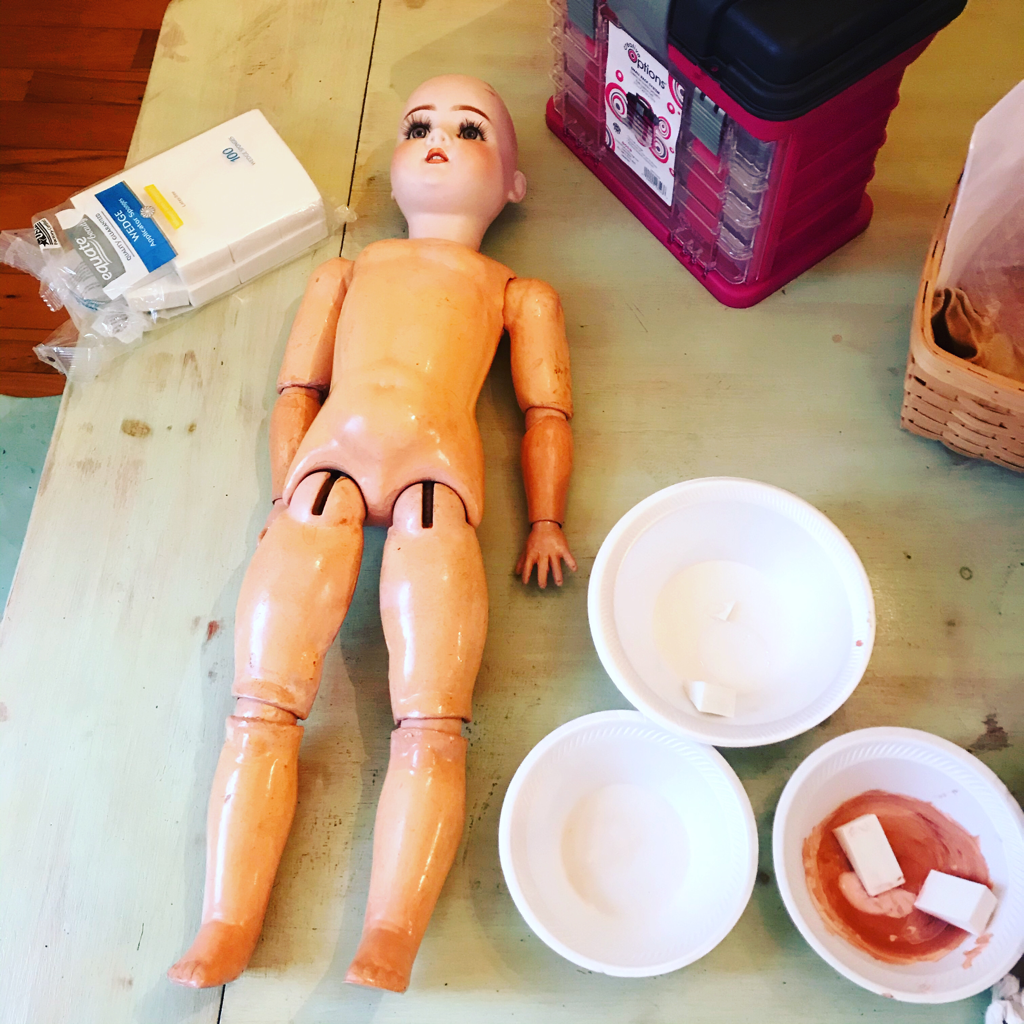 Once the doll was strung I did some spot-painting to match the new parts to the old and cover the most egregious scratches. I would have like to do complete body re-paint with oil but there just wasn't time and the buyer didn't ask for that repair in her budget. The dress we chose covers most of the body anyway. Thankfully the doll had her original high-button shoes so that covered the rest of the legs. I didn't have shoes to fit her so it would have been a problem to find some in time otherwise. 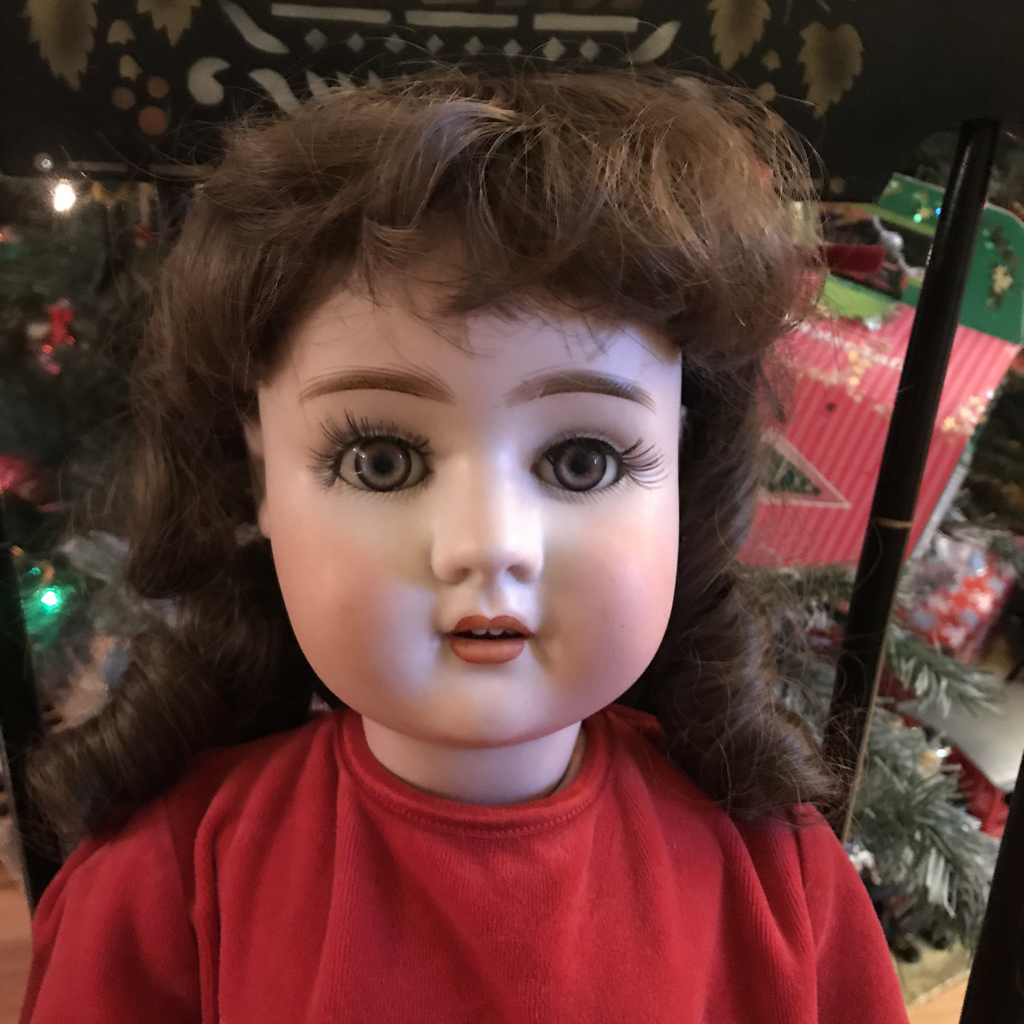 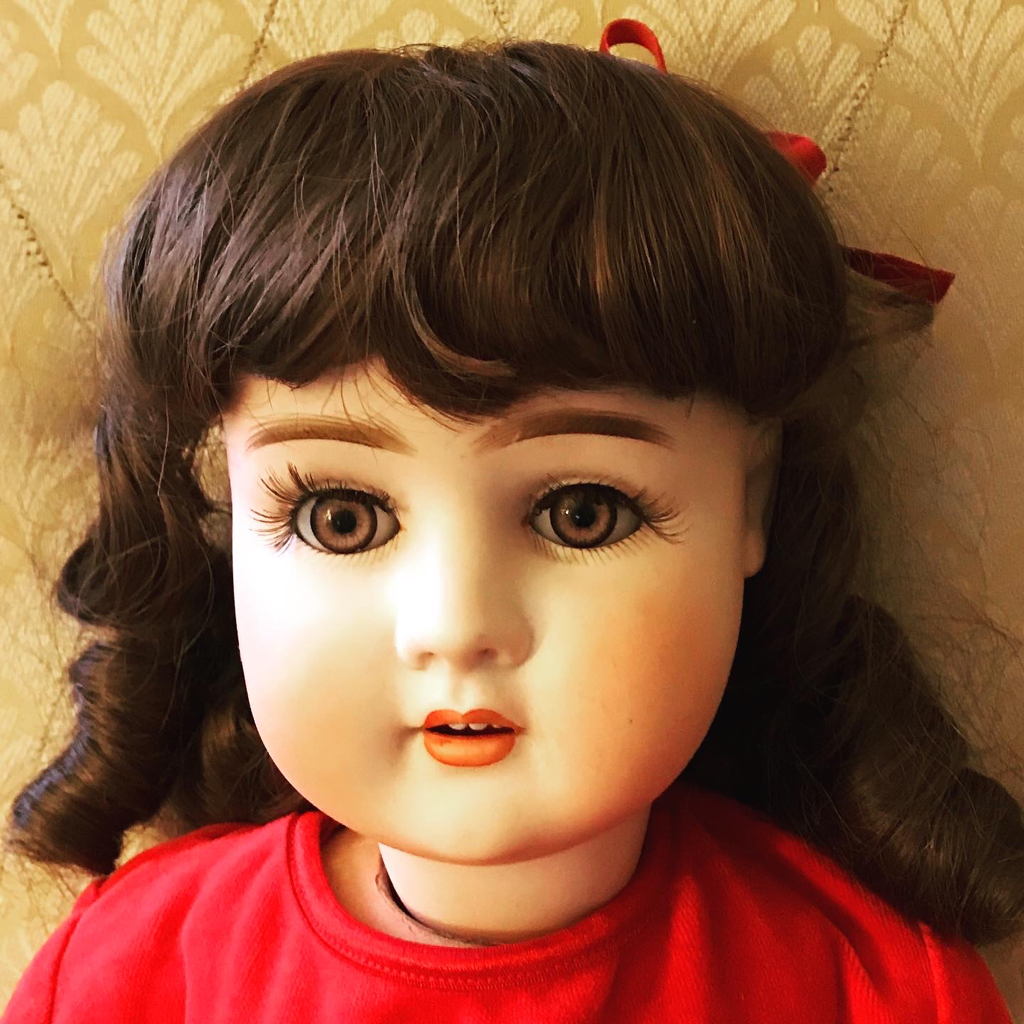 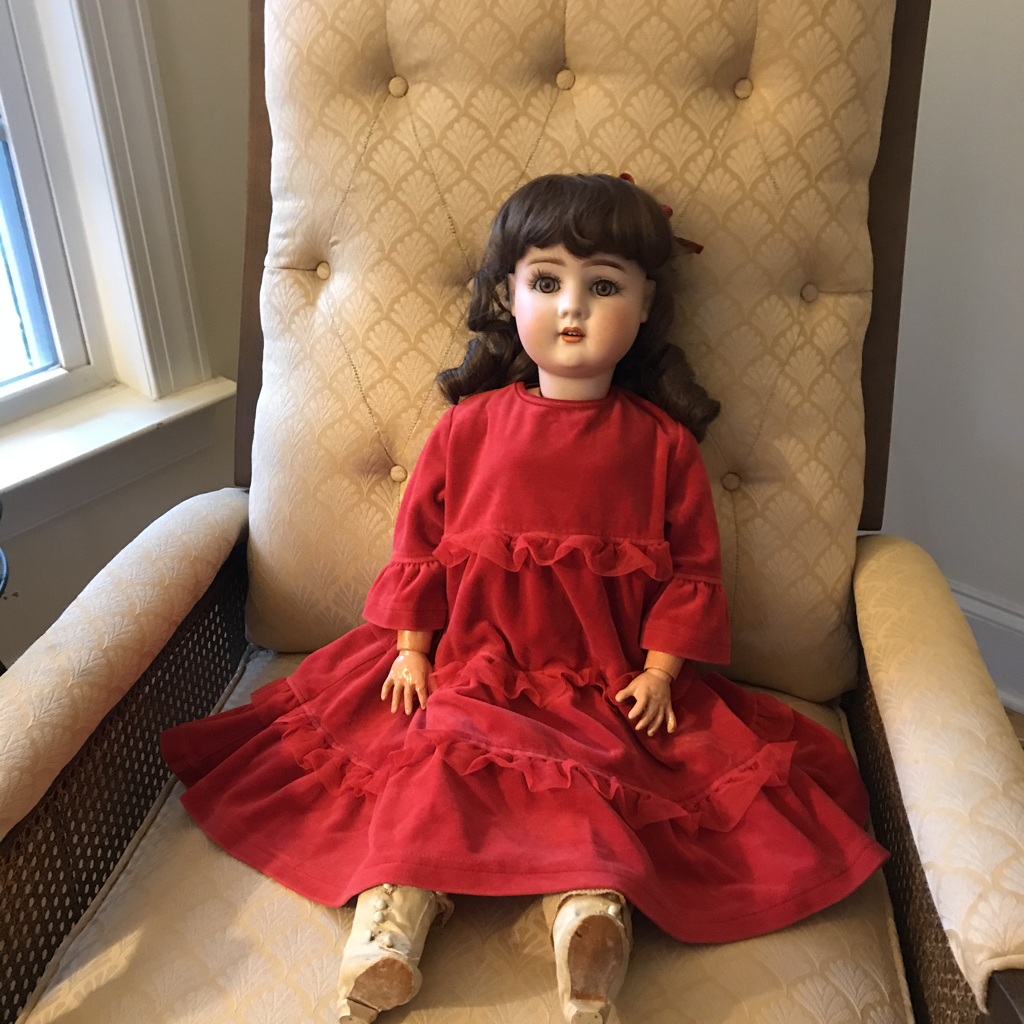 The Christmas doll turned out beautifully, if I do say so! She's the perfect classic doll, always shown under Christmas trees in illustrations to this day, even though these dolls are largely non-existent now! When I was a little girl I was a huge fan of the book A is For Annabelle by Tasha Tudor. Annabelle is a doll much like this one and she has a wonderful wardrobe of clothes and accessories and a trunk to hold them all. I wanted one so badly but of course I never got one. My parents tried, but in the pre-Internet days just not possible to find. My grandmother had a photo of herself as a girl with a doll like this but it was long broken by the time I came along. I really felt betrayed she didn't preserve her doll for me! I can't even imagine how difficult it must have been to keep your kid's dolls intact if you were a parent back then. I got a porcelain doll for Christmas once when I was about 12, so not a little girl, and when I picked her up out of the box her legs banged together and one foot broke off! So my dad was having to glue it back on later on Christmas Day! If you're lucky enough to come across a doll like this one she'll probably need some repairs after a century of play. Over the next few weeks I'll be posting some restoration tips, my holiday gift for you. You can also request an appointment for your doll to visit my doll hospital using the form below. I hope you have a Merry Christmas and wonderful holiday season!
0 Comments
Leave a Reply. |
AuthorMy name is Amanda, but my childhood nickname was "Mandaline". I am a mother of three turning my passion for creating into a full-time business. Archives
April 2024
Categories |
 RSS Feed