
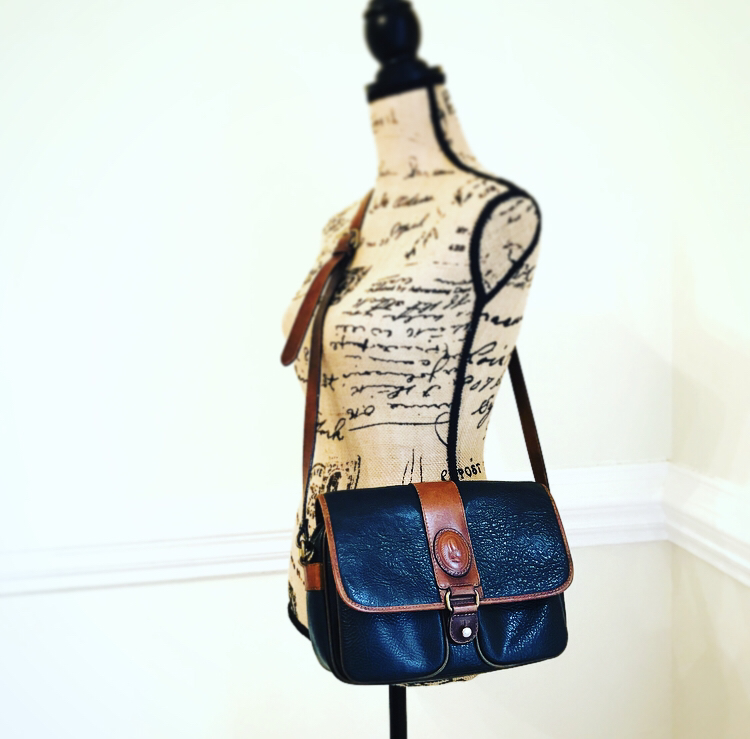
 Recently I came across a new-to-me brand at the thrift store: Saint Jack. I noticed a messenger or saddlebag style leather pocketbook that looked like vintage Dooney & Burke. When I picked it up I saw it was marked Saint Jack in several places so I looked up the brand. I found out Saint Jack was a fine leather maker in London and their pieces are worth a great deal of money. So much money, I lost my head and grabbed the bag and headed home to polish the leather, which is all the bag seemed to need. Let's just say, this will be a lesson to me that I should curb my enthusiasm the next time I go thrifting! 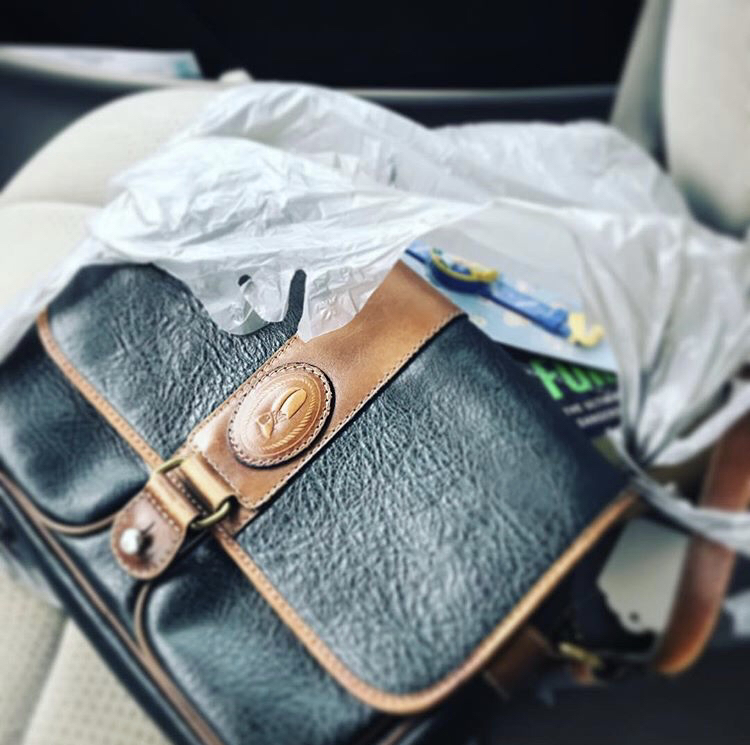 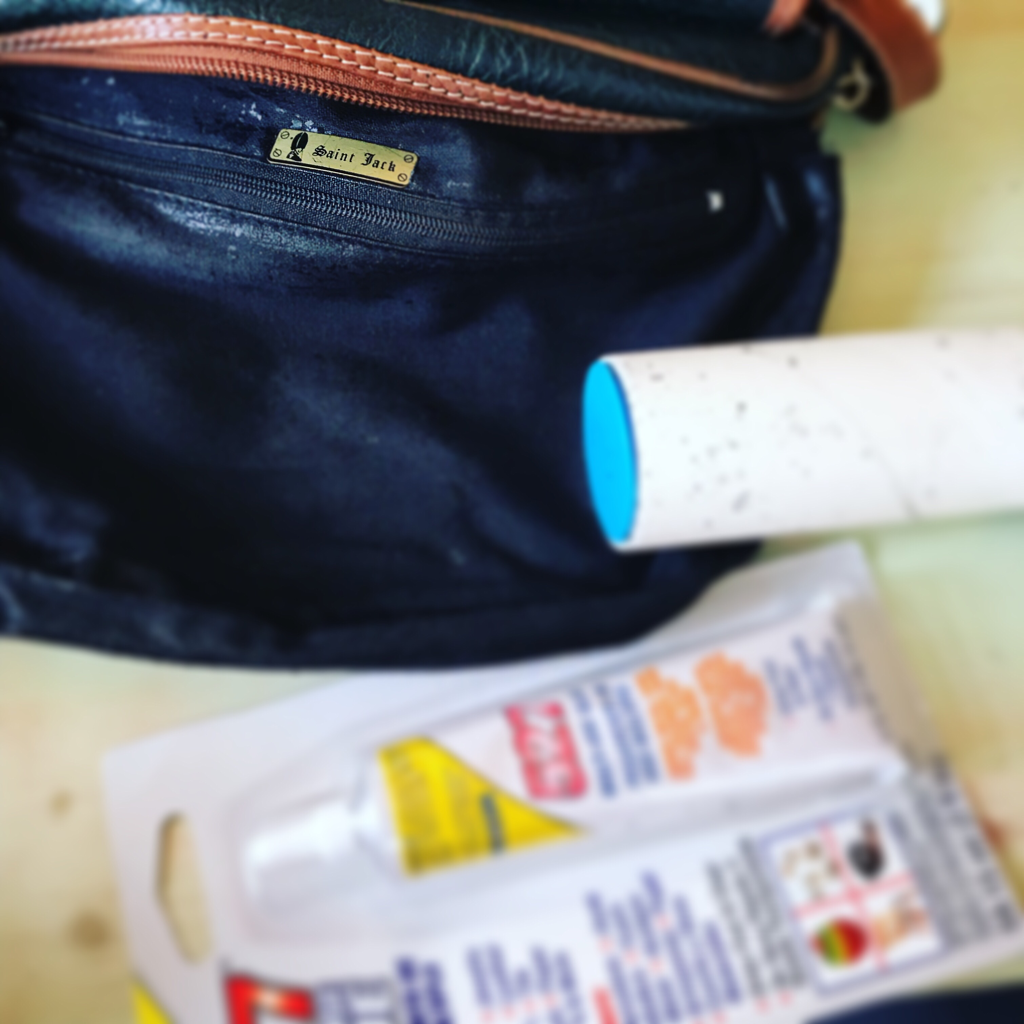 Although the bag looked used but presentable in the shop, when I got it home I noticed every time I handled it I would get sticky flakes of black plastic or something on my hands. When I investigated I realized that although the bag is made of leather the lining was made of a vinyl-coated "wipe clean" fabric. The style and color of the leather looks to me like it's from the late 1980s or early 1990s and after 30 years the vinyl coating was peeling off the fabric. I tried scrubbing off the vinyl and peeling it off with a lint roller, but I couldn't get it all. The plastic flakes stuck like glue to everything they touched and after a few days I was finding little flecks all over the house. Whenever I thought I'd gotten it all out of the purse I would reach in and get more little black flakes on my hands. There's no way I would ever sell this to someone else to use when it was driving me so crazy. I decided I would have to put in a new lining.  I looked through my fabric stash and found a sueded cotton paisley called Kashmir by Hoffman California, most like from the exact same era as the bag and a perfect match! I carefully removed the original lining by picking out the seams with a seam ripper. Then I took apart the pieces and used them as a pattern for the new lining. 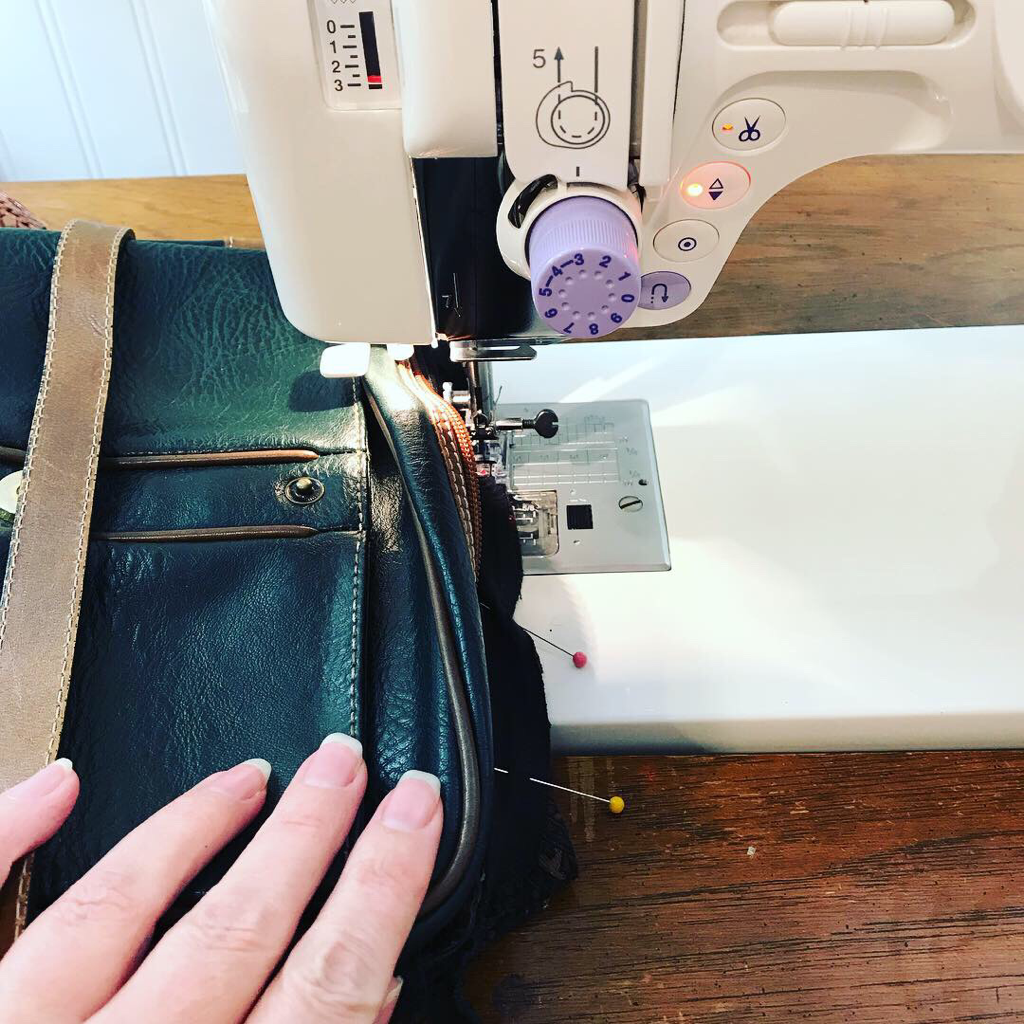 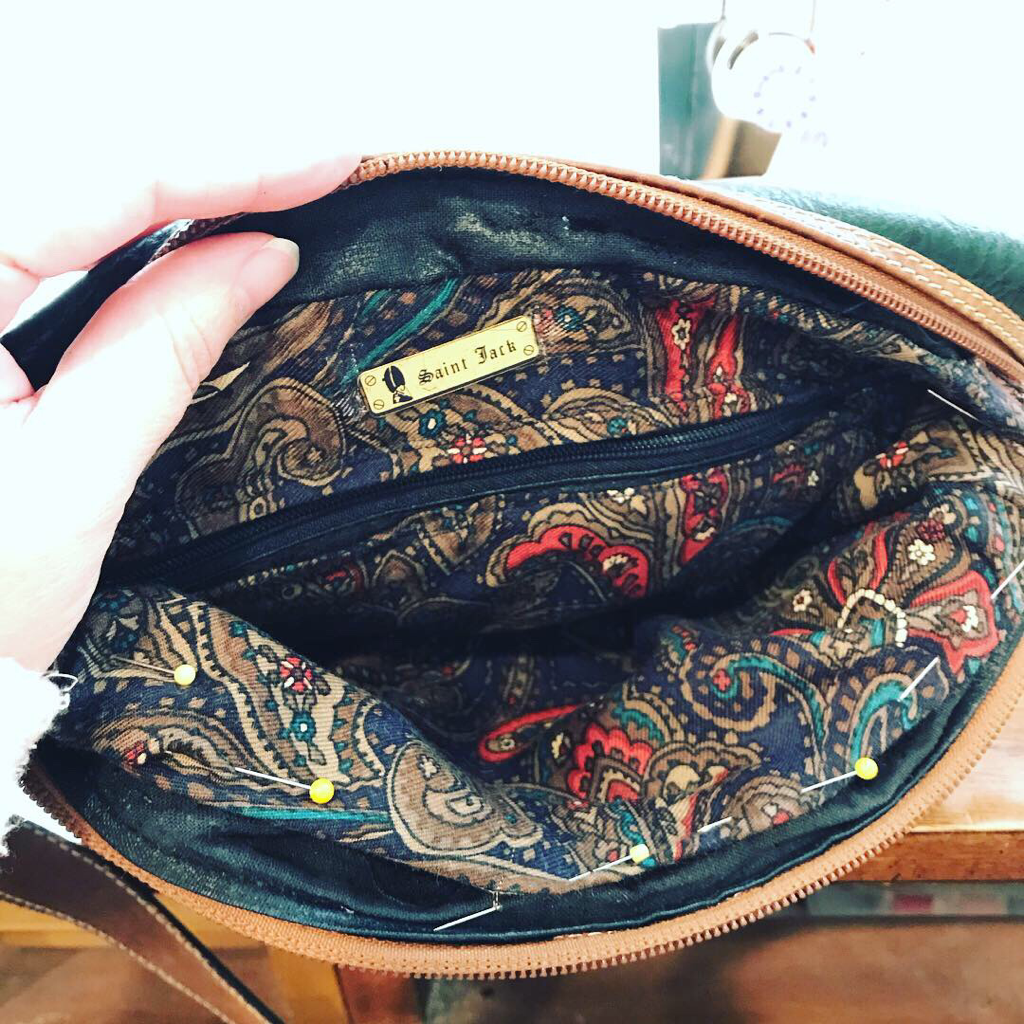 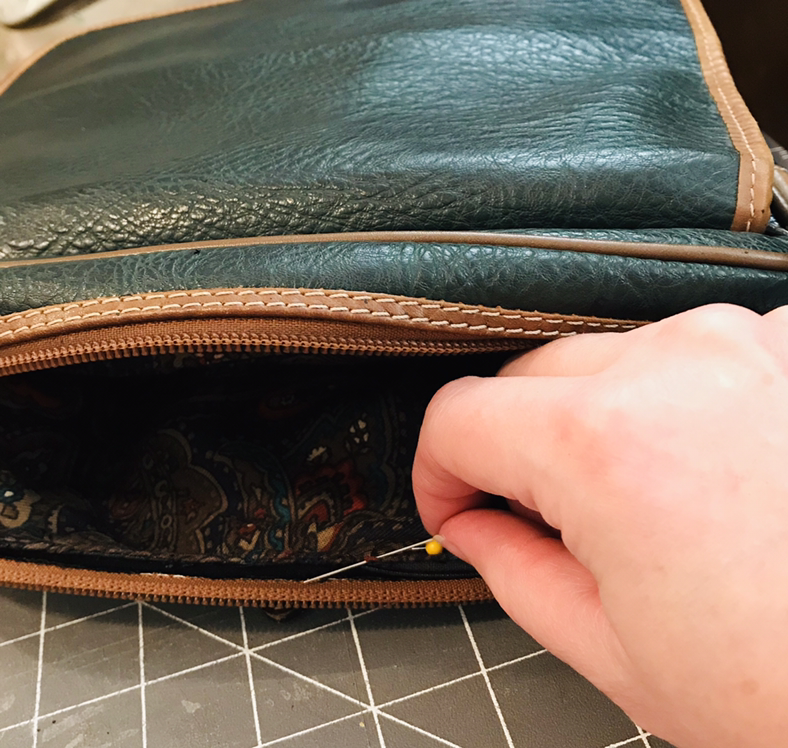 I sewed in the new lining by machine and hand and was even able to move the Saint Jack logo plate to the new lining. I re-lined both the main and front pockets of the bag. The paisley peeks out a little when you open the bag and I think it adds a lot of style compared to the plain black of the original! 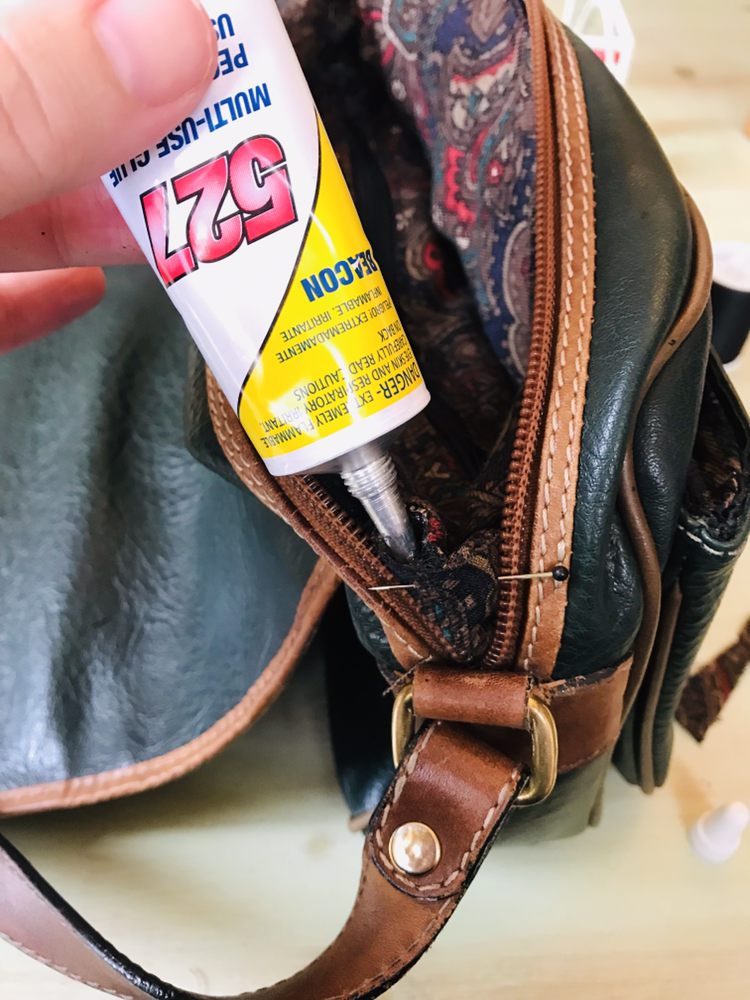 When I removed the original lining I was careful to make note of the construction and I saw the lining was both sewn in and glued to tabs on the sides. I used my go-to glue, Beacon 527, to glue the sides. My inspection of the bag turned up a couple splits in the leather binding of the flap, so I used the Beacon glue to re-attach those as well. It's such a great repair you can't even see it! 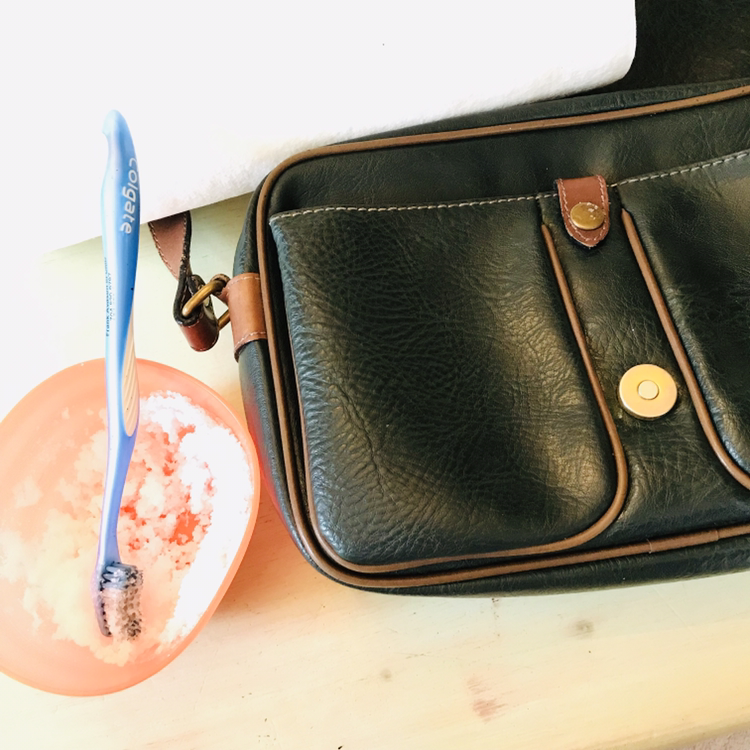 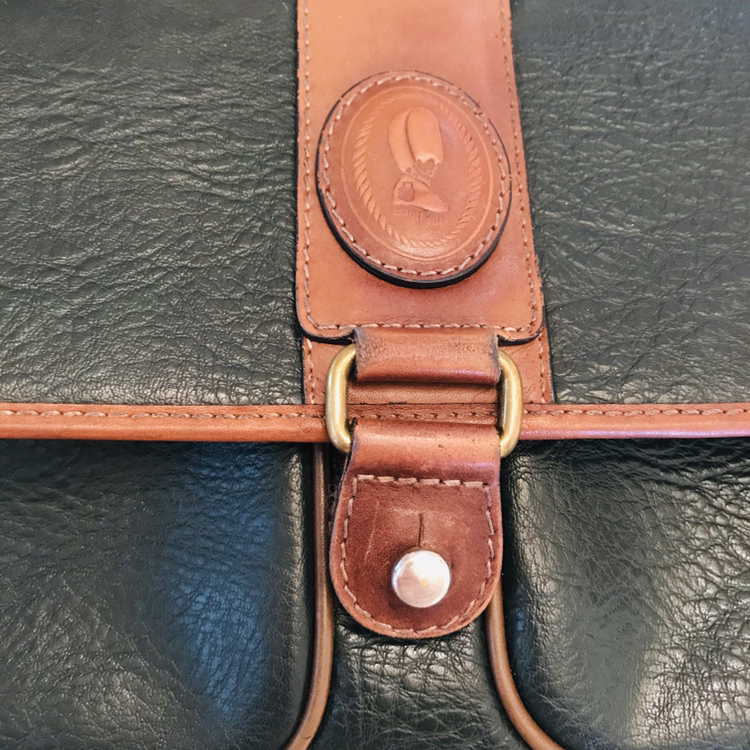 The brass hardware had some discoloration from age so I made a homemade brass polish and scrubbed it all. It makes sense to do this before you clean the rest of the bag, but unfortunately it didn't occur to me until after I'd done that, so I had to clean it again to remove the salt afterward. The scrub is kind of messy but it does work: mix salt, white vinegar, and lemon juice or essential oil to make a paste. Apply the paste to the brass, let it sit for while, scrub it with a toothbrush, and then buff off with a paper towel. I was fasting when I was doing this and it made me hungry because it smells like cocktail sauce and made me crave shrimp cocktail, so keep that in mind if you're dieting!  Another flaw I discovered when I got the bag home was the snap on the front flap was broken off. I converted the snap to a magnetic closure. I glued the magnet with Beacon 527 over the spot where the snap had been and then I covered it with wool felt on the inside. I both sewed and glued the felt in place. The felt helps keep the magnet in place and also prevents the metal from scratching the brass on the bag's front.  Finally, after all that work I was ready to remedy the dry and scuffed leather, all I thought I would have to repair originally! As I mentioned when I restored the WWII leather B6 bomber helmet, my homemade wood polish makes a terrific leather cleaner and restorer! You just use a soft cloth to rub it on and then buff it off to remove dirt and re-condition the leather at the same time! You can buy the Young Living essential oils I use from the link on the Home page.  After I cleaned and conditioned the leather I got out the shoeshine kit and used brown cream shoe polish on the brown trim. Then I brushed the entire bag to a gloss with a horsehair brush.  There was a small spot on the edge of the strap where the edge coating was worn away. I fixed this by dipping a toothpick in acrylic paint and dabbing it on the spot. You can't even see this repair, either!  I'm really thrilled with this restoration! This bag still shows enough vintage patina to communicate its authenticity but now the leather is supple and soft and the lining is beautiful. Everything feels sturdy, as only truly quality-constructed pieces feel. The bag was well-made to begin with and the hand-sewing of the restoration only supports and accentuates that. I can't find out much about Saint Jack, except they made fine leather pieces in London; I don't think they are still in business. Their pieces are extremely rare, especially in the USA. This one is one-of-a-kind. The classic style is timeless. This is a bag you will use forever, that will never go out of style. You can find it in my shops, along with many other restored vintage pieces, using the link from the Home page.
2 Comments
Melissa
7/25/2021 07:04:42 am
Amazing Job.
Amanda
7/26/2021 01:36:57 pm
Good luck! I’m sure you will do a wonderful job with your bag. Thanks for reading my blog! Amanda Leave a Reply. |
AuthorMy name is Amanda, but my childhood nickname was "Mandaline". I am a mother of three turning my passion for creating into a full-time business. Archives
April 2024
Categories |
 RSS Feed